
画像処理装置(GPU)を使用して機械学習(ML)モデルを実行する モデルのパフォーマンスとユーザー エクスペリエンスの いくつか見てみましょうiOS デバイスでは、 GPU による高速実行 delegate。デリゲートは、次のタスクのハードウェア ドライバとして機能します。 LiteRT。GPU プロセッサでモデルのコードを実行できます。
このページでは、LiteRT モデルの GPU アクセラレーションを有効にする方法について説明します。 iOS アプリ。LiteRT の GPU デリゲートの使用について詳しくは、 ベスト プラクティスや高度な手法などについては、GPU 代理人のページをご覧ください。
Interpreter API で GPU を使用する
LiteRT インタープリタ API: 一般的な一連の ML アプリケーションを構築するための API です。次の では、iOS アプリに GPU サポートを追加する手順について説明します。このガイド ML モデルを正常に実行できる iOS アプリがすでに存在することを前提としています。 使用できます。
GPU サポートを含むように Podfile を変更する
LiteRT 2.3.0 リリース以降では、GPU デリゲートは除外されています。
Pod から取り出してバイナリサイズを小さくします。これを含めるには、
TensorFlowLiteSwift Pod のサブスペック:
pod 'TensorFlowLiteSwift/Metal', '~> 0.0.1-nightly',
または
pod 'TensorFlowLiteSwift', '~> 0.0.1-nightly', :subspecs => ['Metal']
TensorFlowLiteObjC または TensorFlowLiteC を使用することもできます。
Objective-C(バージョン 2.4.0 以降で利用可能)または C API
GPU デリゲートを初期化して使用する
LiteRT インタープリタで GPU デリゲートを使用できます。 API など、多数のプログラミング技術が 対応しています。Swift と Objective-C が推奨されますが、C++ や C.それより前のバージョンの LiteRT を使用している場合は、C を使用する必要があります。 です。次のコードサンプルは、それぞれのロールでデリゲートを使用する方法を サポートしています。
Swift
import TensorFlowLite

// Load model ...

// Initialize LiteRT interpreter with the GPU delegate.
let delegate = MetalDelegate()
if let interpreter = try Interpreter(modelPath: modelPath,
                                      delegates: [delegate]) {
  // Run inference ...
}
Objective-C
// Import module when using CocoaPods with module support
@import TFLTensorFlowLite;

// Or import following headers manually
#import "tensorflow/lite/objc/apis/TFLMetalDelegate.h"
#import "tensorflow/lite/objc/apis/TFLTensorFlowLite.h"

// Initialize GPU delegate
TFLMetalDelegate* metalDelegate = [[TFLMetalDelegate alloc] init];

// Initialize interpreter with model path and GPU delegate
TFLInterpreterOptions* options = [[TFLInterpreterOptions alloc] init];
NSError* error = nil;
TFLInterpreter* interpreter = [[TFLInterpreter alloc]
                                initWithModelPath:modelPath
                                          options:options
                                        delegates:@[ metalDelegate ]
                                            error:&error];
if (error != nil) { /* Error handling... */ }

if (![interpreter allocateTensorsWithError:&error]) { /* Error handling... */ }
if (error != nil) { /* Error handling... */ }

// Run inference ...
C++
// Set up interpreter.
auto model = FlatBufferModel::BuildFromFile(model_path);
if (!model) return false;
tflite::ops::builtin::BuiltinOpResolver op_resolver;
std::unique_ptr<Interpreter> interpreter;
InterpreterBuilder(*model, op_resolver)(&interpreter);

// Prepare GPU delegate.
auto* delegate = TFLGpuDelegateCreate(/*default options=*/nullptr);
if (interpreter->ModifyGraphWithDelegate(delegate) != kTfLiteOk) return false;

// Run inference.
WriteToInputTensor(interpreter->typed_input_tensor<float>(0));
if (interpreter->Invoke() != kTfLiteOk) return false;
ReadFromOutputTensor(interpreter->typed_output_tensor<float>(0));

// Clean up.
TFLGpuDelegateDelete(delegate);
C(2.4.0 より前)
#include "tensorflow/lite/c/c_api.h"
#include "tensorflow/lite/delegates/gpu/metal_delegate.h"

// Initialize model
TfLiteModel* model = TfLiteModelCreateFromFile(model_path);

// Initialize interpreter with GPU delegate
TfLiteInterpreterOptions* options = TfLiteInterpreterOptionsCreate();
TfLiteDelegate* delegate = TFLGPUDelegateCreate(nil);  // default config
TfLiteInterpreterOptionsAddDelegate(options, metal_delegate);
TfLiteInterpreter* interpreter = TfLiteInterpreterCreate(model, options);
TfLiteInterpreterOptionsDelete(options);

TfLiteInterpreterAllocateTensors(interpreter);

NSMutableData *input_data = [NSMutableData dataWithLength:input_size * sizeof(float)];
NSMutableData *output_data = [NSMutableData dataWithLength:output_size * sizeof(float)];
TfLiteTensor* input = TfLiteInterpreterGetInputTensor(interpreter, 0);
const TfLiteTensor* output = TfLiteInterpreterGetOutputTensor(interpreter, 0);

// Run inference
TfLiteTensorCopyFromBuffer(input, inputData.bytes, inputData.length);
TfLiteInterpreterInvoke(interpreter);
TfLiteTensorCopyToBuffer(output, outputData.mutableBytes, outputData.length);

// Clean up
TfLiteInterpreterDelete(interpreter);
TFLGpuDelegateDelete(metal_delegate);
TfLiteModelDelete(model);
GPU API 言語の使用上の注意
- 2.4.0 より前のバージョンの LiteRT では、次の目的でのみ C API を使用できます。 Objective-C:
- C++ API は、bazel を使用しているか、TensorFlow をビルドしている場合にのみ使用可能です。 ひとりでライトをつける。CocoaPods では C++ API を使用できません。
- C++ で GPU デリゲートを使用して LiteRT を使用する場合は、GPU を取得する
TFLGpuDelegateCreate()関数でデリゲートし、それをInterpreter::ModifyGraphWithDelegate()を呼び出し、代わりにInterpreter::AllocateTensors()。
リリースモードでのビルドとテスト
適切な Metal API アクセラレータ設定のリリースビルドに変更し、以下を行います。 パフォーマンスが向上しますこのセクションでは、 リリースビルドを有効にし、メタル アクセラレーションの設定を構成します。
リリースビルドに変更するには:
- ビルド設定を編集するには、[Product] >スキーム >スキームを編集... [Run] を選択します。
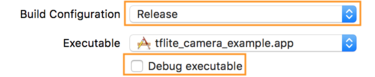
- [Info] タブで、[Build Configuration] を [Release] に変更し、
[Debug executable] チェックボックスをオフにします。
- [Options] タブをクリックし、[GPU Frame Capture] を [Disabled] に変更します。
[Metal API Validation] を [Disabled] に設定します。

- [64 ビット アーキテクチャでのリリースのみのビルド] を選択してください。アンダー
プロジェクト ナビゲータ >tflite_camera_example >プロジェクト >プロジェクト名 >
[ビルド設定] で [Build Active Architecture Only(アクティブ アーキテクチャのみをビルドする)] を設定する >リリースを
[はい] をタップします。

高度な GPU サポート
このセクションでは、以下を含む iOS 用の GPU デリゲートの高度な使用方法について説明します。 デリゲート オプション、入力バッファと出力バッファ、量子化モデルの使用などについて学習します。
iOS の委任オプション
GPU デリゲートのコンストラクタは、structSwift アプリケーションのオプションを
API、
Objective-C
API、
および C
API。
nullptr(C API)を渡すか、何も渡さない(Objective-C と Swift API)を
イニシャライザは、デフォルトのオプションを設定します(基本の使用法の
例です)。
Swift
// THIS:
var options = MetalDelegate.Options()
options.isPrecisionLossAllowed = false
options.waitType = .passive
options.isQuantizationEnabled = true
let delegate = MetalDelegate(options: options)

// IS THE SAME AS THIS:
let delegate = MetalDelegate()
Objective-C
// THIS:
TFLMetalDelegateOptions* options = [[TFLMetalDelegateOptions alloc] init];
options.precisionLossAllowed = false;
options.waitType = TFLMetalDelegateThreadWaitTypePassive;
options.quantizationEnabled = true;

TFLMetalDelegate* delegate = [[TFLMetalDelegate alloc] initWithOptions:options];

// IS THE SAME AS THIS:
TFLMetalDelegate* delegate = [[TFLMetalDelegate alloc] init];
C
// THIS:
const TFLGpuDelegateOptions options = {
  .allow_precision_loss = false,
  .wait_type = TFLGpuDelegateWaitType::TFLGpuDelegateWaitTypePassive,
  .enable_quantization = true,
};

TfLiteDelegate* delegate = TFLGpuDelegateCreate(options);

// IS THE SAME AS THIS:
TfLiteDelegate* delegate = TFLGpuDelegateCreate(nullptr);
C++ API を使用した入出力バッファ
GPU での計算を行うには、GPU でデータが利用可能である必要があります。この メモリのコピーが必要になります外部 IP アドレスが CPU / GPU のメモリ境界をまたがる場合、この処理には CPU / GPU メモリの かなりの時間続いたら通知するというものです通常、このような境界は避けられないものですが、 どちらか一方を省略できます
ネットワークの入力が、GPU メモリにすでに読み込まれている画像である場合( カメラフィードを含む GPU テクスチャなど)を GPU メモリに保持できます。 CPU メモリに入ることなく実行できます。同様に、ネットワークの出力が 画像スタイルなど、レンダリング可能な画像の形式を指定します。 転送 結果を画面に直接表示できます。
最適なパフォーマンスを実現するため、LiteRT ではユーザーが次のことを行えるよう TensorFlow ハードウェア バッファの読み取りと書き込みを直接行い、 回避できるメモリコピーです。
画像入力が GPU メモリにあると仮定すると、まず画像を
Metal 用の MTLBuffer オブジェクト。TfLiteTensor は、
TFLGpuDelegateBindMetalBufferToTensor() を使用してユーザーが準備した MTLBuffer
使用します。この関数は、コマンドの後に呼び出す必要があります。
Interpreter::ModifyGraphWithDelegate()。また、推論の出力は次のとおりです。
デフォルトでは GPU メモリから CPU メモリにコピーされます。この動作はオフにできます。
呼び出し中に Interpreter::SetAllowBufferHandleOutput(true) を呼び出すことで、
初期化します。
C++
#include "tensorflow/lite/delegates/gpu/metal_delegate.h"
#include "tensorflow/lite/delegates/gpu/metal_delegate_internal.h"

// ...

// Prepare GPU delegate.
auto* delegate = TFLGpuDelegateCreate(nullptr);

if (interpreter->ModifyGraphWithDelegate(delegate) != kTfLiteOk) return false;

interpreter->SetAllowBufferHandleOutput(true);  // disable default gpu->cpu copy
if (!TFLGpuDelegateBindMetalBufferToTensor(
        delegate, interpreter->inputs()[0], user_provided_input_buffer)) {
  return false;
}
if (!TFLGpuDelegateBindMetalBufferToTensor(
        delegate, interpreter->outputs()[0], user_provided_output_buffer)) {
  return false;
}

// Run inference.
if (interpreter->Invoke() != kTfLiteOk) return false;
デフォルトの動作を無効にしたら、GPU から推論出力をコピーします。
明示的に呼び出す必要があります。
各出力テンソルに対して Interpreter::EnsureTensorDataIsReadable()。この
手法は量子化モデルにも有効ですが、それでも
float32 データを含む float32 サイズのバッファ。バッファは
内部逆量子化バッファです。
量子化モデル
iOS GPU デリゲート ライブラリは、デフォルトで量子化モデルをサポートしています。Google GPU デリゲートで量子化モデルを使用するためにコードを変更する必要がある。「 次のセクションでは、テストやイベントで量子化サポートを無効にする方法について説明します。 使用します。
量子化モデルのサポートを無効にする
次のコードは、量子化モデルのサポートを無効にする方法を示しています。
Swift
    var options = MetalDelegate.Options()
    options.isQuantizationEnabled = false
    let delegate = MetalDelegate(options: options)
Objective-C
    TFLMetalDelegateOptions* options = [[TFLMetalDelegateOptions alloc] init];
    options.quantizationEnabled = false;
C
    TFLGpuDelegateOptions options = TFLGpuDelegateOptionsDefault();
    options.enable_quantization = false;

    TfLiteDelegate* delegate = TFLGpuDelegateCreate(options);
GPU アクセラレーションを使用した量子化モデルの実行について詳しくは、以下をご覧ください。 GPU デリゲートの概要。