
画像分類は、画像が何を表しているかを特定するために ML を使用する一般的な方法です。たとえば、特定の写真に写っている動物の種類を知りたい場合があります。画像が何を表しているかを予測するタスクは、画像分類と呼ばれます。画像分類子は、さまざまなクラスの画像を認識するようにトレーニングされます。たとえば、ウサギ、ハムスター、犬の 3 種類の動物を表す写真を認識するようにモデルをトレーニングできます。画像分類の詳細については、画像分類の例をご覧ください。
Task Library ImageClassifier API を使用して、カスタム画像分類子または事前トレーニング済みの画像分類子をモバイルアプリにデプロイします。
ImageClassifier API の主な機能
回転、サイズ変更、色空間変換などの入力画像処理。
入力画像の対象領域。
ラベルマップの言語 / 地域。
結果をフィルタするスコアのしきい値。
上位 k 個の分類結果。
ラベルの許可リストと拒否リスト。
サポートされている画像分類モデル
次のモデルは、ImageClassifier API との互換性が保証されています。
TensorFlow Lite Model Maker for Image Classification で作成されたモデル。
AutoML Vision Edge 画像分類で作成されたモデル。
モデルの互換性要件を満たすカスタムモデル。
Java で推論を実行する
Android アプリで ImageClassifier を使用する方法の例については、画像分類リファレンス アプリをご覧ください。
ステップ 1: Gradle の依存関係とその他の設定をインポートする
.tflite モデルファイルを、モデルが実行される Android モジュールの assets ディレクトリにコピーします。ファイルを圧縮しないように指定し、TensorFlow Lite ライブラリをモジュールの build.gradle ファイルに追加します。
android {
    // Other settings

    // Specify tflite file should not be compressed for the app apk
    aaptOptions {
        noCompress "tflite"
    }
}

dependencies {
    // Other dependencies

    // Import the Task Vision Library dependency
    implementation 'org.tensorflow:tensorflow-lite-task-vision'
    // Import the GPU delegate plugin Library for GPU inference
    implementation 'org.tensorflow:tensorflow-lite-gpu-delegate-plugin'
}
ステップ 2: モデルを使用する
// Initialization
ImageClassifierOptions options =
    ImageClassifierOptions.builder()
        .setBaseOptions(BaseOptions.builder().useGpu().build())
        .setMaxResults(1)
        .build();
ImageClassifier imageClassifier =
    ImageClassifier.createFromFileAndOptions(
        context, modelFile, options);

// Run inference
List<Classifications> results = imageClassifier.classify(image);
ImageClassifier を構成するその他のオプションについては、ソースコードと javadoc をご覧ください。
iOS で推論を実行する
ステップ 1: 依存関係をインストールする
タスク ライブラリは、CocoaPods を使用したインストールをサポートしています。システムに CocoaPods がインストールされていることを確認します。手順については、CocoaPods インストール ガイドをご覧ください。
Xcode プロジェクトに Pod を追加する方法について詳しくは、CocoaPods ガイドをご覧ください。
Podfile に TensorFlowLiteTaskVision Pod を追加します。
target 'MyAppWithTaskAPI' do
  use_frameworks!
  pod 'TensorFlowLiteTaskVision'
end
推論に使用する .tflite モデルがアプリバンドルに含まれていることを確認します。
ステップ 2: モデルを使用する
Swift
// Imports
import TensorFlowLiteTaskVision
// Initialization
guard let modelPath = Bundle.main.path(forResource: "birds_V1",
ofType: "tflite") else { return }
let options = ImageClassifierOptions(modelPath: modelPath)
// Configure any additional options:
// options.classificationOptions.maxResults = 3
let classifier = try ImageClassifier.classifier(options: options)
// Convert the input image to MLImage.
// There are other sources for MLImage. For more details, please see:
// https://developers.google.com/ml-kit/reference/ios/mlimage/api/reference/Classes/GMLImage
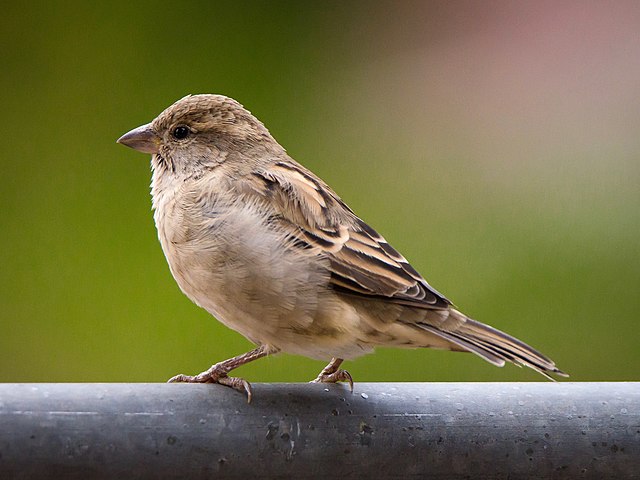
guard let image = UIImage (named: "sparrow.jpg"), let mlImage = MLImage(image: image) else { return }
// Run inference
let classificationResults = try classifier.classify(mlImage: mlImage)
Objective-C
// Imports
#import <TensorFlowLiteTaskVision/TensorFlowLiteTaskVision.h>

// Initialization
NSString *modelPath = [[NSBundle mainBundle] pathForResource:@"birds_V1" ofType:@"tflite"];

TFLImageClassifierOptions *options =
    [[TFLImageClassifierOptions alloc] initWithModelPath:modelPath];

// Configure any additional options:
// options.classificationOptions.maxResults = 3;

TFLImageClassifier *classifier = [TFLImageClassifier imageClassifierWithOptions:options
                                                                          error:nil];

// Convert the input image to MLImage.
UIImage *image = [UIImage imageNamed:@"sparrow.jpg"];

// There are other sources for GMLImage. For more details, please see:
// https://developers.google.com/ml-kit/reference/ios/mlimage/api/reference/Classes/GMLImage
GMLImage *gmlImage = [[GMLImage alloc] initWithImage:image];

// Run inference
TFLClassificationResult *classificationResult =
    [classifier classifyWithGMLImage:gmlImage error:nil];
TFLImageClassifier を構成するその他のオプションについては、ソースコードをご覧ください。
Python で推論を実行する
ステップ 1: pip パッケージをインストールする
pip install tflite-support
ステップ 2: モデルを使用する
# Imports
from tflite_support.task import vision
from tflite_support.task import core
from tflite_support.task import processor

# Initialization
base_options = core.BaseOptions(file_name=model_path)
classification_options = processor.ClassificationOptions(max_results=2)
options = vision.ImageClassifierOptions(base_options=base_options, classification_options=classification_options)
classifier = vision.ImageClassifier.create_from_options(options)

# Alternatively, you can create an image classifier in the following manner:
# classifier = vision.ImageClassifier.create_from_file(model_path)

# Run inference
image = vision.TensorImage.create_from_file(image_path)
classification_result = classifier.classify(image)
ImageClassifier を構成するその他のオプションについては、ソースコードをご覧ください。
C++ で推論を実行する
// Initialization
ImageClassifierOptions options;
options.mutable_base_options()->mutable_model_file()->set_file_name(model_path);
std::unique_ptr<ImageClassifier> image_classifier = ImageClassifier::CreateFromOptions(options).value();

// Create input frame_buffer from your inputs, `image_data` and `image_dimension`.
// See more information here: tensorflow_lite_support/cc/task/vision/utils/frame_buffer_common_utils.h

std::unique_ptr<FrameBuffer> frame_buffer = CreateFromRgbRawBuffer(
      image_data, image_dimension);

// Run inference
const ClassificationResult result = image_classifier->Classify(*frame_buffer).value();
ImageClassifier を構成するその他のオプションについては、ソースコードをご覧ください。
検索結果の例
鳥分類器の分類結果の例を次に示します。
Results:
  Rank #0:
   index       : 671
   score       : 0.91406
   class name  : /m/01bwb9
   display name: Passer domesticus
  Rank #1:
   index       : 670
   score       : 0.00391
   class name  : /m/01bwbt
   display name: Passer montanus
  Rank #2:
   index       : 495
   score       : 0.00391
   class name  : /m/0bwm6m
   display name: Passer italiae
独自のモデルとテストデータを使用して、シンプルな ImageClassifier 用の CLI デモツールを試してみてください。
モデルの互換性要件
ImageClassifier API は、必須の TFLite モデル メタデータを含む TFLite モデルを想定しています。TensorFlow Lite Metadata Writer API を使用して画像分類子のメタデータを作成する例をご覧ください。
互換性のある画像分類モデルは、次の要件を満たしている必要があります。
入力画像テンソル(kTfLiteUInt8/kTfLiteFloat32)
- サイズ
[batch x height x width x channels]の画像入力。 - バッチ推論はサポートされていません(
batchは 1 である必要があります)。 - RGB 入力のみがサポートされます(
channelsは 3 である必要があります)。 - 型が kTfLiteFloat32 の場合、入力正規化のメタデータに NormalizationOptions を付加する必要があります。
- サイズ
出力スコア テンソル(kTfLiteUInt8/kTfLiteFloat32)
Nクラスと 2 つまたは 4 つのディメンション([1 x N]または[1 x 1 x 1 x N])- 省略可能な(推奨)ラベルマップ(複数可)。AssociatedFile として、タイプ TENSOR_AXIS_LABELS で、1 行に 1 つのラベルを含む。ラベルファイルの例をご覧ください。そのような AssociatedFile がある場合、最初に見つかったものが結果の
labelフィールド(C++ ではclass_name)に入力されます。display_nameフィールドは、作成時に使用されたImageClassifierOptionsのdisplay_names_localeフィールドとロケールが一致する AssociatedFile(存在する場合)から入力されます(デフォルトでは「en」、つまり英語)。いずれも利用できない場合は、結果のindexフィールドのみが入力されます。