
图像分割器会预测图像的每个像素是否与特定类别相关联。这与在矩形区域中检测对象的对象检测以及对整个图像进行分类的图像分类形成对比。如需详细了解图片分割器,请参阅图片分割概览示例。
使用 Task Library ImageSegmenter API 将自定义或预训练的图像分割器部署到移动应用中。
ImageSegmenter API 的主要功能
输入图像处理,包括旋转、调整大小和颜色空间转换。
标签地图语言区域。
两种输出类型:类别掩码和置信度掩码。
用于显示目的的彩色标签。
支持的图片分割器模型
以下型号保证与 ImageSegmenter API 兼容。
符合模型兼容性要求的自定义模型。
在 Java 中运行推理
如需查看如何在 Android 应用中使用 ImageSegmenter 的示例,请参阅图像分割参考应用。
第 1 步:导入 Gradle 依赖项和其他设置
将 .tflite 模型文件复制到将运行该模型的 Android 模块的 assets 目录中。指定不应压缩该文件,并将 TensorFlow Lite 库添加到模块的 build.gradle 文件中:
android {
    // Other settings

    // Specify tflite file should not be compressed for the app apk
    aaptOptions {
        noCompress "tflite"
    }
}

dependencies {
    // Other dependencies

    // Import the Task Vision Library dependency
    implementation 'org.tensorflow:tensorflow-lite-task-vision'
    // Import the GPU delegate plugin Library for GPU inference
    implementation 'org.tensorflow:tensorflow-lite-gpu-delegate-plugin'
}
第 2 步:使用模型
// Initialization
ImageSegmenterOptions options =
    ImageSegmenterOptions.builder()
        .setBaseOptions(BaseOptions.builder().useGpu().build())
        .setOutputType(OutputType.CONFIDENCE_MASK)
        .build();
ImageSegmenter imageSegmenter =
    ImageSegmenter.createFromFileAndOptions(context, modelFile, options);

// Run inference
List<Segmentation> results = imageSegmenter.segment(image);
如需了解配置 ImageSegmenter 的更多选项,请参阅源代码和 Javadoc。
在 iOS 中运行推理
第 1 步:安装依赖项
Task 库支持使用 CocoaPods 进行安装。确保您的系统上安装了 CocoaPods。如需了解相关说明,请参阅 CocoaPods 安装指南。
如需详细了解如何向 Xcode 项目添加 pod,请参阅 CocoaPods 指南。
在 Podfile 中添加 TensorFlowLiteTaskVision pod。
target 'MyAppWithTaskAPI' do
  use_frameworks!
  pod 'TensorFlowLiteTaskVision'
end
确保您将用于推理的 .tflite 模型存在于应用软件包中。
第 2 步:使用模型
Swift
// Imports
import TensorFlowLiteTaskVision
// Initialization
guard let modelPath = Bundle.main.path(forResource: "deeplabv3",
ofType: "tflite") else { return }
let options = ImageSegmenterOptions(modelPath: modelPath)
// Configure any additional options:
// options.outputType = OutputType.confidenceMasks
let segmenter = try ImageSegmenter.segmenter(options: options)
// Convert the input image to MLImage.
// There are other sources for MLImage. For more details, please see:
// https://developers.google.com/ml-kit/reference/ios/mlimage/api/reference/Classes/GMLImage
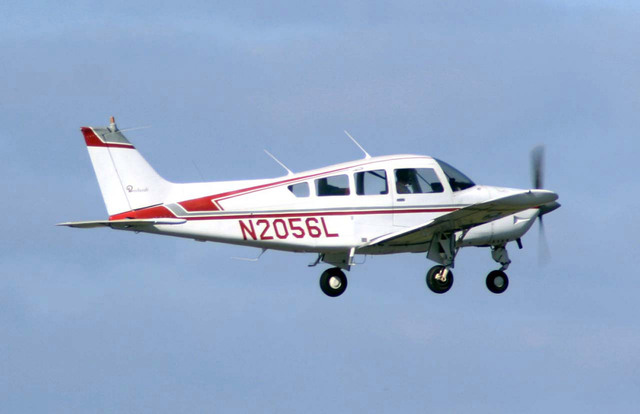
guard let image = UIImage (named: "plane.jpg"), let mlImage = MLImage(image: image) else { return }
// Run inference
let segmentationResult = try segmenter.segment(mlImage: mlImage)
Objective-C
// Imports
#import <TensorFlowLiteTaskVision/TensorFlowLiteTaskVision.h>

// Initialization
NSString *modelPath = [[NSBundle mainBundle] pathForResource:@"deeplabv3" ofType:@"tflite"];

TFLImageSegmenterOptions *options =
    [[TFLImageSegmenterOptions alloc] initWithModelPath:modelPath];

// Configure any additional options:
// options.outputType = TFLOutputTypeConfidenceMasks;

TFLImageSegmenter *segmenter = [TFLImageSegmenter imageSegmenterWithOptions:options
                                                                      error:nil];

// Convert the input image to MLImage.
UIImage *image = [UIImage imageNamed:@"plane.jpg"];

// There are other sources for GMLImage. For more details, please see:
// https://developers.google.com/ml-kit/reference/ios/mlimage/api/reference/Classes/GMLImage
GMLImage *gmlImage = [[GMLImage alloc] initWithImage:image];

// Run inference
TFLSegmentationResult *segmentationResult =
    [segmenter segmentWithGMLImage:gmlImage error:nil];
如需了解更多用于配置 TFLImageSegmenter 的选项,请参阅源代码。
在 Python 中运行推理
第 1 步:安装 pip 软件包
pip install tflite-support
第 2 步:使用模型
# Imports
from tflite_support.task import vision
from tflite_support.task import core
from tflite_support.task import processor

# Initialization
base_options = core.BaseOptions(file_name=model_path)
segmentation_options = processor.SegmentationOptions(
    output_type=processor.SegmentationOptions.output_type.CATEGORY_MASK)
options = vision.ImageSegmenterOptions(base_options=base_options, segmentation_options=segmentation_options)
segmenter = vision.ImageSegmenter.create_from_options(options)

# Alternatively, you can create an image segmenter in the following manner:
# segmenter = vision.ImageSegmenter.create_from_file(model_path)

# Run inference
image_file = vision.TensorImage.create_from_file(image_path)
segmentation_result = segmenter.segment(image_file)
如需了解更多用于配置 ImageSegmenter 的选项,请参阅源代码。
在 C++ 中运行推理
// Initialization
ImageSegmenterOptions options;
options.mutable_base_options()->mutable_model_file()->set_file_name(model_path);
std::unique_ptr<ImageSegmenter> image_segmenter = ImageSegmenter::CreateFromOptions(options).value();

// Create input frame_buffer from your inputs, `image_data` and `image_dimension`.
// See more information here: tensorflow_lite_support/cc/task/vision/utils/frame_buffer_common_utils.h
std::unique_ptr<FrameBuffer> frame_buffer = CreateFromRgbRawBuffer(
      image_data, image_dimension);

// Run inference
const SegmentationResult result = image_segmenter->Segment(*frame_buffer).value();
如需了解更多用于配置 ImageSegmenter 的选项,请参阅源代码。
示例结果
以下是 deeplab_v3(TensorFlow Hub 上提供的通用分割模型)的分割结果示例。
Color Legend:
 (r: 000, g: 000, b: 000):
  index       : 0
  class name  : background
 (r: 128, g: 000, b: 000):
  index       : 1
  class name  : aeroplane

# (omitting multiple lines for conciseness) ...

 (r: 128, g: 192, b: 000):
  index       : 19
  class name  : train
 (r: 000, g: 064, b: 128):
  index       : 20
  class name  : tv
Tip: use a color picker on the output PNG file to inspect the output mask with
this legend.
分割类别掩码应如下所示:

使用您自己的模型和测试数据试用简单的 ImageSegmenter CLI 演示工具。
模型兼容性要求
ImageSegmenter API 需要具有强制性 TFLite 模型元数据的 TFLite 模型。查看使用 TensorFlow Lite 元数据写入器 API 为图像分割器创建元数据的示例。
输入图片张量 (kTfLiteUInt8/kTfLiteFloat32)
- 大小为
[batch x height x width x channels]的图片输入。 - 不支持批量推理(
batch必须为 1)。 - 仅支持 RGB 输入(
channels必须为 3)。 - 如果类型为 kTfLiteFloat32,则必须将 NormalizationOptions 附加到元数据以进行输入归一化。
- 大小为
输出遮罩张量:(kTfLiteUInt8/kTfLiteFloat32)
- 大小为
[batch x mask_height x mask_width x num_classes]的张量,其中batch必须为 1,mask_width和mask_height是模型生成的分割掩码的维度,num_classes是模型支持的类别数量。 - 可选(但建议使用)标签映射可以作为类型为 TENSOR_AXIS_LABELS 的 AssociatedFile 附加,每行包含一个标签。第一个此类 AssociatedFile(如果有)用于填充结果的
label字段(在 C++ 中命名为class_name)。display_name字段是从语言区域与创建时所用ImageSegmenterOptions的display_names_locale字段相匹配的 AssociatedFile(如果有)填充的(默认情况下为“en”,即英语)。如果上述任何一个都不可用,则只会填充结果的index字段。
- 大小为