
MediaPipe Framework Android ARchive (AAR) 程式庫是讓你輕鬆使用 搭配 Android Studio 和 Gradle 使用 MediaPipe 架構。MediaPipe 架構沒有 以及發布適用於所有專案的一般 AAR。開發人員 即可建立 mediapipe_aar() 目標,為自己的自訂 AAR 檔案產生 Google Cloud 的 Resource Manager 工具 經特別設計,能以程式輔助方式協助您管理專案如要納入特定資源,例如 每項專案所需的 MediaPipe 計算機。
建立 MediaPipe 架構 AAR 的步驟
建立 mediapipe_aar() 目標。
在 MediaPipe 目錄中,在 BUILD 中建立新的 mediapipe_aar() 目標 檔案。您需要找出圖表中所使用的計算器 提供 mediapipe_aar() 的計算機依附元件。舉例來說 為臉部偵測圖表建立 AAR,您可以將下列程式碼 mediapipe/examples/android/src/java/com/google/mediapipe/apps/aar_example/BUILD.
load("//mediapipe/java/com/google/mediapipe:mediapipe_aar.bzl", "mediapipe_aar")

mediapipe_aar(
    name = "mediapipe_face_detection",
    calculators = ["//mediapipe/graphs/face_detection:mobile_calculators"],
)
執行 Bazel 建構指令以產生 AAR。
bazel build -c opt --strip=ALWAYS \
    --host_crosstool_top=@bazel_tools//tools/cpp:toolchain \
    --fat_apk_cpu=arm64-v8a,armeabi-v7a \
    --legacy_whole_archive=0 \
    --features=-legacy_whole_archive \
    --copt=-fvisibility=hidden \
    --copt=-ffunction-sections \
    --copt=-fdata-sections \
    --copt=-fstack-protector \
    --copt=-Oz \
    --copt=-fomit-frame-pointer \
    --copt=-DABSL_MIN_LOG_LEVEL=2 \
    --linkopt=-Wl,--gc-sections,--strip-all \
    //path/to/the/aar/build/file:aar_name.aar
針對我們在步驟 1 建立的臉部偵測 AAR 目標,請執行:
bazel build -c opt --strip=ALWAYS \
    --host_crosstool_top=@bazel_tools//tools/cpp:toolchain \
    --fat_apk_cpu=arm64-v8a,armeabi-v7a \
    --legacy_whole_archive=0 \
    --features=-legacy_whole_archive \
    --copt=-fvisibility=hidden \
    --copt=-ffunction-sections \
    --copt=-fdata-sections \
    --copt=-fstack-protector \
    --copt=-Oz \
    --copt=-fomit-frame-pointer \
    --copt=-DABSL_MIN_LOG_LEVEL=2 \
    --linkopt=-Wl,--gc-sections,--strip-all \
    //mediapipe/examples/android/src/java/com/google/mediapipe/apps/aar_example:mediapipe_face_detection.aar

# It should print:
# Target //mediapipe/examples/android/src/java/com/google/mediapipe/apps/aar_example:mediapipe_face_detection.aar up-to-date:
# bazel-bin/mediapipe/examples/android/src/java/com/google/mediapipe/apps/aar_example/mediapipe_face_detection.aar
(選用) 將 AAR 儲存至偏好位置。
cp bazel-bin/mediapipe/examples/android/src/java/com/google/mediapipe/apps/aar_example/mediapipe_face_detection.aar
/absolute/path/to/your/preferred/location
如何搭配 Gradle 使用 Android Studio 中的 MediaPipe Framework AAR
啟動 Android Studio,然後前往您的專案。
將 AAR 複製到應用程式/程式庫。
cp bazel-bin/mediapipe/examples/android/src/java/com/google/mediapipe/apps/aar_example/mediapipe_face_detection.aar
/path/to/your/app/libs/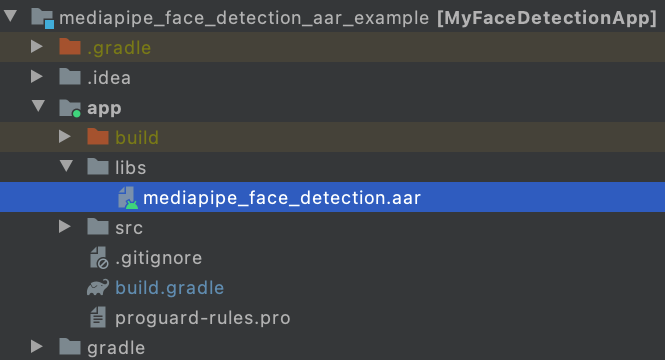
將應用程式/src/main/assets,並將素材資源 (圖形、模型等) 複製到 app/src/main/assets.
建構 MediaPipe 二進位圖表,並將資產複製到 app/src/main/assets,例如臉部偵測圖表時,您需要建構 將二進位檔案 圖表 臉部偵測 tflite 模型
bazel build -c opt mediapipe/graphs/face_detection:face_detection_mobile_gpu_binary_graph
cp bazel-bin/mediapipe/graphs/face_detection/face_detection_mobile_gpu.binarypb /path/to/your/app/src/main/assets/
cp mediapipe/modules/face_detection/face_detection_short_range.tflite /path/to/your/app/src/main/assets/
修改 app/build.gradle,新增 MediaPipe 依附元件和 MediaPipe AAR。
dependencies {
    implementation fileTree(dir: 'libs', include: ['*.jar', '*.aar'])
    implementation 'androidx.appcompat:appcompat:1.0.2'
    implementation 'androidx.constraintlayout:constraintlayout:1.1.3'
    testImplementation 'junit:junit:4.12'
    androidTestImplementation 'androidx.test.ext:junit:1.1.0'
    androidTestImplementation 'androidx.test.espresso:espresso-core:3.1.1'
    // MediaPipe deps
    implementation 'com.google.flogger:flogger:latest.release'
    implementation 'com.google.flogger:flogger-system-backend:latest.release'
    implementation 'com.google.code.findbugs:jsr305:latest.release'
    implementation 'com.google.guava:guava:27.0.1-android'
    implementation 'com.google.protobuf:protobuf-javalite:3.19.1'
    // CameraX core library
    def camerax_version = "1.0.0-beta10"
    implementation "androidx.camera:camera-core:$camerax_version"
    implementation "androidx.camera:camera-camera2:$camerax_version"
    implementation "androidx.camera:camera-lifecycle:$camerax_version"
    // AutoValue
    def auto_value_version = "1.8.1"
    implementation "com.google.auto.value:auto-value-annotations:$auto_value_version"
    annotationProcessor "com.google.auto.value:auto-value:$auto_value_version"
}
按照 Android 應用程式範例,在 Android Studio 中使用 MediaPipe, 具體來說,您可以設計提示來解決業務工作如果您要參考範例,可以參考「臉部偵測」這個例子 找到 這裡並 請參考 請參閱這篇文章。