
Preview our GitHub Web samples instantly with our interactive playground, which lets you evaluate our on-device ML models and pipelines. Our web app makes it a joy to quickly test MediaPipe solutions in your browser with your own data. For each task, you can experiment with model settings for the total number of results, customize the minimum confidence threshold for reporting results, and adjust much more.
This page provides some quick instructions on working with solutions in MediaPipe Studio.
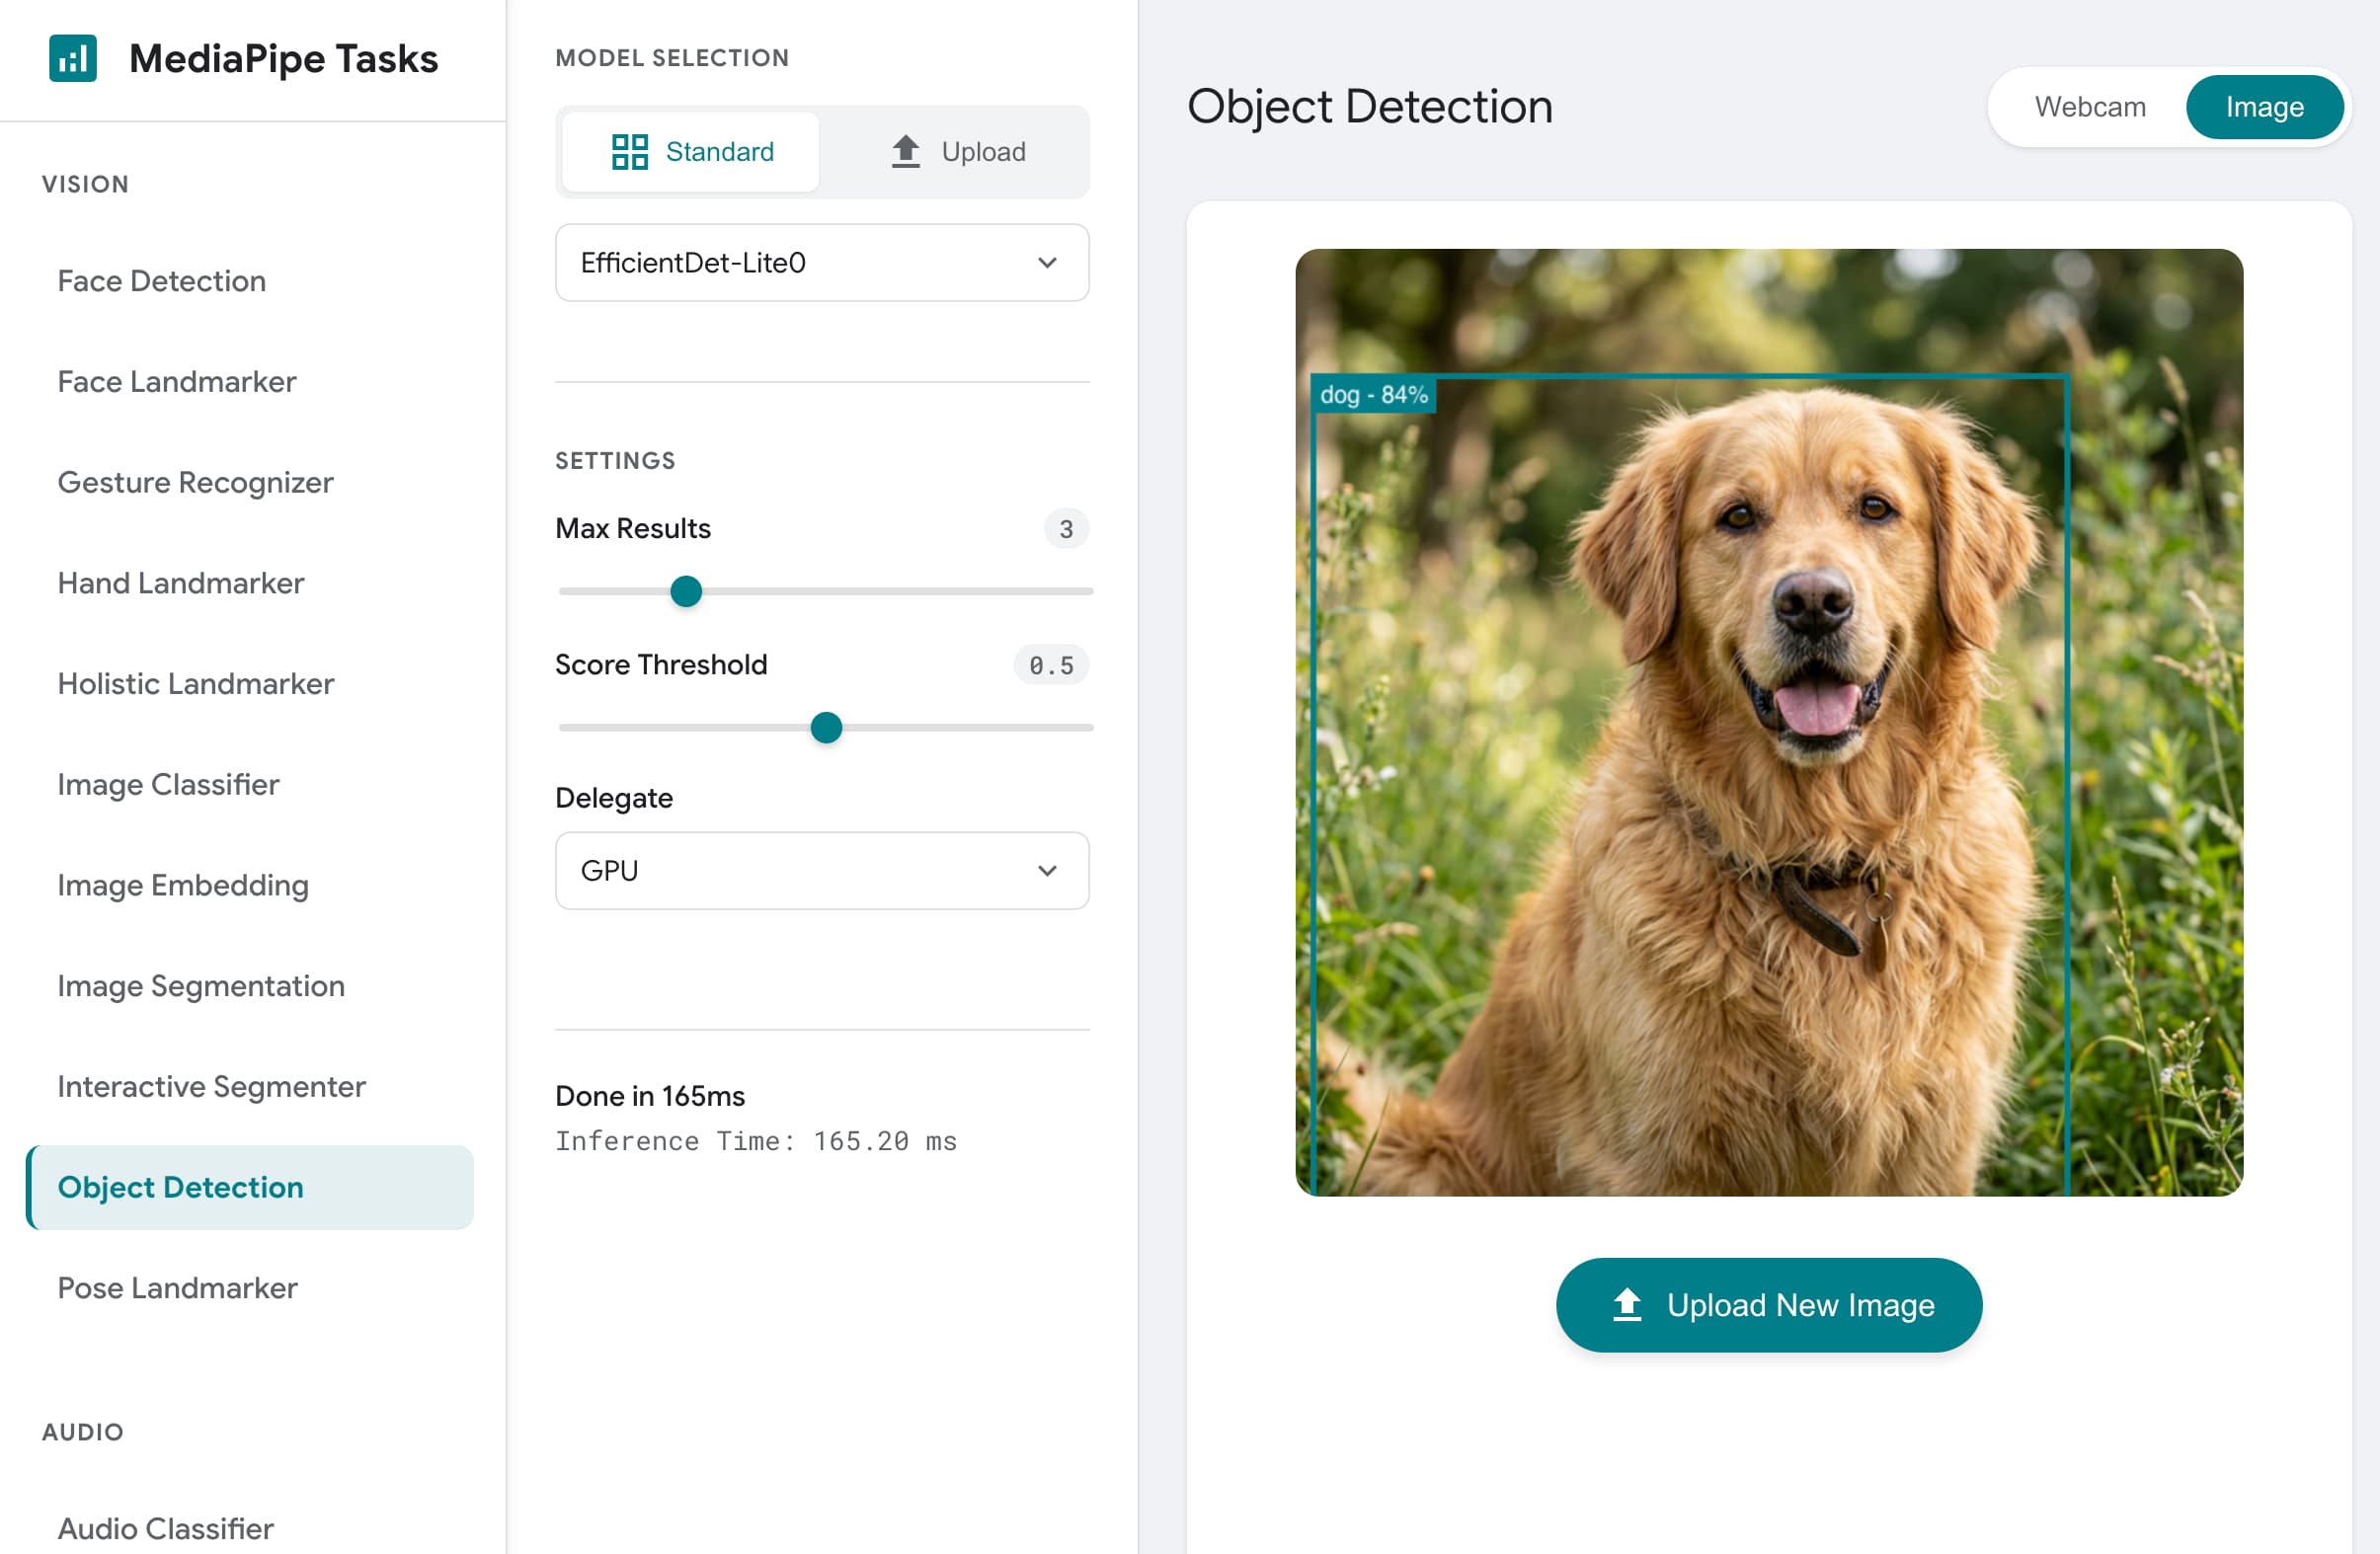 Figure 1. MediaPipe Samples Web application home page.
Custom models
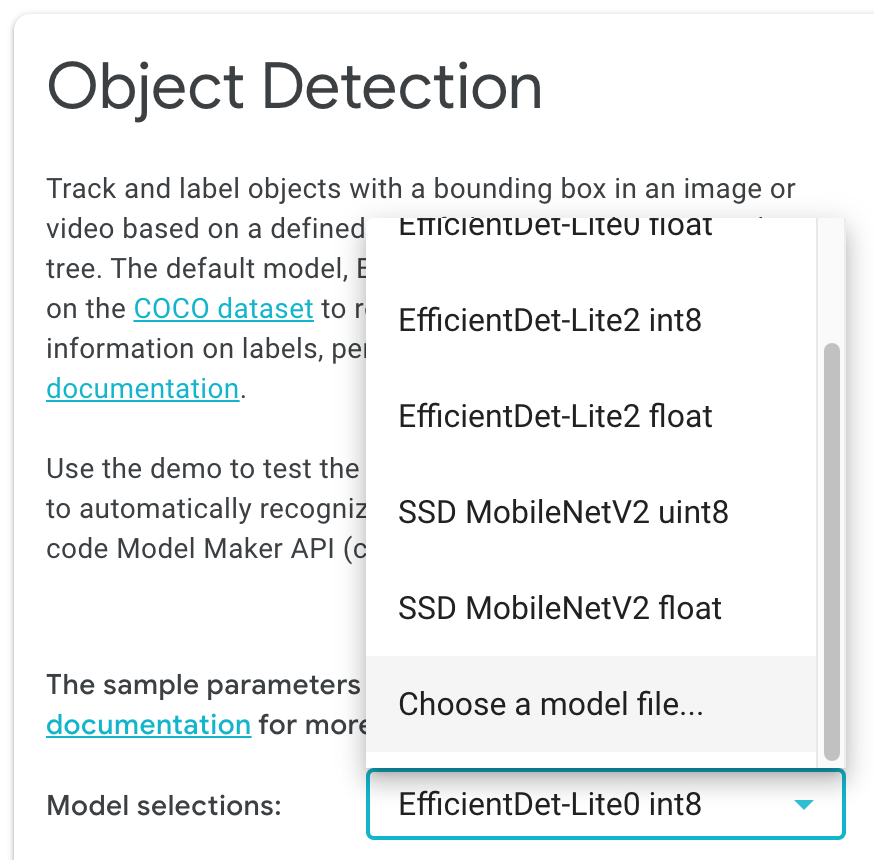 You can use customized models with MediaPipe in the Model selection option,
by choosing Choose a model file and selecting a model from your file
storage, as shown in the screenshot.
You can use customized models with MediaPipe in the Model selection option,
by choosing Choose a model file and selecting a model from your file
storage, as shown in the screenshot.
The model you choose must conform to the model input and output requirements of the MediaPipe Tasks API you are using, and include compatible model metadata. The quickest way to create your own model for use with a MediaPipe Tasks API is to use the MediaPipe Model Maker tool to modify a compatible solution model with your own data. For more information, see MediaPipe Model Maker.
Custom input data
You can use your own data on each solution page in MediaPipe Studio. For text-based tasks, you can enter text in the field provided. Vision tasks allow you to use a web camera as input, and you can also upload your own images.
Get started
You can interact with our APIs by running one of the solution demos, such as Image Classification, and then use the related developer guide to build this functionality into your own application.