Nano Banana की मदद से इमेज जनरेट करने की सुविधा
- इसके अलावा, प्रॉम्प्ट का इस्तेमाल करके भी सर्वे बनाया जा सकता है:
-


-
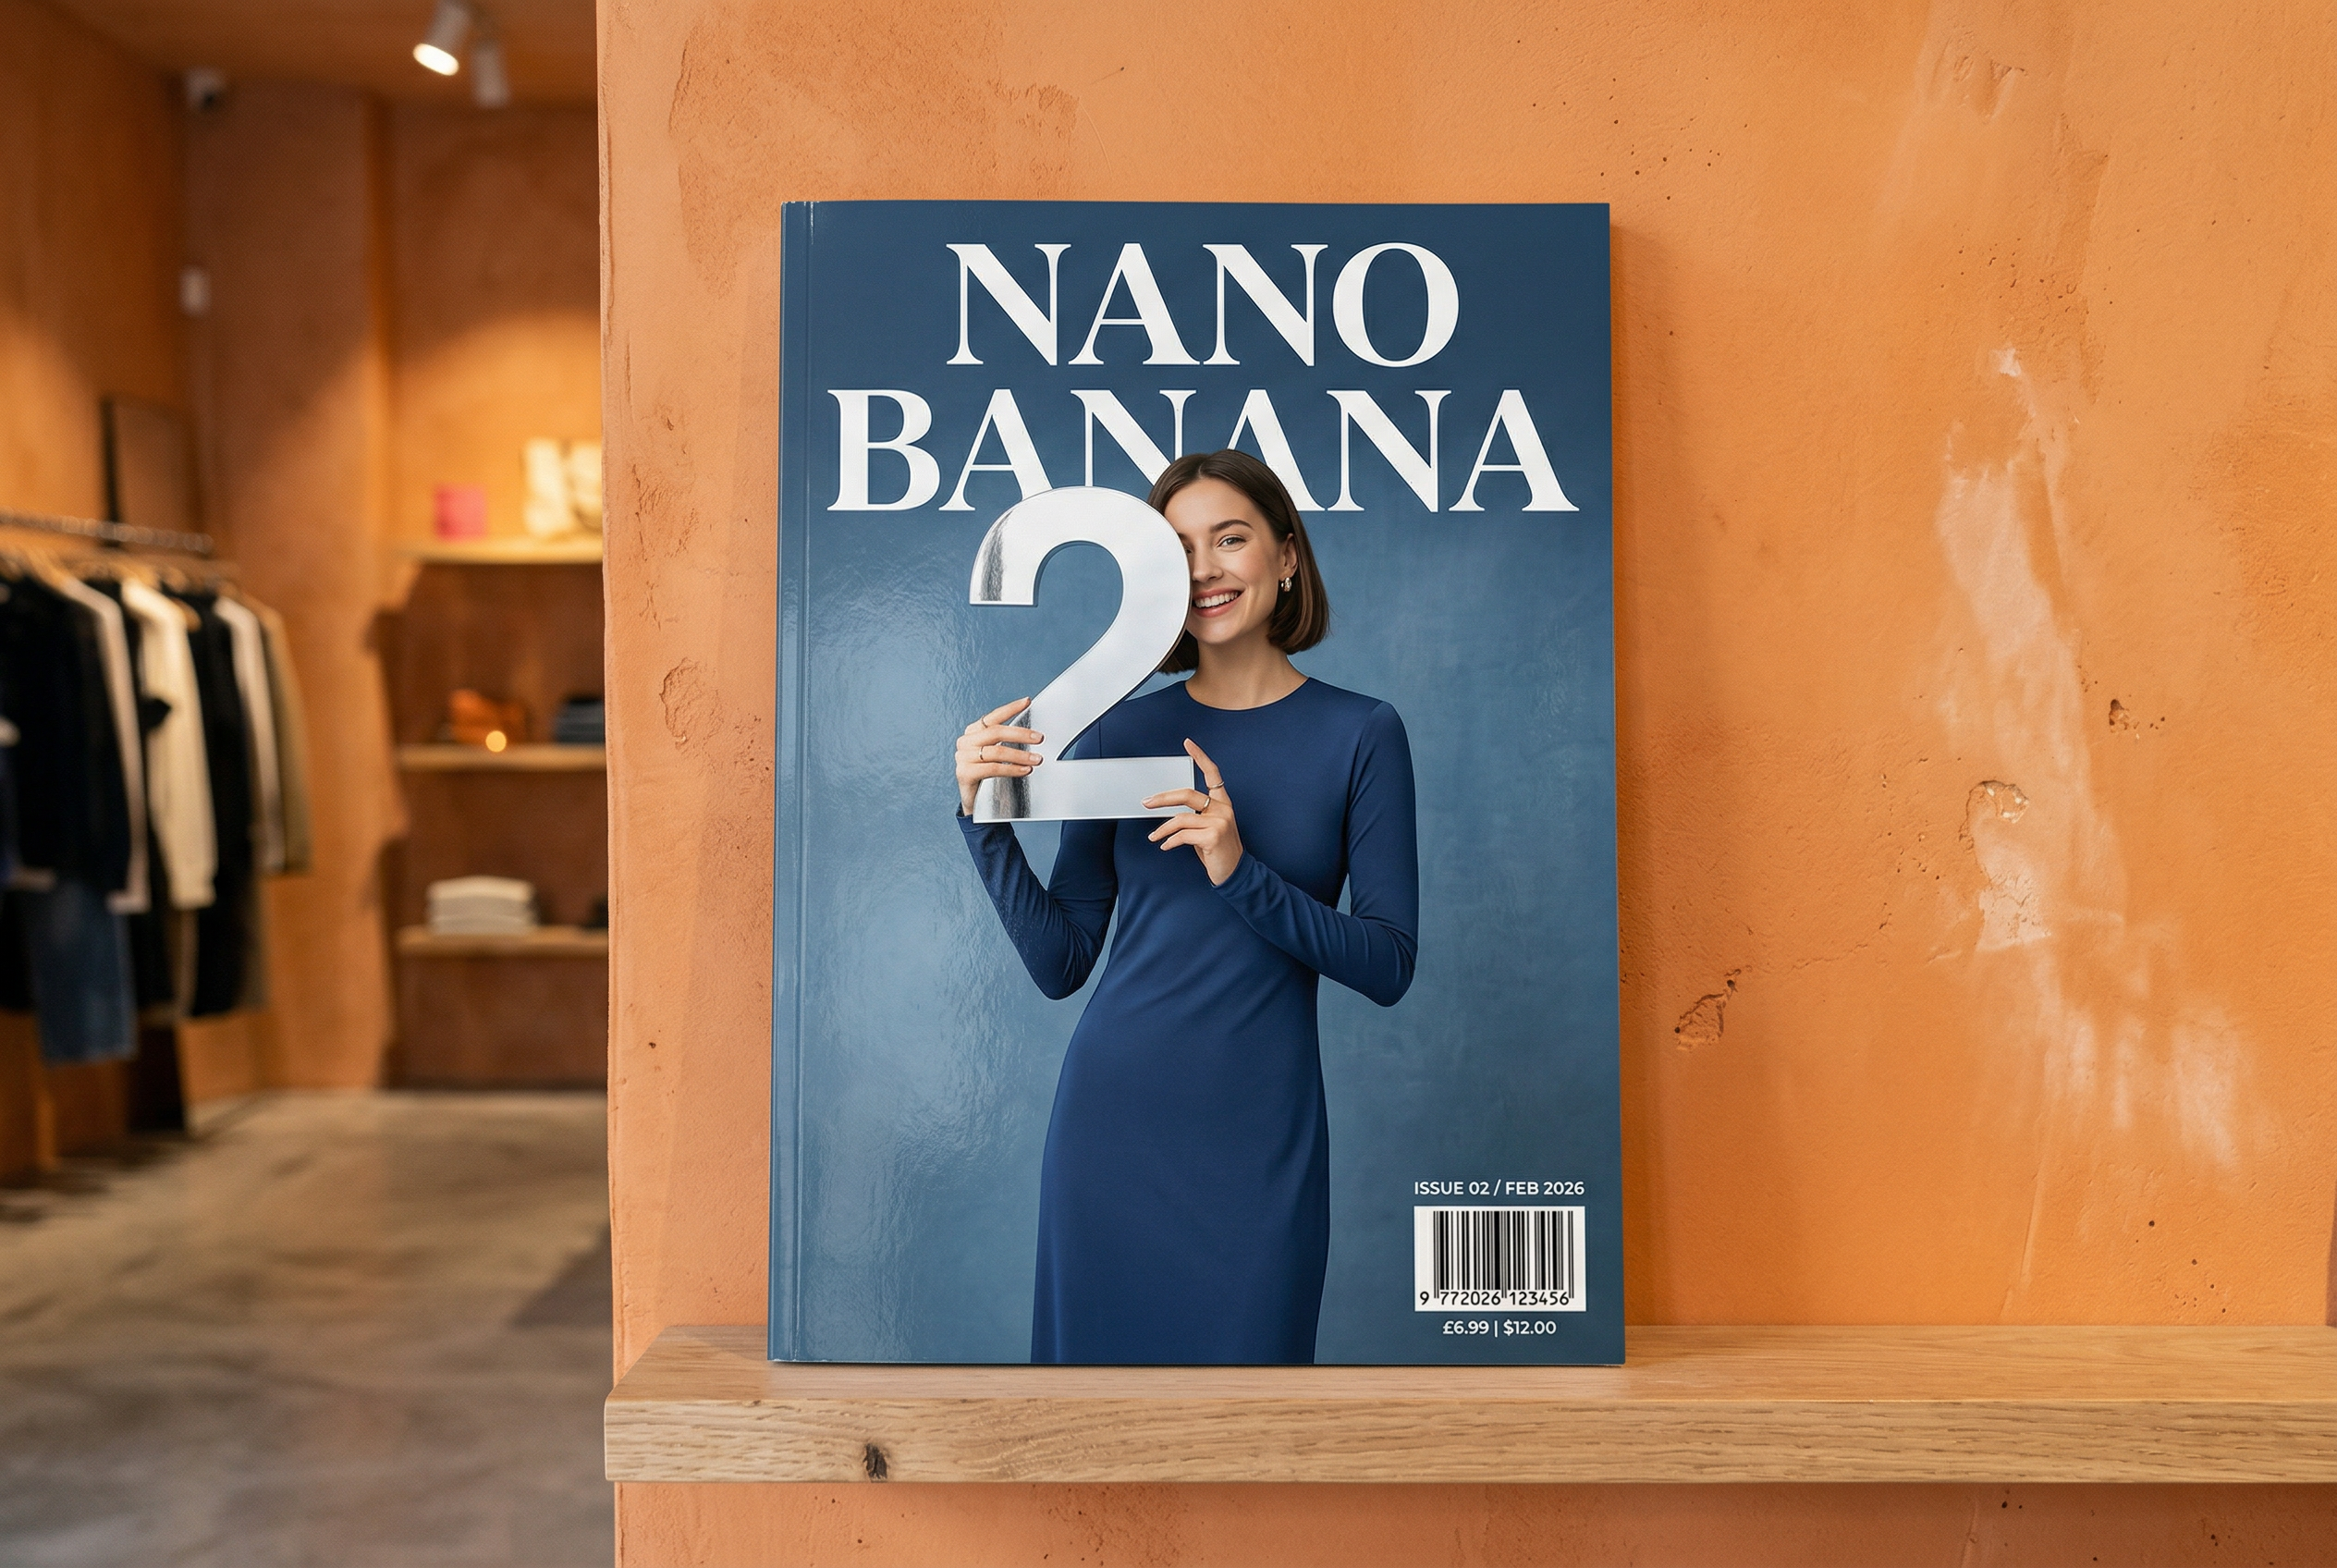
Nano Banana 2 की मदद से जनरेट किया गया प्रॉम्प्ट: "ग्लॉसी मैगज़ीन के कवर की एक फ़ोटो. नीले रंग के इस कवर पर, बड़े और बोल्ड अक्षरों में Nano Banana लिखा है. टेक्स्ट, सेरिफ़ फ़ॉन्ट में है और पूरे व्यू में दिखता है. कोई और टेक्स्ट नहीं. टेक्स्ट के सामने, एक व्यक्ति का पोर्ट्रेट है. इसमें व्यक्ति ने स्लीक और कम डिज़ाइन वाली ड्रेस पहनी है. वह मज़ाकिया अंदाज़ में नंबर 2 को पकड़े हुए है, जो फ़ोकल पॉइंट है.
बारकोड के साथ-साथ, कोने में "फ़रवरी 2026" की तारीख और समस्या नंबर डालें. पत्रिका, डिज़ाइनर स्टोर में प्लास्टर की गई नारंगी रंग की दीवार के पास मौजूद शेल्फ़ पर रखी है." -
Nano Banana Pro की मदद से जनरेट की गई इमेज प्रॉम्प्ट: "लंदन का साफ़-सुथरा, 45° टॉप-डाउन, आइसोमेट्रिक मिनिएचर 3D कार्टून सीन दिखाओ. इसमें लंदन के सबसे मशहूर लैंडमार्क और आर्किटेक्चरल एलिमेंट शामिल हों. सॉफ़्ट और रिफ़ाइंड टेक्सचर का इस्तेमाल करें. साथ ही, असली जैसे दिखने वाले पीबीआर मटीरियल और हल्की, असली जैसी रोशनी और परछाई का इस्तेमाल करें. शहर के माहौल में मौसम की मौजूदा स्थितियों को सीधे तौर पर इंटिग्रेट करें, ताकि माहौल को और भी ज़्यादा दिलचस्प बनाया जा सके. साफ़-सुथरे और मिनिमलिस्ट कंपोज़िशन का इस्तेमाल करें. साथ ही, हल्के और एक रंग वाले बैकग्राउंड का इस्तेमाल करें. सबसे ऊपर बीच में, बड़े और बोल्ड टेक्स्ट में "लंदन" टाइटल रखें. इसके नीचे, मौसम का आइकॉन प्रमुखता से दिखाएं. इसके बाद, तारीख (छोटे टेक्स्ट में) और तापमान (मीडियम टेक्स्ट में) दिखाएं. सभी टेक्स्ट को बीच में अलाइन किया जाना चाहिए. साथ ही, उनके बीच एक जैसा स्पेस होना चाहिए. इसके अलावा, टेक्स्ट, इमारतों के ऊपरी हिस्सों पर हल्का-सा ओवरलैप हो सकता है." -
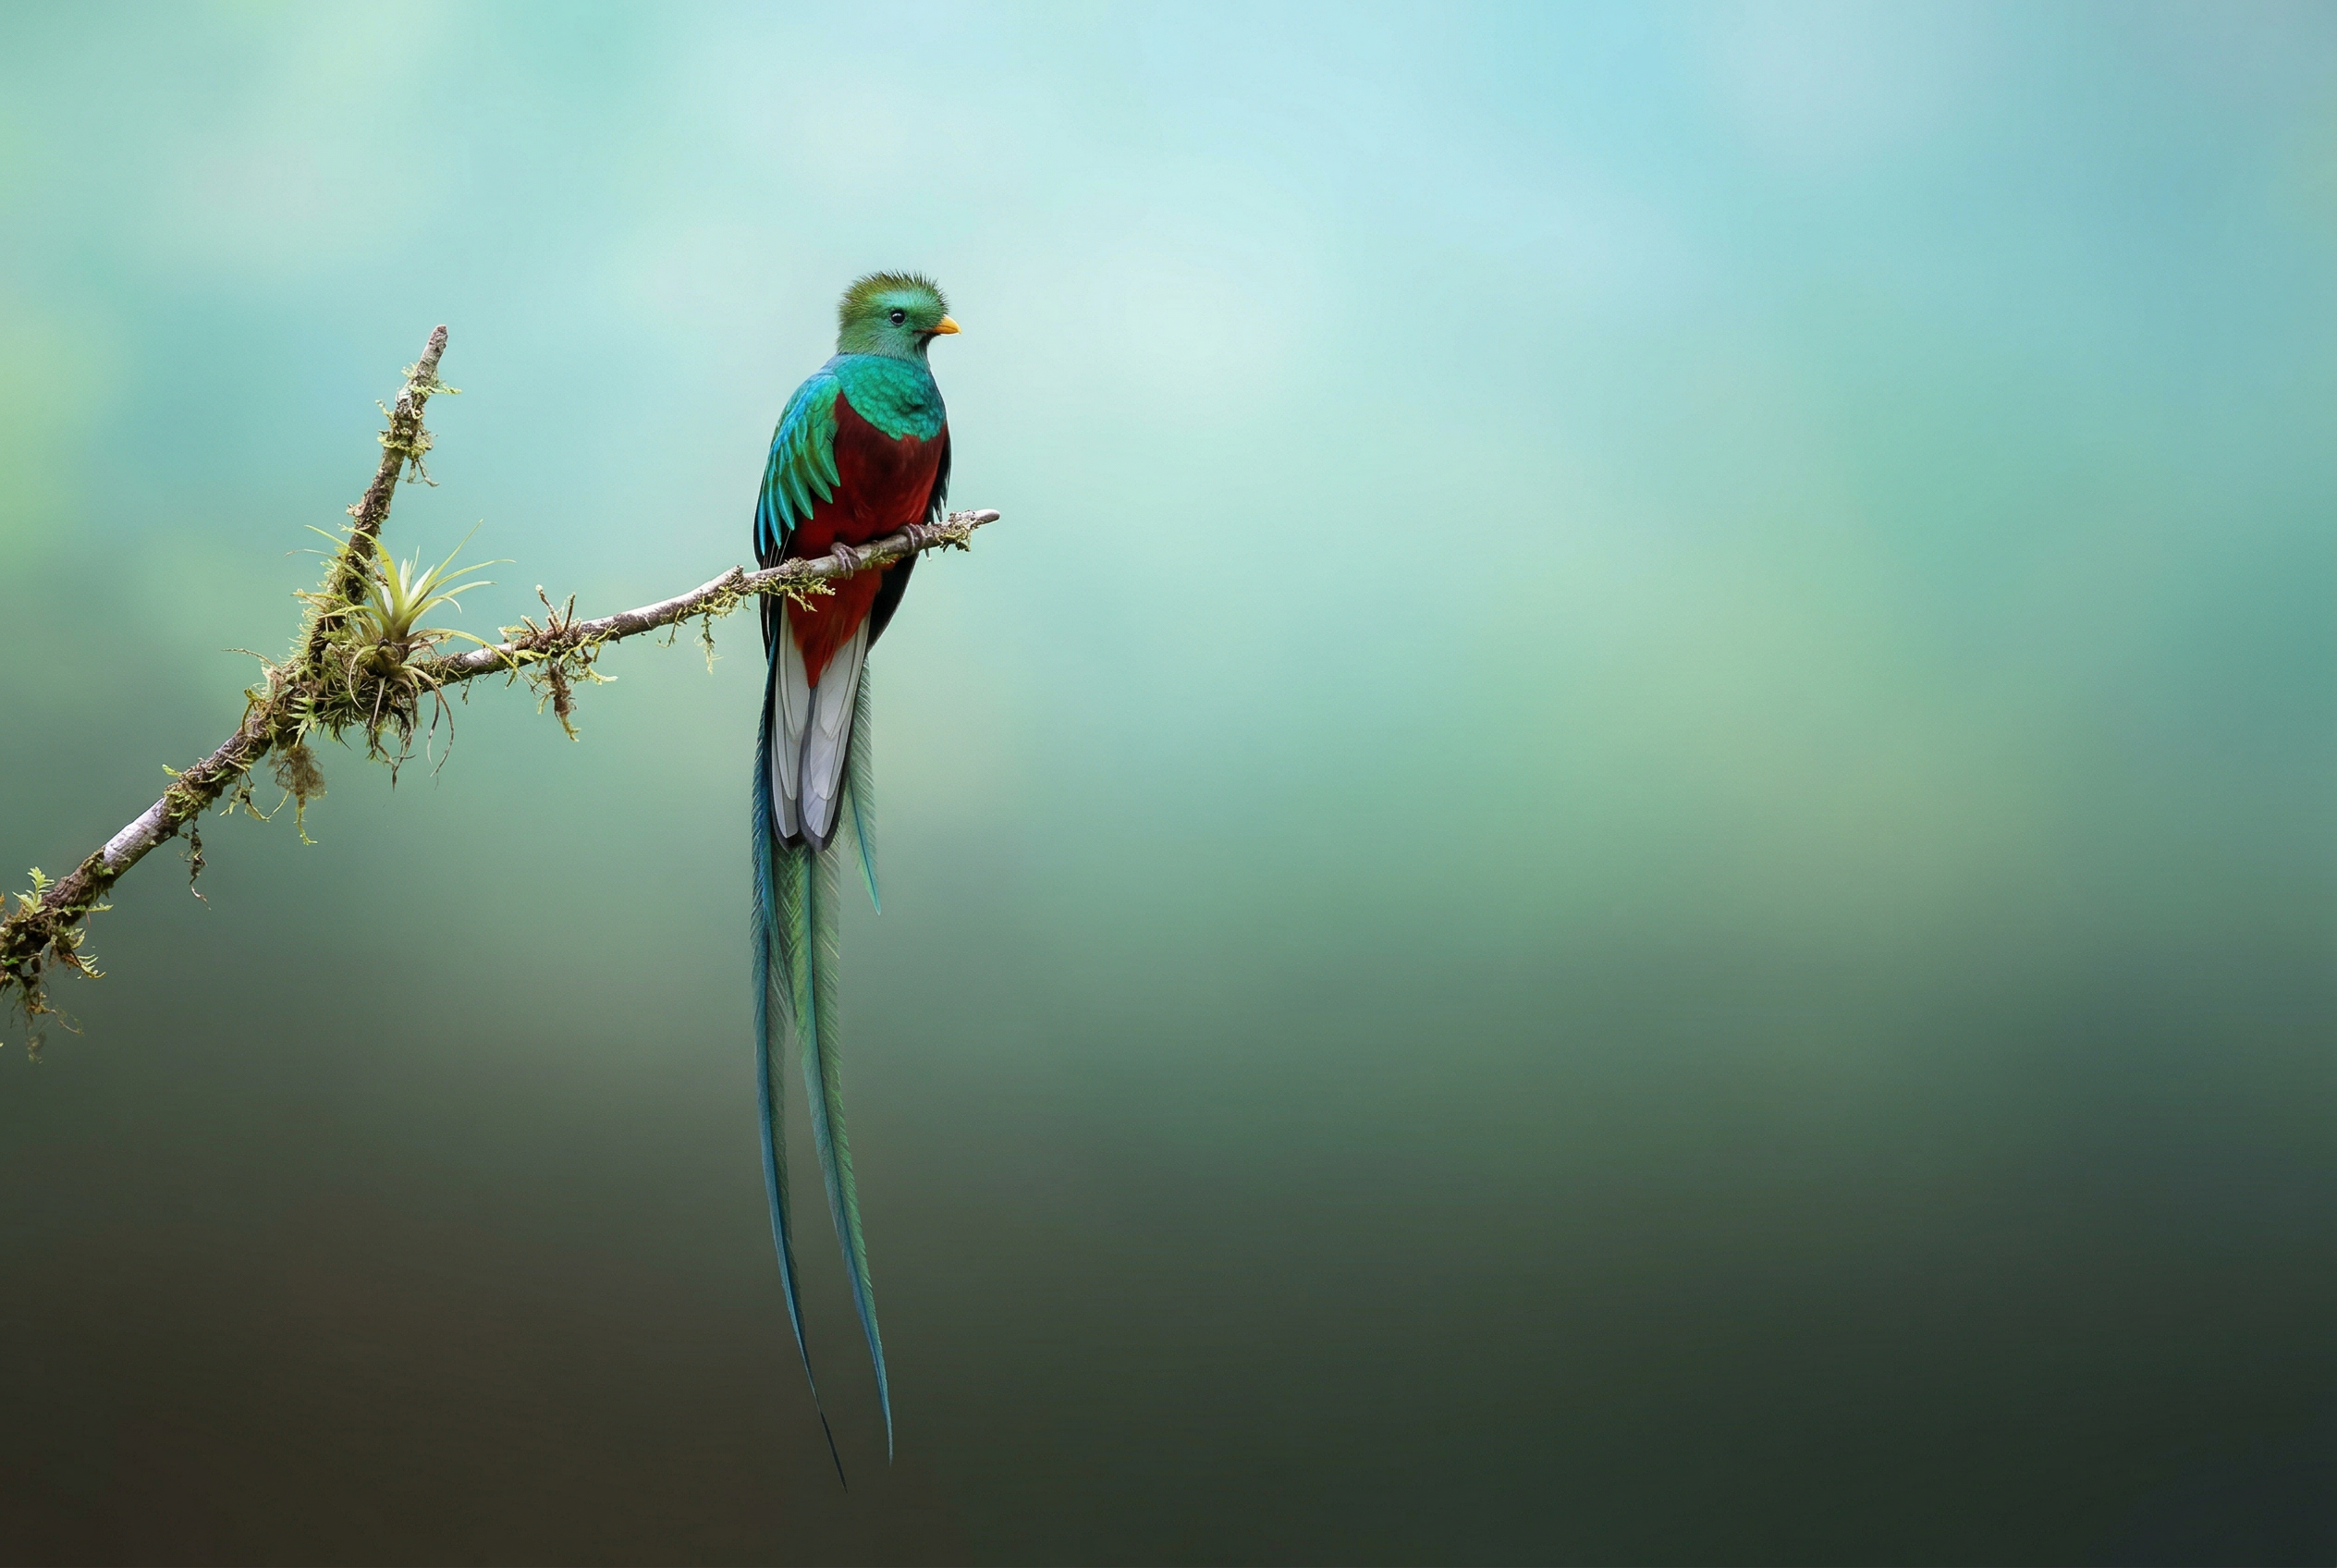
Nano Banana 2 की मदद से जनरेट किया गया प्रॉम्प्ट: "इमेज खोज की सुविधा का इस्तेमाल करके, शानदार क्वेट्ज़ल पक्षी की सटीक इमेज ढूंढो. इस पक्षी का 3:2 वाला एक सुंदर वॉलपेपर बनाओ. इसमें ऊपर से नीचे तक नैचुरल ग्रेडिएंट हो और कंपोज़िशन कम से कम हो." -

Nano Banana Pro की मदद से जनरेट की गई इमेज प्रॉम्प्ट: "इस लोगो को केले की खुशबू वाले परफ़्यूम के प्रीमियम विज्ञापन पर लगाओ. लोगो को बोतल में अच्छी तरह से शामिल किया गया है." -
Nano Banana Pro की मदद से जनरेट की गई इमेज प्रॉम्प्ट: "नाश्ता परोसने वाले एक व्यस्त कैफ़े की रोज़मर्रा की गतिविधि की फ़ोटो. फ़ोरग्राउंड में नीले बालों वाला एक ऐनिमे व्यक्ति है. इनमें से एक व्यक्ति पेंसिल स्केच है, दूसरा क्लेमेशन व्यक्ति है" -
Nano Banana Pro की मदद से जनरेट की गई इमेज प्रॉम्प्ट: "Gemini 3 Flash को लॉन्च करने के फ़ैसले पर लोगों की क्या प्रतिक्रिया है, यह जानने के लिए खोज का इस्तेमाल करो. इस जानकारी का इस्तेमाल करके, इसके बारे में एक छोटा लेख लिखो. इसमें हेडिंग भी शामिल करो. इस लेख की ऐसी फ़ोटो दिखाओ जो डिज़ाइन पर फ़ोकस करने वाली ग्लॉसी मैगज़ीन में दिखाई गई हो. यह एक फ़ोटो है. इसमें एक पेज को मोड़ा गया है. इसमें Gemini 3 Flash के बारे में लेख दिखाया गया है. एक हीरो फ़ोटो. सेरिफ़ फ़ॉन्ट में हेडलाइन." -
Nano Banana Pro की मदद से जनरेट की गई इमेज प्रॉम्प्ट: "एक प्यारे कुत्ते को दिखाने वाला आइकॉन. बैकग्राउंड का रंग सफ़ेद है. आइकॉन को रंगीन और टेक्टाइल 3D स्टाइल में बनाओ. कोई टेक्स्ट नहीं है." -
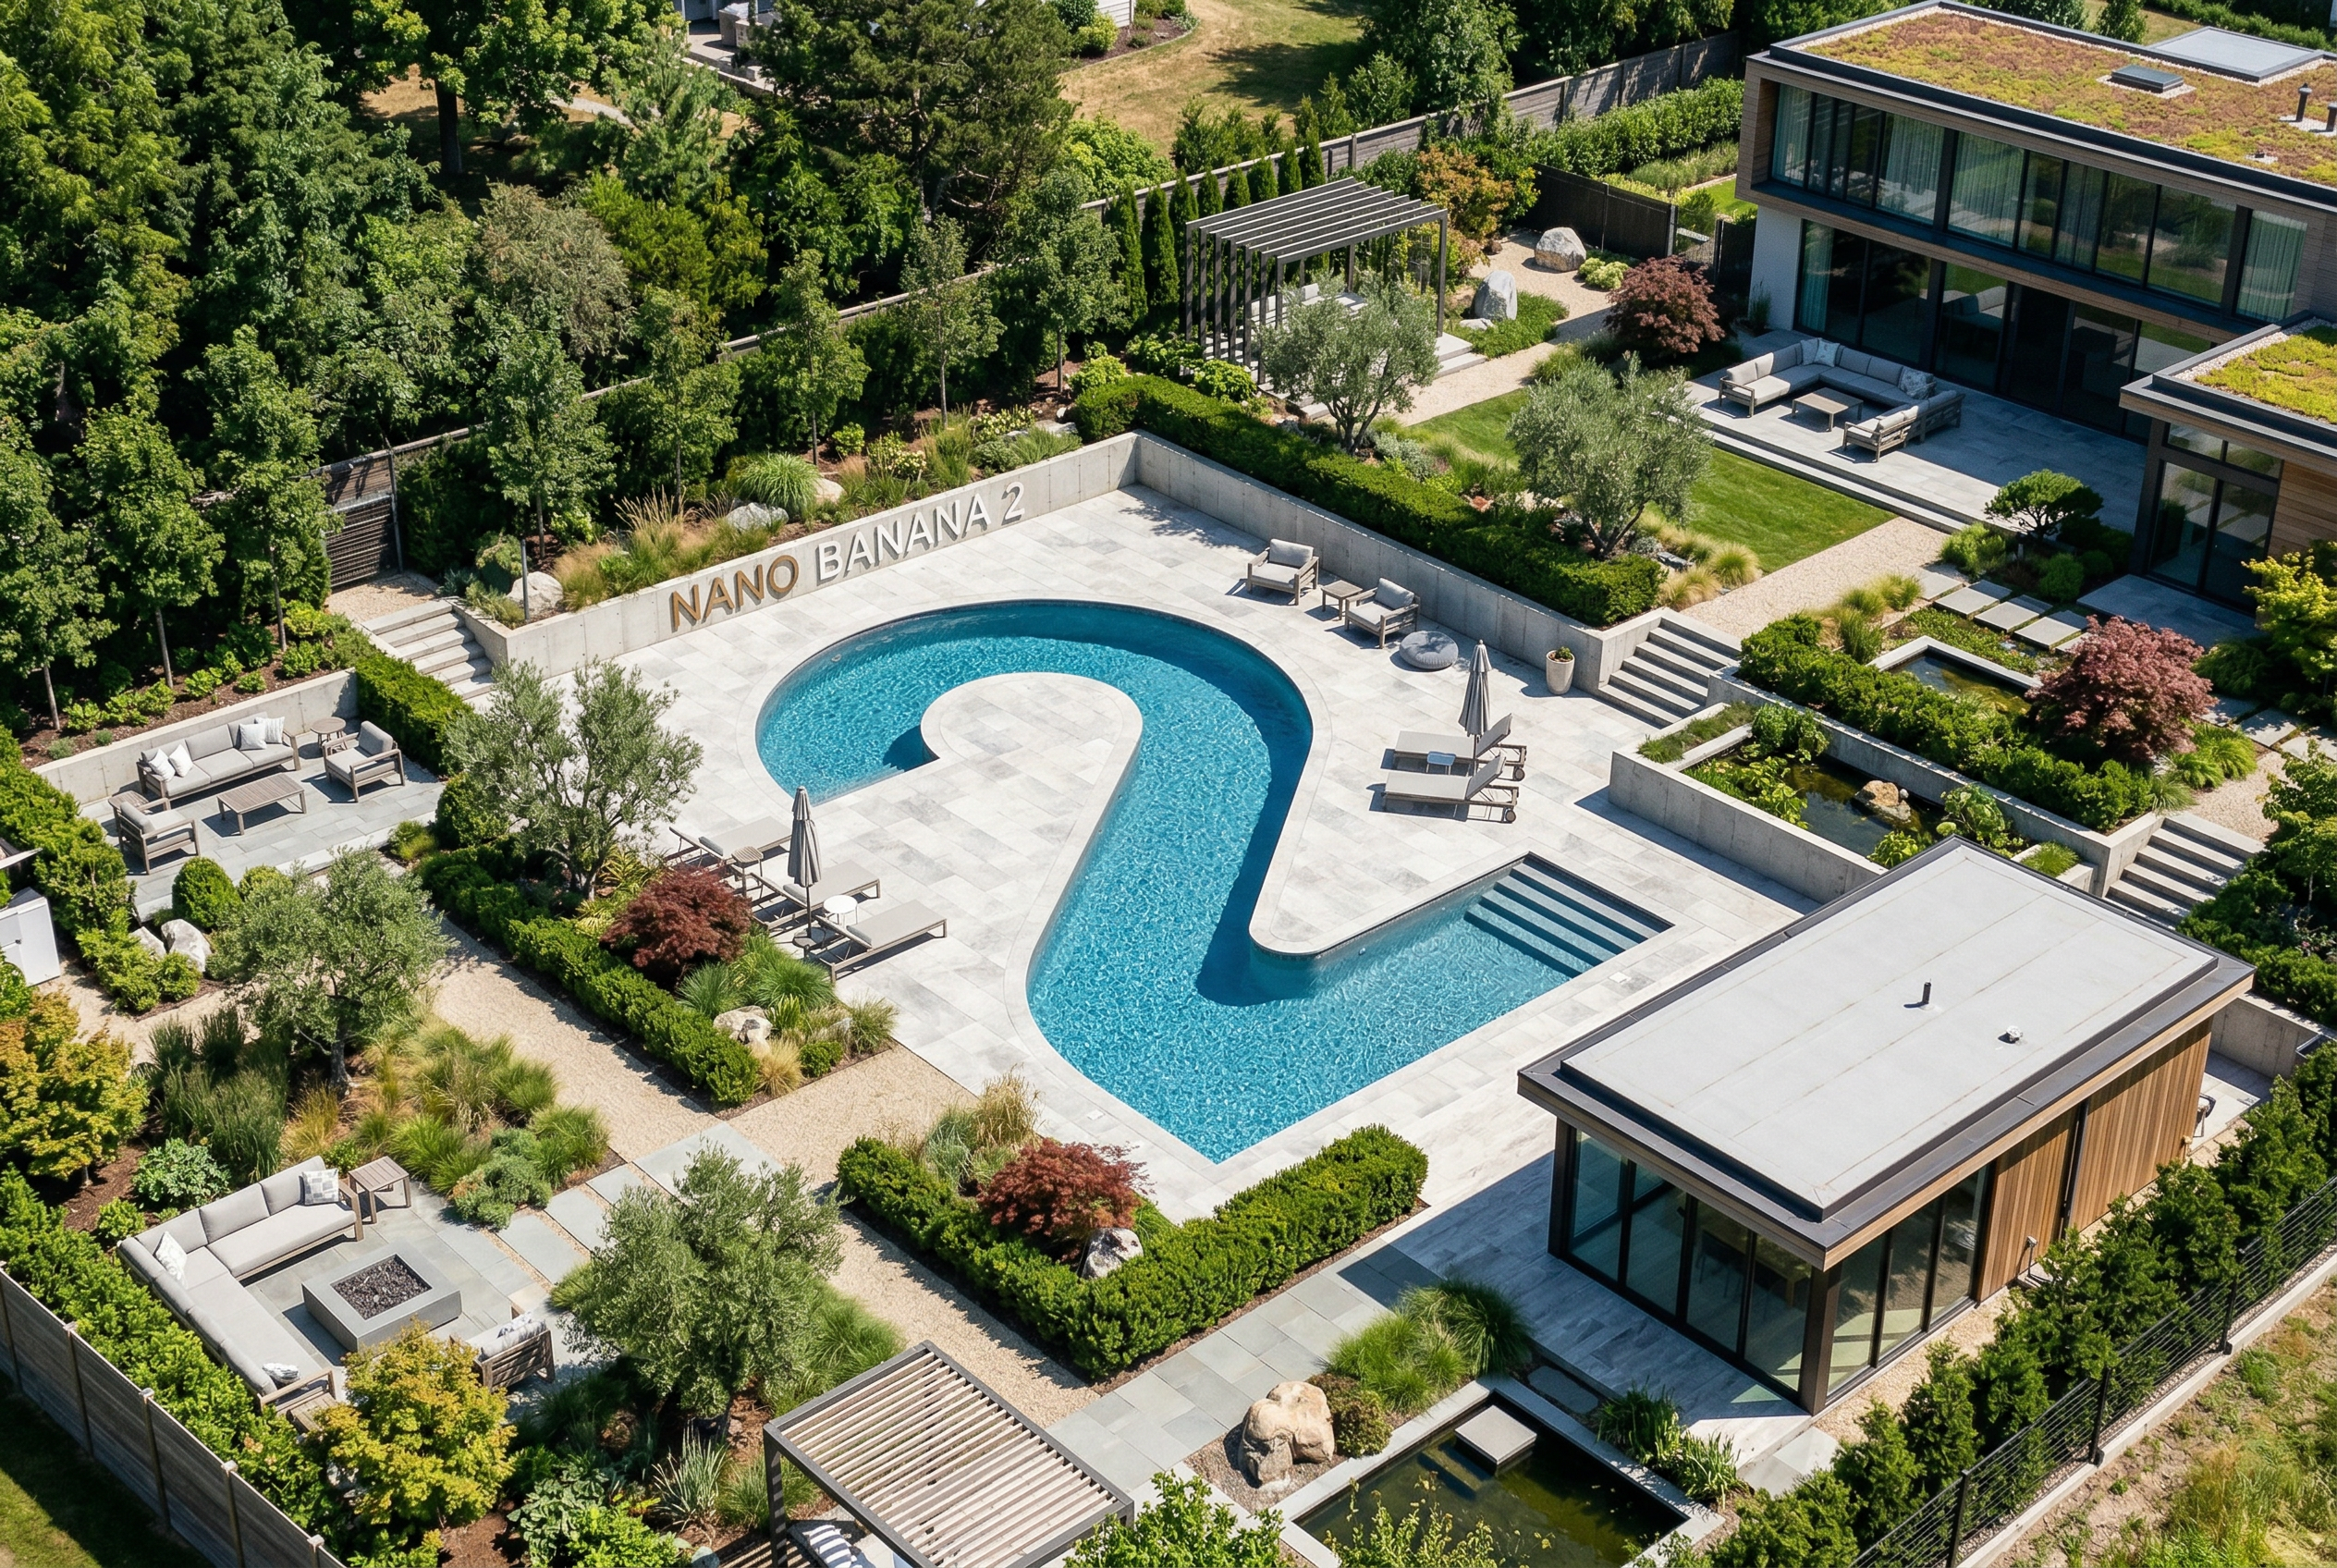
Nano Banana 2 की मदद से जनरेट किया गया प्रॉम्प्ट: "ऐसी फ़ोटो बनाओ जो पूरी तरह से आइसोमेट्रिक हो. यह कोई छोटी इमेज नहीं है, बल्कि एक फ़ोटो है. यह फ़ोटो, आइसोमेट्रिक व्यू में ली गई है. यह एक खूबसूरत मॉडर्न गार्डन की फ़ोटो है. इसमें दो के आकार का एक बड़ा पूल है. साथ ही, इसमें Nano Banana 2 लिखा है."
Nano Banana, Gemini में इमेज जनरेट करने की सुविधा का नाम है. Gemini, बातचीत के दौरान टेक्स्ट, इमेज या दोनों का इस्तेमाल करके इमेज जनरेट और प्रोसेस कर सकता है. इससे आपको विज़ुअल बनाने, उनमें बदलाव करने, और उन्हें बेहतर बनाने के लिए पहले से ज़्यादा कंट्रोल मिलता है.
Nano Banana, Gemini API में उपलब्ध चार अलग-अलग मॉडल को कहते हैं:
- Nano Banana 2 Lite (Gemini 3.1 Flash Lite Image)
(
gemini-3.1-flash-lite-image): यह Gemini का सबसे तेज़ और सस्ता इमेज मॉडल है. इसे तेज़ी से काम करने और बड़े पैमाने पर इमेज जनरेट करने के लिए डिज़ाइन किया गया है. इसमें तेज़ी से काम करने और कम लागत में इमेज जनरेट करने को प्राथमिकता दी जाती है. इसे एक से ज़्यादा रेफ़रंस इनपुट या क्रम से एक से ज़्यादा बार बदलाव करने के लिए ऑप्टिमाइज़ नहीं किया गया है. - Nano Banana 2 (Gemini 3.1 Flash Image)
(
gemini-3.1-flash-image): यह सबसे ज़्यादा काम आने वाला मॉडल है. यह सभी टास्क के लिए, सामान्य तौर पर इस्तेमाल किया जाने वाला वर्कहॉर्स मॉडल है. यह मॉडल, इमेज की बेहतर क्वालिटी, दुनिया भर के तथ्यों और बारीकियों की बेहतर समझ, और टेक्स्ट को सटीक तरीक़े से रेंडर करने के साथ-साथ तेज़ी से काम करता है. यह मॉडल, एक साथ कई रेफ़रंस इमेज को प्रोसेस करने और उनमें एकरूपता बनाए रखने में बेहतर है. - Nano Banana Pro (Gemini 3 Pro Image)
(
gemini-3-pro-image): यह सबसे मुश्किल विज़ुअल टास्क के लिए प्रीमियम विकल्प है. इसमें दुनिया भर की सबसे ज़्यादा जानकारी, ऐडवांस लोकलाइज़ेशन, सटीक ब्रैंड कंसिस्टेंसी, और क्रिएटिव कंट्रोल की सुविधा मिलती है. - Nano Banana (Gemini 2.5 Flash Image)
(
gemini-2.5-flash-image): यह Nano Banana सीरीज़ का लेगसी पायनियर है. यह मॉडल काफ़ी भरोसेमंद है. हालांकि, हमारा सुझाव है कि ग्राहक Nano Banana 2 Lite पर स्विच करें, ताकि उन्हें बेहतर क्वालिटी, इमेज को फटाफट जनरेट करने की सुविधा, और एपीआई की कम कीमत का फ़ायदा मिल सके.
जनरेट की गई सभी इमेज में SynthID वॉटरमार्क शामिल होता है.
इमेज जनरेट करने की प्रोसेस (टेक्स्ट प्रॉम्प्ट से इमेज जनरेट करने की प्रोसेस)
Python
from google import genai
from PIL import Image
import base64

client = genai.Client()

interaction = client.interactions.create(
    model="gemini-3.1-flash-image",
    input="Create a picture of a nano banana dish in a fancy restaurant with a Gemini theme",
)

with open("generated_image.png", "wb") as f:

    f.write(base64.b64decode(interaction.output_image.data))
JavaScript
import { GoogleGenAI } from "@google/genai";
import * as fs from "node:fs";

async function main() {

  const ai = new GoogleGenAI({});

  const prompt =
    "Create a picture of a nano banana dish in a fancy restaurant with a Gemini theme";

  const interaction = await ai.interactions.create({
    model: "gemini-3.1-flash-image",
    input: prompt,
  });
  const generatedImage = interaction.output_image;
  if (generatedImage) {
    const buffer = Buffer.from(generatedImage.data, "base64");
    fs.writeFileSync("gemini-native-image.png", buffer);
    console.log("Image saved as gemini-native-image.png");
  }
}

main();
REST
curl -s -X POST \
  "https://generativelanguage.googleapis.com/v1beta/interactions" \
  -H "x-goog-api-key: $GEMINI_API_KEY" \
  -H "Content-Type: application/json" \
  -d '{
    "model": "gemini-3.1-flash-image",
    "input": [
      {"type": "text", "text": "Create a picture of a nano banana dish in a fancy restaurant with a Gemini theme"}
    ]
  }'
जनरेट की गई इमेज का डेटा वापस पाने के लिए, interaction.output_image
प्रॉपर्टी का इस्तेमाल किया जा सकता है. यह प्रॉपर्टी, जनरेट की गई इमेज का आखिरी ब्लॉक दिखाती है. सुविधा से जुड़ी प्रॉपर्टी के बारे में ज़्यादा जानने के लिए, इंटरैक्शन की खास जानकारी देखें.
इमेज में बदलाव करना (टेक्स्ट और इमेज से इमेज जनरेट करना)
याद रखें: पक्का करें कि आपके पास, अपलोड की जाने वाली किसी भी इमेज से जुड़े सभी ज़रूरी अधिकार हों. ऐसा कॉन्टेंट जनरेट न करें जिससे किसी के अधिकारों का उल्लंघन होता हो. इसमें ऐसे वीडियो या इमेज शामिल हैं जो धोखा देने, उत्पीड़न करने या नुक़सान पहुँचाने के मक़सद बनाए गए हों. जनरेटिव एआई की इस सेवा के इस्तेमाल पर, हमारी जनरेटिव एआई के इस्तेमाल से जुड़ी पाबंदी की नीति लागू होती है.
कोई इमेज दें और टेक्स्ट प्रॉम्प्ट का इस्तेमाल करके, एलिमेंट जोड़ें, हटाएं या उनमें बदलाव करें. इसके अलावा, स्टाइल बदलें या कलर ग्रेडिंग अडजस्ट करें.
यहां दिए गए उदाहरण में, base64 कोड में बदले गए इमेज अपलोड करने का तरीका बताया गया है.
एक से ज़्यादा इमेज, बड़े पेलोड, और काम करने वाले MIME टाइप के लिए, इमेज को समझना पेज देखें.
Python
from google import genai
from PIL import Image
import base64

client = genai.Client()

with open("/path/to/cat_image.png", "rb") as f:
    image_bytes = f.read()

interaction = client.interactions.create(
    model="gemini-3.1-flash-image",
    input=[
        {
          "type": "text",
          "text": "Create a picture of a nano banana dish in a fancy restaurant with a Gemini theme"
        },
        {
            "type": "image",
            "data": base64.b64encode(image_bytes).decode('utf-8'),
            "mime_type": "image/png"
        }
    ],
)

with open("generated_image.png", "wb") as f:

    f.write(base64.b64decode(interaction.output_image.data))
JavaScript
import { GoogleGenAI } from "@google/genai";
import * as fs from "node:fs";

async function main() {

  const ai = new GoogleGenAI({});

  const imagePath = "path/to/cat_image.png";
  const imageData = fs.readFileSync(imagePath);
  const base64Image = imageData.toString("base64");

  const prompt = [
    { type: "text", text: "Create a picture of my cat eating a nano-banana in a" +
            "fancy restaurant under the Gemini constellation" },
    {
      type: "image",
      mime_type: "image/png",
      data: base64Image
    },
  ];

  const interaction = await ai.interactions.create({
    model: "gemini-3.1-flash-image",
    input: prompt,
  });
  const generatedImage = interaction.output_image;
  if (generatedImage) {
    const buffer = Buffer.from(generatedImage.data, "base64");
    fs.writeFileSync("gemini-native-image.png", buffer);
    console.log("Image saved as gemini-native-image.png");
  }
}

main();
REST
curl -s -X POST \
  "https://generativelanguage.googleapis.com/v1beta/interactions" \
    -H "x-goog-api-key: $GEMINI_API_KEY" \
    -H 'Content-Type: application/json' \
    -d "{
      \"model\": \"gemini-3.1-flash-image\",
      \"input\": [
        {\"type\": \"text\", \"text\": \"Create a picture of my cat eating a nano-banana in a fancy restaurant under the Gemini constellation\"},
        {
          \"type\": \"image\",
          \"mime_type\": \"image/jpeg\",
          \"data\": \"<BASE64_IMAGE_DATA>\"
        }
      ]
    }"
सिलसिलेवार बातचीत में इमेज में बदलाव करने की सुविधा
बातचीत के दौरान, इमेज जनरेट करने और उनमें बदलाव करने की सुविधा का इस्तेमाल जारी रखें. इमेज के बारे में ज़्यादा जानकारी पाने के लिए, बातचीत को कई बार दोहराने का सुझाव दिया जाता है. यहां दिए गए उदाहरण में, फ़ोटोसिंथिसिस के बारे में इन्फ़ोग्राफ़िक जनरेट करने के लिए प्रॉम्प्ट दिखाया गया है.
Python
from google import genai
import base64

client = genai.Client()

interaction = client.interactions.create(
    model="gemini-3.1-flash-image",
    input="Create a vibrant infographic that explains photosynthesis as if it were a recipe for a plant's favorite food. Show the \"ingredients\" (sunlight, water, CO2) and the \"finished dish\" (sugar/energy). The style should be like a page from a colorful kids' cookbook, suitable for a 4th grader.",
    tools=[{"type": "google_search"}],
)

with open("photosynthesis.png", "wb") as f:

    f.write(base64.b64decode(interaction.output_image.data))
JavaScript
import { GoogleGenAI } from "@google/genai";
import * as fs from "node:fs";

const ai = new GoogleGenAI({});

async function main() {
  const interaction = await ai.interactions.create({
    model: "gemini-3.1-flash-image",
    input: "Create a vibrant infographic that explains photosynthesis as if it were a recipe for a plant's favorite food. Show the \"ingredients\" (sunlight, water, CO2) and the \"finished dish\" (sugar/energy). The style should be like a page from a colorful kids' cookbook, suitable for a 4th grader.",
    tools: [{"type": "google_search"}],
  });

  const generatedImage = interaction.output_image;
  if (generatedImage) {
    const buffer = Buffer.from(generatedImage.data, "base64");
    fs.writeFileSync("photosynthesis.png", buffer);
    console.log("Image saved as photosynthesis.png");
  }
}

await main();
REST
curl -s -X POST \
  "https://generativelanguage.googleapis.com/v1beta/interactions" \
  -H "x-goog-api-key: $GEMINI_API_KEY" \
  -H "Content-Type: application/json" \
  -d '{
    "model": "gemini-3.1-flash-image",
    "input": [
      {"type": "text", "text": "Create a vibrant infographic that explains photosynthesis as if it were a recipe for a plants favorite food. Show the \"ingredients\" (sunlight, water, CO2) and the \"finished dish\" (sugar/energy). The style should be like a page from a colorful kids cookbook, suitable for a 4th grader."}
    ],
    "tools": [{"type": "google_search"}]
  }'

इसके बाद, previous_interaction_id का इस्तेमाल करके, ग्राफ़िक की भाषा को स्पैनिश में बदला जा सकता है.
Python
interaction_2 = client.interactions.create(
    model="gemini-3.1-flash-image",
    input="Update this infographic to be in Spanish. Do not change any other elements of the image.",
    previous_interaction_id=interaction.id,
    response_format={
        "type": "image",
        "mime_type": "image/jpeg",
        "aspect_ratio": "16:9",
        "image_size": "2K"
    },
)

generated_image = interaction_2.output_image
if generated_image:
    with open("photosynthesis_spanish.png", "wb") as f:
        f.write(base64.b64decode(generated_image.data))
JavaScript
const interaction2 = await ai.interactions.create({
  model: "gemini-3.1-flash-image",
  input: "Update this infographic to be in Spanish. Do not change any other elements of the image.",
  previous_interaction_id: interaction.id,
  response_format: {
    type: "image",
    mime_type: "image/png",
    aspect_ratio: "16:9",
    image_size: "2K"
  },
});

const generatedImage = interaction2.output_image;
if (generatedImage) {
  const buffer = Buffer.from(generatedImage.data, "base64");
  fs.writeFileSync("photosynthesis_spanish.png", buffer);
}
REST
curl -s -X POST \
  "https://generativelanguage.googleapis.com/v1beta/interactions" \
  -H "x-goog-api-key: $GEMINI_API_KEY" \
  -H 'Content-Type: application/json' \
  -d '{
    "model": "gemini-3.1-flash-image",
    "input": "Update this infographic to be in Spanish. Do not change any other elements of the image.",
    "previous_interaction_id": "<PREVIOUS_INTERACTION_ID>",
    "response_format": {
      "type": "image",
      "mime_type": "image/jpeg",
      "aspect_ratio": "16:9",
      "image_size": "2K"
    }
  }'

Gemini 3 के इमेज मॉडल की नई सुविधाएं
Gemini 3 में, इमेज जनरेट करने और उनमें बदलाव करने के लिए बेहतरीन मॉडल उपलब्ध हैं. Gemini 3.1 Flash Image को तेज़ी से काम करने और ज़्यादा से ज़्यादा इस्तेमाल के लिए ऑप्टिमाइज़ किया गया है. वहीं, Gemini 3 Pro Image को प्रोफ़ेशनल ऐसेट बनाने के लिए ऑप्टिमाइज़ किया गया है. इन्हें मुश्किल से मुश्किल वर्कफ़्लो को पूरा करने के लिए डिज़ाइन किया गया है. ये ऐडवांस रीज़निंग की मदद से, मुश्किल और सिलसिलेवार बातचीत वाले टास्क को आसानी से पूरा कर सकते हैं. साथ ही, ये क्रिएटिव कॉन्टेंट बनाने और उसमें बदलाव करने से जुड़े टास्क को भी आसानी से पूरा कर सकते हैं.
- हाई रिज़ॉल्यूशन वाला आउटपुट: 1K, 2K, और 4K विज़ुअल जनरेट करने की सुविधाएं पहले से मौजूद हैं.
- Gemini 3.1 Flash Image में, 512 पिक्सल (0.5K) का छोटा रिज़ॉल्यूशन जोड़ा गया है.
- Gemini 3.1 Flash Lite की इमेज सिर्फ़ 1K रिज़ॉल्यूशन के साथ काम करती है.
- ऐडवांस टेक्स्ट रेंडरिंग: यह इन्फ़ोग्राफ़िक, मेन्यू, डायग्राम, और मार्केटिंग ऐसेट के लिए, पढ़ने में आसान और स्टाइल वाला टेक्स्ट जनरेट कर सकता है.
- Google Search से जानकारी पाना: मॉडल, Google Search का इस्तेमाल एक टूल के तौर पर कर सकता है.इससे उसे तथ्यों की पुष्टि करने और रीयल-टाइम डेटा के आधार पर इमेज जनरेट करने में मदद मिलती है. जैसे, मौजूदा मौसम के मैप, स्टॉक चार्ट, हाल ही के इवेंट.
- Gemini 3.1 Flash Lite Image मॉडल के साथ काम नहीं करता.
- Gemini 3.1 Flash Image में, Web Search के साथ-साथ Google Image Search Grounding को भी इंटिग्रेट किया गया है.
- सोच-विचार वाला मोड: इस मोड में मॉडल, मुश्किल प्रॉम्प्ट के जवाब देने के लिए "सोच-विचार" की प्रोसेस का इस्तेमाल करता है. यह अच्छी क्वालिटी का फ़ाइनल आउटपुट जनरेट करने से पहले, कंपोज़िशन को बेहतर बनाने के लिए "सोच वाली इमेज" (ये इमेज बैकएंड में दिखती हैं, लेकिन इनके लिए शुल्क नहीं लिया जाता) जनरेट करता है.
- ज़्यादा से ज़्यादा 14 रेफ़रंस इमेज: अब फ़ाइनल इमेज बनाने के लिए, ज़्यादा से ज़्यादा 14 रेफ़रंस इमेज को एक साथ इस्तेमाल किया जा सकता है.
- नए आसपेक्ट रेशियो (लंबाई-चौड़ाई का अनुपात): Gemini 3.1 Flash Lite Image में
1:1,3:2,2:3,3:4,4:3,4:5,5:4,9:16,16:9,21:9आसपेक्ट रेशियो जोड़े गए हैं.
ज़्यादा से ज़्यादा 14 रेफ़रंस इमेज इस्तेमाल करें
Gemini 3 के इमेज मॉडल की मदद से, ज़्यादा से ज़्यादा 14 रेफ़रंस इमेज को मिक्स किया जा सकता है. इन 14 इमेज में, यहां दी गई इमेज शामिल हो सकती हैं:
| Gemini 3.1 Flash Lite की इमेज | Gemini 3.1 Flash की इमेज | Gemini 3 Pro की इमेज |
|---|---|---|
| फ़ाइनल इमेज में शामिल करने के लिए, ऑब्जेक्ट की ज़्यादा से ज़्यादा 14 इमेज. ये इमेज, ओरिजनल इमेज से मिलती-जुलती होनी चाहिए | फ़ाइनल इमेज में शामिल करने के लिए, ज़्यादा से ज़्यादा 10 ऑब्जेक्ट की हाई-फ़िडेलिटी वाली इमेज | फ़ाइनल इमेज में शामिल करने के लिए, ज़्यादा से ज़्यादा छह ऑब्जेक्ट की हाई-फ़िडेलिटी वाली इमेज |
| लागू नहीं | कैरेक्टर की कंसिस्टेंसी बनाए रखने के लिए, ज़्यादा से ज़्यादा चार इमेज | किरदारों की ज़्यादा से ज़्यादा पांच इमेज, ताकि जनरेट की गई इमेज में किरदार का लुक एक जैसा रहे |
| लागू नहीं | लागू नहीं | स्टाइल के रेफ़रंस के तौर पर इस्तेमाल करने के लिए, ज़्यादा से ज़्यादा तीन इमेज |
Python
from google import genai
from google.genai import types
from PIL import Image
import base64

prompt = "An office group photo of these people, they are making funny faces."

client = genai.Client()

interaction = client.interactions.create(
    model="gemini-3.1-flash-image",
    input=[
        {
            "type": "text",
            "text": prompt,
        },
        {
            "type": "image",
            "data": base64.b64encode(image_bytes).decode('utf-8'),
            "mime_type": "image/png"
        },
        {
            "type": "image",
            "data": base64.b64encode(image_bytes).decode('utf-8'),
            "mime_type": "image/png"
        },
        {
            "type": "image",
            "data": base64.b64encode(image_bytes).decode('utf-8'),
            "mime_type": "image/png"
        },
        {
            "type": "image",
            "data": base64.b64encode(image_bytes).decode('utf-8'),
            "mime_type": "image/png"
        },
        {
            "type": "image",
            "data": base64.b64encode(image_bytes).decode('utf-8'),
            "mime_type": "image/png"
        },
    ],
    response_format={
        "type": "image",
        "aspect_ratio": "5:4",
        "image_size": "2K"
    },
)

with open("office.png", "wb") as f:

    f.write(base64.b64decode(interaction.output_image.data))
JavaScript
import { GoogleGenAI } from "@google/genai";
import * as fs from "node:fs";

async function main() {
  const ai = new GoogleGenAI({});

  const input = [
    {
      type: "text",
      text: "An office group photo of these people, they are making funny faces.",
    },
    { type: "image", mime_type: "image/jpeg", data: base64ImageFile1 },
    { type: "image", mime_type: "image/jpeg", data: base64ImageFile2 },
    { type: "image", mime_type: "image/jpeg", data: base64ImageFile3 },
    { type: "image", mime_type: "image/jpeg", data: base64ImageFile4 },
    { type: "image", mime_type: "image/jpeg", data: base64ImageFile5 },
  ];

  const interaction = await ai.interactions.create({
    model: "gemini-3.1-flash-image",
    input: input,
    response_format: {
      type: "image",
      aspect_ratio: "5:4",
      image_size: "2K",
    },
  });

  const buffer = Buffer.from(interaction.output_image.data, 'base64');

  fs.writeFileSync('office.png', buffer);
}

main();
REST
curl -s -X POST \
  "https://generativelanguage.googleapis.com/v1beta/interactions" \
    -H "x-goog-api-key: $GEMINI_API_KEY" \
    -H 'Content-Type: application/json' \
    -d "{
      \"model\": \"gemini-3.1-flash-image\",
      \"input\": [
        {\"type\": \"text\", \"text\": \"An office group photo of these people, they are making funny faces.\"},
        {\"type\": \"image\", \"mime_type\": \"image/png\", \"data\": \"<BASE64_DATA_IMG_1>\"},
        {\"type\": \"image\", \"mime_type\": \"image/png\", \"data\": \"<BASE64_DATA_IMG_2>\"},
        {\"type\": \"image\", \"mime_type\": \"image/png\", \"data\": \"<BASE64_DATA_IMG_3>\"},
        {\"type\": \"image\", \"mime_type\": \"image/png\", \"data\": \"<BASE64_DATA_IMG_4>\"},
        {\"type\": \"image\", \"mime_type\": \"image/png\", \"data\": \"<BASE64_DATA_IMG_5>\"}
      ],
      \"response_format\": {
        \"type\": \"image\",
        \"aspect_ratio\": \"5:4\",
        \"image_size\": \"2K\"
      }
    }"

Google Search से सटीक जानकारी पाने की सुविधा
Google Search टूल का इस्तेमाल करके, रीयल-टाइम जानकारी के आधार पर इमेज जनरेट करें. जैसे, मौसम के पूर्वानुमान, स्टॉक चार्ट या हाल ही में हुई घटनाएँ.
ध्यान दें कि इमेज जनरेट करने के लिए, Google Search से मिली जानकारी का इस्तेमाल करने पर, इमेज पर आधारित खोज के नतीजों को जनरेशन मॉडल में नहीं भेजा जाता. साथ ही, उन्हें जवाब में शामिल नहीं किया जाता. इसके बारे में जानने के लिए, Google Image Search से मिली जानकारी का इस्तेमाल करना लेख पढ़ें
Python
from google import genai
from google.genai import types
import base64
prompt = "Visualize the current weather forecast for the next 5 days in San Francisco as a clean, modern weather chart. Add a visual on what I should wear each day"

client = genai.Client()

interaction = client.interactions.create(
    model="gemini-3.1-flash-image",
    input=prompt,
    tools=[{"type": "google_search"}],
    response_format={
        "type": "image",
        "mime_type": "image/jpeg",
        "aspect_ratio": "16:9"
    },
)

with open("weather.png", "wb") as f:

    f.write(base64.b64decode(interaction.output_image.data))
JavaScript
import { GoogleGenAI } from "@google/genai";
import * as fs from "node:fs";

async function main() {
  const ai = new GoogleGenAI({});

  const interaction = await ai.interactions.create({
    model: "gemini-3.1-flash-image",
    input: "Visualize the current weather forecast for the next 5 days in San Francisco as a clean, modern weather chart. Add a visual on what I should wear each day",
    tools: [{"type": "google_search"}],
    response_format: {
      type: "image",
      mime_type: "image/png",
      aspect_ratio: "16:9",
      image_size: "2K"
    },
  });

  const buffer = Buffer.from(interaction.output_image.data, 'base64');

  fs.writeFileSync('weather.png', buffer);
}

main();
REST
curl -s -X POST \
  "https://generativelanguage.googleapis.com/v1beta/interactions" \
  -H "x-goog-api-key: $GEMINI_API_KEY" \
  -H "Content-Type: application/json" \
  -d '{
    "model": "gemini-3.1-flash-image",
    "input": [
      {"type": "text", "text": "Visualize the current weather forecast for the next 5 days in San Francisco as a clean, modern weather chart. Add a visual on what I should wear each day"}
    ],
    "tools": [{"type": "google_search"}],
    "response_format": {
      "type": "image",
      "mime_type": "image/jpeg",
      "aspect_ratio": "16:9"
    }
  }'

जवाब में google_search_call और google_search_result चरण शामिल हैं. साथ ही, टेक्स्ट वाले चरण पर इनलाइन url_citation एनोटेशन भी शामिल हैं:
google_search_result: इसमेंsearch_suggestionsहोता है. यह आपके यूज़र इंटरफ़ेस (यूआई) में खोज के सुझावों को रेंडर करने के लिए, एचटीएमएल स्निपेट होता है.url_citationएनोटेशन: टेक्स्ट स्टेप पर इनलाइन उद्धरण, जवाब के कुछ हिस्सों को उनके वेब सोर्स से लिंक करते हैं.
इमेज के लिए, Google Search से सटीक जानकारी पाने की सुविधा (3.1 Flash)
Google Image Search के साथ ग्राउंडिंग की सुविधा की मदद से मॉडल, Google Image Search से हासिल की गई वेब इमेज का इस्तेमाल, इमेज जनरेट करने के लिए विज़ुअल कॉन्टेक्स्ट के तौर पर कर सकते हैं. इमेज सर्च, Google Search की मदद से जानकारी पाने वाले मौजूदा टूल में खोज का एक नया टाइप है. यह स्टैंडर्ड वेब सर्च के साथ काम करता है.
इमेज सर्च की सुविधा चालू करने के लिए, अपने एपीआई अनुरोध में google_search टूल को कॉन्फ़िगर करें. साथ ही, search_types ऐरे में image_search को शामिल करें. इमेज सर्च का इस्तेमाल, वेब सर्च के साथ या अलग से किया जा सकता है.
Python
from google import genai

client = genai.Client()

interaction = client.interactions.create(
    model="gemini-3.1-flash-image",
    input="A detailed painting of a Timareta butterfly resting on a flower",
    tools=[{
      "type": "google_search",
      "search_types": ["web_search", "image_search"]
    }]
)
JavaScript
import { GoogleGenAI } from "@google/genai";

async function main() {
  const ai = new GoogleGenAI({});

  const interaction = await ai.interactions.create({
    model: "gemini-3.1-flash-image",
    input: "A detailed painting of a Timareta butterfly resting on a flower",
    tools: [{
      "type": "google_search",
      "search_types": ["web_search", "image_search"]
    }]
  });
}

main();
REST
curl -s -X POST \
  "https://generativelanguage.googleapis.com/v1beta/interactions" \
  -H "x-goog-api-key: $GEMINI_API_KEY" \
  -H "Content-Type: application/json" \
  -d '{
    "model": "gemini-3.1-flash-image",
    "input": "A detailed painting of a Timareta butterfly resting on a flower",
    "tools": [{"type": "google_search", "search_types": ["web_search", "image_search"]}]
  }'
विज्ञापन दिखाने के लिए ज़रूरी शर्तें
Google Search की मदद से जानकारी पाने की सुविधा के साथ इमेज सर्च का इस्तेमाल करते समय, आपको google_search_result चरण से search_suggestions दिखाना होगा. इस सुविधा को इस्तेमाल करने की सभी ज़रूरी शर्तों के बारे में ज़्यादा जानकारी, सेवा की शर्तों में दी गई है.
जवाब
इमेज सर्च का इस्तेमाल करके, भरोसेमंद स्रोतों से मिली जानकारी के आधार पर जवाब पाने के लिए, एपीआई जवाब के चरणों के तौर पर इनलाइन उद्धरण और एट्रिब्यूशन मेटाडेटा दिखाता है:
url_citationएनोटेशन: टेक्स्ट कॉन्टेंट ब्लॉक में इनलाइन उद्धरणmodel_outputमें मौजूद होते हैं. ये जनरेट किए गए कॉन्टेंट को उसके सोर्स से लिंक करते हैं.google_search_result: इसमेंsearch_suggestionsशामिल है. यह एचटीएमएल स्निपेट है. इसका इस्तेमाल, यूज़र इंटरफ़ेस (यूआई) में खोज के सुझाव दिखाने के लिए किया जाता है.
वीडियो से इमेज जनरेट करने की सुविधा (3.1 Flash)
वीडियो से इमेज जनरेट करने की सुविधा की मदद से, वीडियो के कॉन्टेक्स्ट का इस्तेमाल करके नई इमेज जनरेट की जा सकती हैं. इसके लिए, मल्टीमॉडल रेफ़रंस का इस्तेमाल किया जाता है. यह अच्छी क्वालिटी के वीडियो थंबनेल, सिनेमैटिक पोस्टर, खास जानकारी देने वाले इन्फ़ोग्राफ़िक या वीडियो सीन से प्रेरित नई कलाकृति बनाने के लिए उपयोगी है.
इमेज जनरेट करते समय मॉडल, वीडियो फ़्रेम का विश्लेषण करता है. इससे उसे विज़ुअल थीम और मुख्य इवेंट के बारे में पता चलता है. इसके बाद, वह इन थीम और इवेंट का इस्तेमाल आपके टेक्स्ट प्रॉम्प्ट के साथ करता है, ताकि आउटपुट इमेज जनरेट की जा सके.
एपीआई अनुरोध में सीधे तौर पर सार्वजनिक YouTube यूआरएल पास किए जा सकते हैं. इसके अलावा, Files API का इस्तेमाल करके, स्थानीय वीडियो फ़ाइलें अपलोड की जा सकती हैं.
Python
from google import genai
from google.genai import types
import base64

client = genai.Client()

interaction = client.interactions.create(
    model="gemini-3.1-flash-image",
    input=[
        {
            "type": "video",
            "uri": "https://www.youtube.com/watch?v=UTdfxFyOQTI",
            "mime_type": "video/mp4"
        },
        {"type": "text", "text": "Generate a poster image that captures the key themes of this video."}
    ],
    response_format={"type": "image", "aspect_ratio": "16:9"}
)

# Save the generated image part
for step in interaction.steps:
    if step.type == "model_output":
        for content_block in step.content:
            if content_block.type == "text":
                print(content_block.text)
            elif content_block.type == "image":
                with open("video_poster.png", "wb") as f:
                    f.write(base64.b64decode(content_block.data))
                print("Image saved as video_poster.png")
JavaScript
import { GoogleGenAI } from "@google/genai";
import * as fs from "node:fs";

async function main() {
  const ai = new GoogleGenAI({});

  const interaction = await ai.interactions.create({
    model: "gemini-3.1-flash-image",
    input: [
      {
        type: "video",
        uri: "https://www.youtube.com/watch?v=UTdfxFyOQTI",
        mime_type: "video/mp4"
      },
      { type: "text", text: "Generate a poster image that captures the key themes of this video." }
    ],
    response_format: {
      type: "image",
      aspect_ratio: "16:9"
    }
  });

  for (const step of interaction.steps) {
    if (step.type === "model_output") {
      for (const contentBlock of step.content) {
        if (contentBlock.type === "text") {
          console.log(contentBlock.text);
        } else if (contentBlock.type === "image") {
          const buffer = Buffer.from(contentBlock.data, "base64");
          fs.writeFileSync("video_poster.png", buffer);
          console.log("Image saved as video_poster.png");
        }
      }
    }
  }
}

main();
REST
curl -s -X POST \
  "https://generativelanguage.googleapis.com/v1beta/interactions" \
  -H "x-goog-api-key: $GEMINI_API_KEY" \
  -H 'Content-Type: application/json' \
  -d '{
    "model": "gemini-3.1-flash-image",
    "input": [
      {
        "type": "video",
        "uri": "https://www.youtube.com/watch?v=UTdfxFyOQTI",
        "mime_type": "video/mp4"
      },
      {
        "type": "text",
        "text": "Generate a poster image that captures the key themes of this video."
      }
    ],
    "response_format": {
      "type": "image",
      "aspect_ratio": "16:9"
    }
  }'
4K रिज़ॉल्यूशन तक की इमेज जनरेट करना
Gemini 3 के इमेज मॉडल, डिफ़ॉल्ट रूप से 1K इमेज जनरेट करते हैं. हालांकि, ये 2K, 4K, और 512 पिक्सल (05.K) (सिर्फ़ Gemini 3.1 Flash Image) इमेज भी जनरेट कर सकते हैं. ज़्यादा रिज़ॉल्यूशन वाली ऐसेट जनरेट करने के लिए, response_format में image_size की वैल्यू डालें.
आपको कैपिटल लेटर में 'K' का इस्तेमाल करना होगा. उदाहरण के लिए, 512 पिक्सल (05.K), 1K, 2K, 4K. छोटे अक्षरों वाले पैरामीटर (जैसे, 1k) स्वीकार नहीं किए जाएंगे.
Python
from google import genai
from google.genai import types
import base64

prompt = "Da Vinci style anatomical sketch of a dissected Monarch butterfly. Detailed drawings of the head, wings, and legs on textured parchment with notes in English."

client = genai.Client()

interaction = client.interactions.create(
    model="gemini-3.1-flash-image",
    input=prompt,
    response_format={
        "type": "image",
        "mime_type": "image/jpeg",
        "aspect_ratio": "1:1",
        "image_size": "1K"
    },
)

print(interaction.output_text)

with open("butterfly.png", "wb") as f:

    f.write(base64.b64decode(interaction.output_image.data))
JavaScript
import { GoogleGenAI } from "@google/genai";
import * as fs from "node:fs";

async function main() {
  const ai = new GoogleGenAI({});

  const interaction = await ai.interactions.create({
    model: "gemini-3.1-flash-image",
    input: "Da Vinci style anatomical sketch of a dissected Monarch butterfly. Detailed drawings of the head, wings, and legs on textured parchment with notes in English.",
    response_format: {
      type: "image",
      mime_type: "image/png",
      aspect_ratio: "1:1",
      image_size: "1K",
    },
  });

  console.log(interaction.output_text);

  const buffer = Buffer.from(interaction.output_image.data, 'base64');

  fs.writeFileSync('butterfly.png', buffer);
}

main();
REST
curl -s -X POST \
  "https://generativelanguage.googleapis.com/v1beta/interactions" \
  -H "x-goog-api-key: $GEMINI_API_KEY" \
  -H "Content-Type: application/json" \
  -d '{
    "model": "gemini-3.1-flash-image",
    "input": "Da Vinci style anatomical sketch of a dissected Monarch butterfly. Detailed drawings of the head, wings, and legs on textured parchment with notes in English.",
    "response_format": {
      "type": "image",
      "mime_type": "image/jpeg",
      "aspect_ratio": "1:1",
      "image_size": "1K"
    }
  }'
इस प्रॉम्प्ट से जनरेट की गई इमेज का उदाहरण यहां दिया गया है:

सोचने की प्रोसेस
Gemini 3 के इमेज मॉडल, थिंकिंग मॉडल होते हैं. ये मुश्किल प्रॉम्प्ट के लिए, रीज़निंग प्रोसेस ("सोचना") का इस्तेमाल करते हैं. यह सुविधा डिफ़ॉल्ट रूप से चालू रहती है और इसे एपीआई में बंद नहीं किया जा सकता. सोचने की प्रोसेस के बारे में ज़्यादा जानने के लिए, Gemini के सोचने की प्रोसेस गाइड देखें.
यह मॉडल, कंपोज़िशन और लॉजिक की जांच करने के लिए, ज़्यादा से ज़्यादा दो इंटरिम इमेज जनरेट करता है. 'सोच रहा है' सेक्शन में मौजूद आखिरी इमेज, रेंडर की गई फ़ाइनल इमेज भी होती है.
आपके पास यह देखने का विकल्प होता है कि किन विचारों के आधार पर फ़ाइनल इमेज जनरेट की गई है.
Python
for step in interaction.steps:
    if step.type == "thought":
        for content_block in step.summary:
            if content_block.type == "text":
                print(content_block.text)
            elif content_block.type == "image":
                image = Image.open(io.BytesIO(base64.b64decode(content_block.data)))
                image.show()
JavaScript
for (const step of interaction.steps) {
  if (step.type === "thought") {
    for (const contentBlock of step.summary) {
      if (contentBlock.type === "text") {
        console.log(contentBlock.text);
      } else if (contentBlock.type === "image") {
        const buffer = Buffer.from(contentBlock.data, 'base64');
        fs.writeFileSync('thought_image.png', buffer);
      }
    }
  }
}
टेक्स्ट और इमेज के बेहतरीन सीक्वेंस वाला आउटपुट
इमेज जनरेट करने वाले स्टैंडर्ड मॉडल सिर्फ़ इमेज जनरेट करते हैं. हालांकि, Gemini 3 के कुछ ऐडवांस मॉडल (जैसे, gemini-3-pro-image) इंटरलीव्ड कॉन्टेंट जनरेट कर सकते हैं. जैसे, ऐसी कहानियाँ या निर्देश वाली गाइड जिनमें एक ही जवाब में टेक्स्ट ब्लॉक और इलस्ट्रेशन, दोनों शामिल हों.
आउटपुट जटिल और इंटरलीव्ड होने की वजह से, .output_image या .output_text जैसी सुविधा वाली प्रॉपर्टी पूरे क्रम को कैप्चर नहीं करेंगी. इंटरलीव किए गए कॉन्टेंट को ऐक्सेस करने और सेव करने के लिए, आपको steps पर मैन्युअल तरीके से दोहराना होगा:
Python
interaction = client.interactions.create(
    model="gemini-3-pro-image",
    input="Write the story of the lifecycle of a monarch butterfly, interleave illustrations",
)

image_counter = 1
for step in interaction.steps:
    if step.type == "model_output":
        for content_block in step.content:
            if content_block.type == "text":
                print(content_block.text)
            elif content_block.type == "image":
                filename = f"butterfly_lifecycle_{image_counter}.png"
                with open(filename, "wb") as f:
                    f.write(base64.b64decode(content_block.data))
                print(f"\n[Saved illustration: {filename}]\n")
                image_counter += 1
JavaScript
const interaction = await ai.interactions.create({
    model: "gemini-3-pro-image",
    input: "Write the story of the lifecycle of a monarch butterfly, interleave illustrations",
});

let imageCounter = 1;
for (const step of interaction.steps) {
  if (step.type === "model_output") {
    for (const contentBlock of step.content) {
      if (contentBlock.type === "text") {
        console.log(contentBlock.text);
      } else if (contentBlock.type === "image") {
        const buffer = Buffer.from(contentBlock.data, "base64");
        const filename = `butterfly_lifecycle_${imageCounter}.png`;
        fs.writeFileSync(filename, buffer);
        console.log(`\n[Saved illustration: ${filename}]\n`);
        imageCounter++;
      }
    }
  }
}
सूझ-बूझ वाले मॉडल के लेवल को कंट्रोल करना
Gemini 3.1 Flash Image की मदद से, यह कंट्रोल किया जा सकता है कि मॉडल, क्वालिटी और लेटेन्सी को बैलेंस करने के लिए कितना समय लेता है. डिफ़ॉल्ट thinking_level minimal है. साथ ही, minimal और high लेवल इस्तेमाल किए जा सकते हैं.
Python
from google import genai
from PIL import Image
import base64
import io

client = genai.Client()

interaction = client.interactions.create(
    model="gemini-3.1-flash-image",
    input="A futuristic city built inside a giant glass bottle floating in space",
    generation_config={"thinking_level": "high"},
)

print(interaction.output_text)

image = Image.open(io.BytesIO(base64.b64decode(interaction.output_image.data)))

image.show()
JavaScript
import { GoogleGenAI } from "@google/genai";
import * as fs from "node:fs";

async function main() {
  const ai = new GoogleGenAI({});

  const interaction = await ai.interactions.create({
    model: "gemini-3.1-flash-image",
    input: "A futuristic city built inside a giant glass bottle floating in space",
    generation_config: { thinking_level: "high" },
  });

  console.log(interaction.output_text);

  const buffer = Buffer.from(interaction.output_image.data, 'base64');

  fs.writeFileSync('image.png', buffer);
}
main();
REST
curl -s -X POST \
  "https://generativelanguage.googleapis.com/v1beta/interactions" \
  -H "x-goog-api-key: $GEMINI_API_KEY" \
  -H "Content-Type: application/json" \
  -d '{
    "model": "gemini-3.1-flash-image",
    "input": "A futuristic city built inside a giant glass bottle floating in space",
    "generation_config": {
      "thinking_level": "high"
    }
  }'
ध्यान दें कि थिंकिंग मॉडल के लिए, थिंकिंग टोकन का बिल डिफ़ॉल्ट रूप से भेजा जाता है. ऐसा इसलिए, क्योंकि थिंकिंग प्रोसेस हमेशा डिफ़ॉल्ट रूप से होती है. भले ही, आपने प्रोसेस देखी हो या नहीं.
इमेज जनरेट करने के अन्य मोड
इमेज जनरेट करने के लिए, Nano Banana मॉडल का इस्तेमाल करने का सुझाव दिया जाता है. हालांकि, इमेज जनरेट करने के लिए खास तौर पर बनाए गए मॉडल भी इस्तेमाल किए जा सकते हैं:
- Imagen: Google के टेक्स्ट से इमेज जनरेट करने वाले मॉडल, अच्छी क्वालिटी की इमेज जनरेट करने के लिए ऑप्टिमाइज़ किए गए हैं.
- Veo: Google का वीडियो जनरेट करने वाला मॉडल.
एक साथ कई इमेज जनरेट करना
इस पेज पर बताई गई इमेज जनरेट करने की सभी सुविधाओं को, Batch API का इस्तेमाल करके बैच जॉब के तौर पर भी चलाया जा सकता है. अगर आपको कई इमेज जनरेट करनी हैं, तो यह सबसे सही विकल्प है. आपको 24 घंटे के अंदर जवाब मिल जाएगा. इसके बदले, आपको ज़्यादा दर सीमाएं मिलेंगी.
प्रॉम्प्ट से जुड़ी गाइड और रणनीतियां
इस सेक्शन में, इमेज जनरेट करने और उनमें बदलाव करने से जुड़े सामान्य वर्कफ़्लो के लिए, प्रॉम्प्ट के उदाहरण और टेंप्लेट दिए गए हैं. हर उदाहरण में, दोबारा इस्तेमाल किया जा सकने वाला टेंप्लेट और Interactions API के लिए एक सैंपल प्रॉम्प्ट शामिल होता है.
इमेज जनरेट करने के लिए प्रॉम्प्ट
यहां दिए गए उदाहरणों में बताया गया है कि अलग-अलग तरह की इमेज जनरेट करने के लिए, टेक्स्ट प्रॉम्प्ट का इस्तेमाल कैसे किया जाता है.
1. असल में खींची गई फ़ोटो जैसे दिखने वाले सीन
किसी सीन के बारे में पूरी जानकारी देना. प्रॉम्प्ट में जितनी ज़्यादा जानकारी दी जाएगी, नतीजों पर आपका उतना ही ज़्यादा कंट्रोल होगा.
टेंप्लेट
A photorealistic [type of shot] of a [subject description] in a [setting
description]. [Description of the light]. Shot from a [camera angle]
with a [lens type].
प्रॉम्प्ट
A photorealistic wide-angle shot of a vibrant coral reef teeming with tropical fish. Crystal-clear turquoise water with sunbeams filtering down from the surface, illuminating a sea turtle gliding gracefully over the coral. Shot from a low perspective with a wide-angle lens. Aspect ratio 16:9.
Python
from google import genai
from google.genai import types
import base64

client = genai.Client()

interaction = client.interactions.create(
    model="gemini-3.1-flash-image",
    input="A photorealistic wide-angle shot of a vibrant coral reef teeming with tropical fish. Crystal-clear turquoise water with sunbeams filtering down from the surface, illuminating a sea turtle gliding gracefully over the coral. Shot from a low perspective with a wide-angle lens. Aspect ratio 16:9.",
    response_format=[
        {
            "type": "image",
            "mime_type": "image/jpeg",
            "aspect_ratio": "16:9",
        }
    ],
)

print(interaction.output_text)

with open("coral_reef.png", "wb") as f:

    f.write(base64.b64decode(interaction.output_image.data))
JavaScript
import { GoogleGenAI } from "@google/genai";
import * as fs from "node:fs";

async function main() {
  const ai = new GoogleGenAI({});

  const interaction = await ai.interactions.create({
    model: "gemini-3.1-flash-image",
    input: "A photorealistic wide-angle shot of a vibrant coral reef teeming with tropical fish. Crystal-clear turquoise water with sunbeams filtering down from the surface, illuminating a sea turtle gliding gracefully over the coral. Shot from a low perspective with a wide-angle lens. Aspect ratio 16:9.",
    response_format: [
      {
        type: "image",
        mime_type: "image/jpeg",
        aspect_ratio: "16:9",
      }
    ],
  });
  console.log(interaction.output_text);

  const buffer = Buffer.from(interaction.output_image.data, 'base64');

  fs.writeFileSync('coral_reef.png', buffer);
}

main();
REST
curl -s -X POST \
  "https://generativelanguage.googleapis.com/v1beta/interactions" \
  -H "x-goog-api-key: $GEMINI_API_KEY" \
  -H "Content-Type: application/json" \
  -d '{
    "model": "gemini-3.1-flash-image",
    "input": "A photorealistic wide-angle shot of a vibrant coral reef teeming with tropical fish. Crystal-clear turquoise water with sunbeams filtering down from the surface, illuminating a sea turtle gliding gracefully over the coral. Shot from a low perspective with a wide-angle lens. Aspect ratio 16:9.",
    "response_format": {
      "type": "image",
      "mime_type": "image/png",
      "aspect_ratio": "16:9"
    }
  }'
2. स्टाइलिश इलस्ट्रेशन और स्टिकर
आर्टिस्टिक स्टाइल, विषय, और मीडियम के बारे में बताएं. एक जैसे नतीजे पाने के लिए, विज़ुअल की बारीकियों (बोल्ड लाइन, रंग वगैरह) के बारे में साफ़ तौर पर बताएं.
टेंप्लेट
A [style] of a [subject, with details about accessories or actions]
doing [activity]. The design features [visual qualities, e.g., bold outlines,
cel-shading, etc.] and [color/background preference].
प्रॉम्प्ट
A kawaii-style sticker of a happy red panda wearing a tiny bamboo hat. It's munching on a green bamboo leaf. The design features bold, clean outlines, simple cel-shading, and a vibrant color palette. The background must be white.
Python
from google import genai
import base64

client = genai.Client()

interaction = client.interactions.create(
    model="gemini-3.1-flash-image",
    input="A kawaii-style sticker of a happy red panda wearing a tiny bamboo hat. It's munching on a green bamboo leaf. The design features bold, clean outlines, simple cel-shading, and a vibrant color palette. The background must be white.",
)

for step in interaction.steps:
    if step.type == "model_output":
        for content_block in step.content:
            if content_block.type == "text":
                print(content_block.text)
            elif content_block.type == "image":
                with open("red_panda_sticker.png", "wb") as f:
                    f.write(base64.b64decode(content_block.data))
JavaScript
import { GoogleGenAI } from "@google/genai";
import * as fs from "node:fs";

async function main() {
  const ai = new GoogleGenAI({});

  const interaction = await ai.interactions.create({
    model: "gemini-3.1-flash-image",
    input: "A kawaii-style sticker of a happy red panda wearing a tiny bamboo hat. It's munching on a green bamboo leaf. The design features bold, clean outlines, simple cel-shading, and a vibrant color palette. The background must be white.",
  });
  for (const step of interaction.steps) {
    if (step.type === "model_output") {
      for (const contentBlock of step.content) {
        if (contentBlock.type === "text") {
          console.log(contentBlock.text);
        } else if (contentBlock.type === "image") {
          const buffer = Buffer.from(contentBlock.data, "base64");
          fs.writeFileSync("red_panda_sticker.png", buffer);
        }
      }
    }
  }
}

main();
REST
curl -s -X POST \
  "https://generativelanguage.googleapis.com/v1beta/interactions" \
  -H "x-goog-api-key: $GEMINI_API_KEY" \
  -H "Content-Type: application/json" \
  -d '{
    "model": "gemini-3.1-flash-image",
    "input": "A kawaii-style sticker of a happy red panda wearing a tiny bamboo hat. It is munching on a green bamboo leaf. The design features bold, clean outlines, simple cel-shading, and a vibrant color palette. The background must be white."
  }'

3. इमेज में मौजूद टेक्स्ट सटीक होना चाहिए
Gemini, टेक्स्ट को रेंडर करने में माहिर है. टेक्स्ट, फ़ॉन्ट स्टाइल (ब्यौरे के साथ), और पूरे डिज़ाइन के बारे में साफ़ तौर पर बताएं. प्रोफ़ेशनल ऐसेट बनाने के लिए, Gemini 3 Pro Image का इस्तेमाल करें.
टेंप्लेट
Create a [image type] for [brand/concept] with the text "[text to render]"
in a [font style]. The design should be [style description], with a
[color scheme].
प्रॉम्प्ट
Create a modern, minimalist logo for a coffee shop called 'The Daily Grind'. The text should be in a clean, bold, sans-serif font. The color scheme is black and white. Put the logo in a circle. Use a coffee bean in a clever way.
Python
from google import genai
import base64

client = genai.Client()

interaction = client.interactions.create(
    model="gemini-3.1-flash-image",
    input="Create a modern, minimalist logo for a coffee shop called 'The Daily Grind'. The text should be in a clean, bold, sans-serif font. The color scheme is black and white. Put the logo in a circle. Use a coffee bean in a clever way.",
    response_format={"type": "image", "aspect_ratio": "1:1"},
)

for step in interaction.steps:
    if step.type == "model_output":
        for content_block in step.content:
            if content_block.type == "text":
                print(content_block.text)
            elif content_block.type == "image":
                with open("logo_example.jpg", "wb") as f:
                    f.write(base64.b64decode(content_block.data))
JavaScript
import { GoogleGenAI } from "@google/genai";
import * as fs from "node:fs";

async function main() {
  const ai = new GoogleGenAI({});

  const interaction = await ai.interactions.create({
    model: "gemini-3.1-flash-image",
    input: "Create a modern, minimalist logo for a coffee shop called 'The Daily Grind'. The text should be in a clean, bold, sans-serif font. The color scheme is black and white. Put the logo in a circle. Use a coffee bean in a clever way.",
    response_format: { type: "image", aspect_ratio: "1:1" },
  });
  for (const step of interaction.steps) {
    if (step.type === "model_output") {
      for (const contentBlock of step.content) {
        if (contentBlock.type === "text") {
          console.log(contentBlock.text);
        } else if (contentBlock.type === "image") {
          const buffer = Buffer.from(contentBlock.data, "base64");
          fs.writeFileSync("logo_example.jpg", buffer);
        }
      }
    }
  }
}

main();
REST
curl -s -X POST \
  "https://generativelanguage.googleapis.com/v1beta/interactions" \
  -H "x-goog-api-key: $GEMINI_API_KEY" \
  -H "Content-Type: application/json" \
  -d '{
    "model": "gemini-3.1-flash-image",
    "input": "Create a modern, minimalist logo for a coffee shop called The Daily Grind. The text should be in a clean, bold, sans-serif font. The color scheme is black and white. Put the logo in a circle. Use a coffee bean in a clever way.",
    "response_format": {
      "type": "image",
      "aspect_ratio": "1:1"
    }
  }'
4. प्रॉडक्ट मॉकअप और कमर्शियल फ़ोटोग्राफ़ी
यह ई-कॉमर्स, विज्ञापन या ब्रैंडिंग के लिए, साफ़-सुथरे और पेशेवर प्रॉडक्ट शॉट बनाने के लिए बेहतरीन है.
टेंप्लेट
A high-resolution, studio-lit product photograph of a [product description]
on a [background surface/description]. The lighting is a [lighting setup,
e.g., three-point softbox setup] to [lighting purpose]. The camera angle is
a [angle type] to showcase [specific feature]. Ultra-realistic, with sharp
focus on [key detail]. [Aspect ratio].
प्रॉम्प्ट
A high-resolution, studio-lit product photograph of a minimalist ceramic
coffee mug in matte black, presented on a polished concrete surface. The
lighting is a three-point softbox setup designed to create soft, diffused
highlights and eliminate harsh shadows. The camera angle is a slightly
elevated 45-degree shot to showcase its clean lines. Ultra-realistic, with
sharp focus on the steam rising from the coffee. Square image.
Python
from google import genai
import base64

client = genai.Client()

interaction = client.interactions.create(
    model="gemini-3.1-flash-image",
    input="A high-resolution, studio-lit product photograph of a minimalist ceramic coffee mug in matte black, presented on a polished concrete surface. The lighting is a three-point softbox setup designed to create soft, diffused highlights and eliminate harsh shadows. The camera angle is a slightly elevated 45-degree shot to showcase its clean lines. Ultra-realistic, with sharp focus on the steam rising from the coffee. Square image.",
)

for step in interaction.steps:
    if step.type == "model_output":
        for content_block in step.content:
            if content_block.type == "text":
                print(content_block.text)
            elif content_block.type == "image":
                with open("product_mockup.png", "wb") as f:
                    f.write(base64.b64decode(content_block.data))
JavaScript
import { GoogleGenAI } from "@google/genai";
import * as fs from "node:fs";

async function main() {
  const ai = new GoogleGenAI({});

  const interaction = await ai.interactions.create({
    model: "gemini-3.1-flash-image",
    input: "A high-resolution, studio-lit product photograph of a minimalist ceramic coffee mug in matte black, presented on a polished concrete surface. The lighting is a three-point softbox setup designed to create soft, diffused highlights and eliminate harsh shadows. The camera angle is a slightly elevated 45-degree shot to showcase its clean lines. Ultra-realistic, with sharp focus on the steam rising from the coffee. Square image.",
  });
  for (const step of interaction.steps) {
    if (step.type === "model_output") {
      for (const contentBlock of step.content) {
        if (contentBlock.type === "text") {
          console.log(contentBlock.text);
        } else if (contentBlock.type === "image") {
          const buffer = Buffer.from(contentBlock.data, "base64");
          fs.writeFileSync("product_mockup.png", buffer);
        }
      }
    }
  }
}

main();
REST
curl -s -X POST \
  "https://generativelanguage.googleapis.com/v1beta/interactions" \
  -H "x-goog-api-key: $GEMINI_API_KEY" \
  -H "Content-Type: application/json" \
  -d '{
    "model": "gemini-3.1-flash-image",
    "input": "A high-resolution, studio-lit product photograph of a minimalist ceramic coffee mug in matte black, presented on a polished concrete surface. The lighting is a three-point softbox setup designed to create soft, diffused highlights and eliminate harsh shadows. The camera angle is a slightly elevated 45-degree shot to showcase its clean lines. Ultra-realistic, with sharp focus on the steam rising from the coffee. Square image."
  }'

5. सिंपल और नेगेटिव स्पेस वाला डिज़ाइन
यह वेबसाइटों, प्रज़ेंटेशन या मार्केटिंग के ऐसे मटीरियल के लिए बैकग्राउंड बनाने के लिए बेहतरीन है जहां टेक्स्ट को ओवरले किया जाएगा.
टेंप्लेट
A minimalist composition featuring a single [subject] positioned in the
[bottom-right/top-left/etc.] of the frame. The background is a vast, empty
[color] canvas, creating significant negative space. Soft, subtle lighting.
[Aspect ratio].
प्रॉम्प्ट
A minimalist composition featuring a single, delicate red maple leaf
positioned in the bottom-right of the frame. The background is a vast, empty
off-white canvas, creating significant negative space for text. Soft,
diffused lighting from the top left. Square image.
Python
from google import genai
import base64

client = genai.Client()

interaction = client.interactions.create(
    model="gemini-3.1-flash-image",
    input="A minimalist composition featuring a single, delicate red maple leaf positioned in the bottom-right of the frame. The background is a vast, empty off-white canvas, creating significant negative space for text. Soft, diffused lighting from the top left. Square image.",
)

for step in interaction.steps:
    if step.type == "model_output":
        for content_block in step.content:
            if content_block.type == "text":
                print(content_block.text)
            elif content_block.type == "image":
                with open("minimalist_design.png", "wb") as f:
                    f.write(base64.b64decode(content_block.data))
JavaScript
import { GoogleGenAI } from "@google/genai";
import * as fs from "node:fs";

async function main() {
  const ai = new GoogleGenAI({});

  const interaction = await ai.interactions.create({
    model: "gemini-3.1-flash-image",
    input: "A minimalist composition featuring a single, delicate red maple leaf positioned in the bottom-right of the frame. The background is a vast, empty off-white canvas, creating significant negative space for text. Soft, diffused lighting from the top left. Square image.",
  });
  for (const step of interaction.steps) {
    if (step.type === "model_output") {
      for (const contentBlock of step.content) {
        if (contentBlock.type === "text") {
          console.log(contentBlock.text);
        } else if (contentBlock.type === "image") {
          const buffer = Buffer.from(contentBlock.data, "base64");
          fs.writeFileSync("minimalist_design.png", buffer);
        }
      }
    }
  }
}

main();
REST
curl -s -X POST \
  "https://generativelanguage.googleapis.com/v1beta/interactions" \
  -H "x-goog-api-key: $GEMINI_API_KEY" \
  -H "Content-Type: application/json" \
  -d '{
    "model": "gemini-3.1-flash-image",
    "input": "A minimalist composition featuring a single, delicate red maple leaf positioned in the bottom-right of the frame. The background is a vast, empty off-white canvas, creating significant negative space for text. Soft, diffused lighting from the top left. Square image."
  }'

6. सीक्वेंशियल आर्ट (कॉमिक पैनल / स्टोरीबोर्ड)
यह किरदार की कंसिस्टेंसी और सीन के ब्यौरे के आधार पर, विज़ुअल स्टोरीटेलिंग के लिए पैनल बनाता है. टेक्स्ट और कहानी कहने की क्षमता के साथ सटीक जवाब पाने के लिए, ये प्रॉम्प्ट Gemini 3 Pro और Gemini 3.1 Flash Image के साथ सबसे अच्छे तरीके से काम करते हैं.
टेंप्लेट
Make a 3 panel comic in a [style]. Put the character in a [type of scene].
प्रॉम्प्ट
Make a 3 panel comic in a gritty, noir art style with high-contrast black and white inks. Put the character in a humurous scene.
Python
from google import genai
from PIL import Image
import base64

client = genai.Client()

with open('/path/to/your/man_in_white_glasses.jpg', 'rb') as f:
    image_bytes = f.read()
text_input = "Make a 3 panel comic in a gritty, noir art style with high-contrast black and white inks. Put the character in a humurous scene."

interaction = client.interactions.create(
    model="gemini-3.1-flash-image",
    input=[
        {"type": "text", "text": text_input},
        {
            "type": "image",
            "data": base64.b64encode(image_bytes).decode('utf-8'),
            "mime_type": "image/jpeg"
        }
    ],
)

for step in interaction.steps:
    if step.type == "model_output":
        for content_block in step.content:
            if content_block.type == "text":
                print(content_block.text)
            elif content_block.type == "image":
                with open("comic_panel.jpg", "wb") as f:
                    f.write(base64.b64decode(content_block.data))
JavaScript
import { GoogleGenAI } from "@google/genai";
import * as fs from "node:fs";

async function main() {
  const ai = new GoogleGenAI({});

  const imagePath = "/path/to/your/man_in_white_glasses.jpg";
  const imageData = fs.readFileSync(imagePath);
  const base64Image = imageData.toString("base64");

  const input = [
    { type: "text", text: "Make a 3 panel comic in a gritty, noir art style with high-contrast black and white inks. Put the character in a humurous scene." },
    {
      type: "image",
      mime_type: "image/jpeg",
      data: base64Image
    },
  ];

  const interaction = await ai.interactions.create({
    model: "gemini-3.1-flash-image",
    input: input,
  });
  for (const step of interaction.steps) {
    if (step.type === "model_output") {
      for (const contentBlock of step.content) {
        if (contentBlock.type === "text") {
          console.log(contentBlock.text);
        } else if (contentBlock.type === "image") {
          const buffer = Buffer.from(contentBlock.data, "base64");
          fs.writeFileSync("comic_panel.jpg", buffer);
        }
      }
    }
  }
}

main();
REST
curl -s -X POST \
  "https://generativelanguage.googleapis.com/v1beta/interactions" \
  -H "x-goog-api-key: $GEMINI_API_KEY" \
  -H "Content-Type: application/json" \
  -d '{
    "model": "gemini-3.1-flash-image",
    "input": [
      {"type": "text", "text": "Make a 3 panel comic in a gritty, noir art style with high-contrast black and white inks. Put the character in a humurous scene."},
      {"type": "image", "data": "<BASE64_IMAGE_DATA>", "mime_type": "image/jpeg"}
    ]
  }'
इनपुट |
आउटपुट |

|

|
7. Google Search से सटीक जानकारी पाने की सुविधा
Google Search का इस्तेमाल करके, हाल ही की या रीयल-टाइम जानकारी के आधार पर इमेज जनरेट करें. यह सुविधा, खबरों, मौसम की जानकारी, और समय के हिसाब से ज़रूरी अन्य विषयों के लिए काम की है.
प्रॉम्प्ट
Make a simple but stylish graphic of last night's Arsenal game in the Champion's League
Python
from google import genai
from google.genai import types
import base64

client = genai.Client()

interaction = client.interactions.create(
    model="gemini-3.1-flash-image",
    input="Make a simple but stylish graphic of last night's Arsenal game in the Champion's League",
    tools=[{"type": "google_search"}],
    response_format={"type": "image", "aspect_ratio": "16:9"},
)

for step in interaction.steps:
    if step.type == "model_output":
        for content_block in step.content:
            if content_block.type == "text":
                print(content_block.text)
            elif content_block.type == "image":
                with open("football-score.jpg", "wb") as f:
                    f.write(base64.b64decode(content_block.data))
JavaScript
import { GoogleGenAI } from "@google/genai";
import * as fs from "node:fs";

async function main() {
  const ai = new GoogleGenAI({});

  const interaction = await ai.interactions.create({
    model: "gemini-3.1-flash-image",
    input: "Make a simple but stylish graphic of last night's Arsenal game in the Champion's League",
    tools: [{ type: "google_search" }],
    response_format: { type: "image", aspect_ratio: "16:9", image_size: "2K" },
  });

  for (const step of interaction.steps) {
    if (step.type === "model_output") {
      for (const contentBlock of step.content) {
        if (contentBlock.type === "text") {
          console.log(contentBlock.text);
        } else if (contentBlock.type === "image") {
          const buffer = Buffer.from(contentBlock.data, "base64");
          fs.writeFileSync("football-score.jpg", buffer);
        }
      }
    }
  }
}

main();
REST
curl -s -X POST \
  "https://generativelanguage.googleapis.com/v1beta/interactions" \
  -H "x-goog-api-key: $GEMINI_API_KEY" \
  -H "Content-Type: application/json" \
  -d '{
    "model": "gemini-3.1-flash-image",
    "input": "Make a simple but stylish graphic of last nights Arsenal game in the Champions League",
    "tools": [{"type": "google_search"}],
    "response_format": {
      "type": "image",
      "aspect_ratio": "16:9"
    }
  }'

इमेज में बदलाव करने के लिए प्रॉम्प्ट
इन उदाहरणों में, इमेज में बदलाव करने, कंपोज़िशन, और स्टाइल ट्रांसफ़र के लिए, टेक्स्ट प्रॉम्प्ट के साथ इमेज देने का तरीका दिखाया गया है.
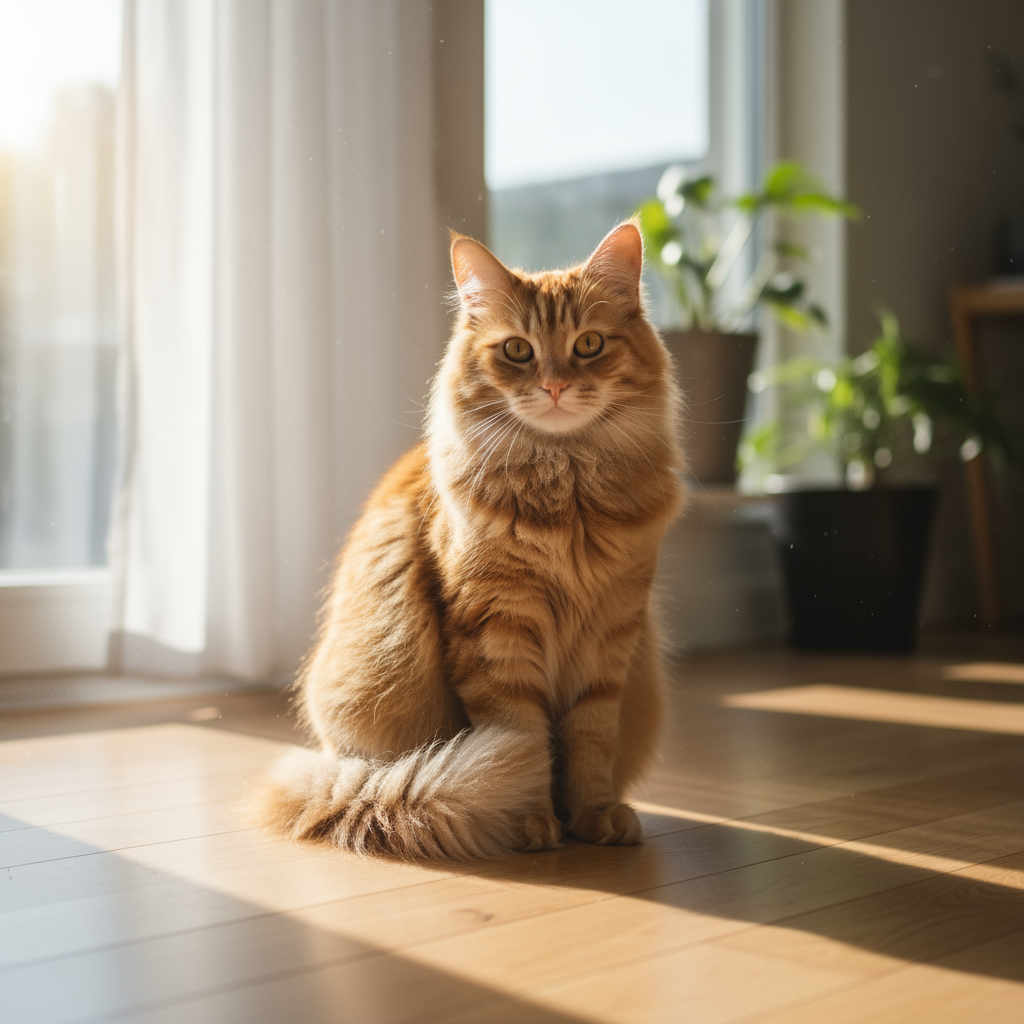
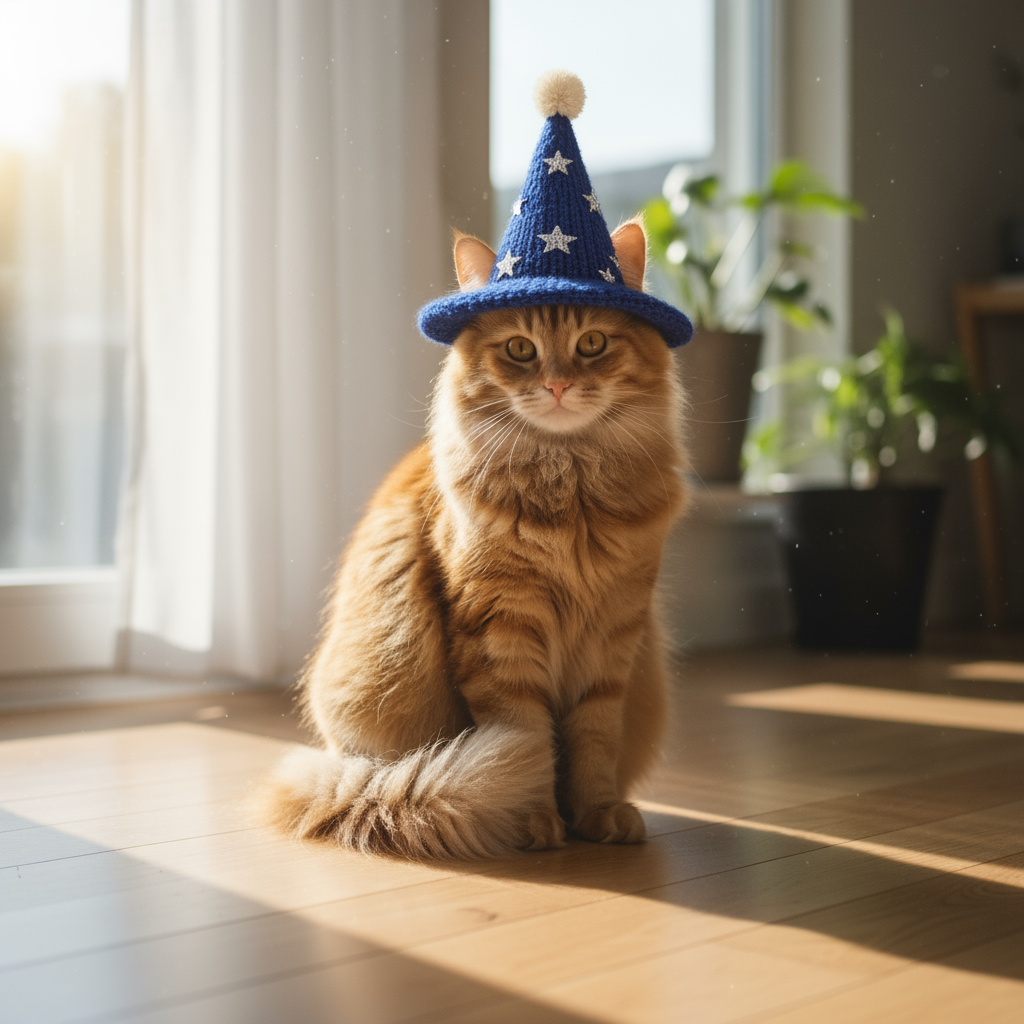
1. एलिमेंट जोड़ना और हटाना
कोई इमेज दें और उसमें किए जाने वाले बदलाव के बारे में बताएं. मॉडल, ओरिजनल इमेज की स्टाइल, लाइटिंग, और पर्सपेक्टिव से मेल खाएगा.
टेंप्लेट
Using the provided image of [subject], please [add/remove/modify] [element]
to/from the scene. Ensure the change is [description of how the change should
integrate].
प्रॉम्प्ट
"Using the provided image of my cat, please add a small, knitted wizard hat
on its head. Make it look like it's sitting comfortably and matches the soft
lighting of the photo."
Python
from google import genai
from PIL import Image
import base64

client = genai.Client()

with open('/path/to/your/cat_photo.png', 'rb') as f:
    image_bytes = f.read()
text_input = """Using the provided image of my cat, please add a small, knitted wizard hat on its head. Make it look like it's sitting comfortably and not falling off."""

interaction = client.interactions.create(
    model="gemini-3.1-flash-image",
    input=[
        {"type": "text", "text": text_input},
        {
            "type": "image",
            "data": base64.b64encode(image_bytes).decode('utf-8'),
            "mime_type": "image/png"
        }
    ],
)

for step in interaction.steps:
    if step.type == "model_output":
        for content_block in step.content:
            if content_block.type == "text":
                print(content_block.text)
            elif content_block.type == "image":
                with open("cat_with_hat.png", "wb") as f:
                    f.write(base64.b64decode(content_block.data))
JavaScript
import { GoogleGenAI } from "@google/genai";
import * as fs from "node:fs";

async function main() {
  const ai = new GoogleGenAI({});

  const imagePath = "/path/to/your/cat_photo.png";
  const imageData = fs.readFileSync(imagePath);
  const base64Image = imageData.toString("base64");

  const input = [
    { type: "text", text: "Using the provided image of my cat, please add a small, knitted wizard hat on its head. Make it look like it's sitting comfortably and not falling off." },
    {
      type: "image",
      mime_type: "image/png",
      data: base64Image
    },
  ];

  const interaction = await ai.interactions.create({
    model: "gemini-3.1-flash-image",
    input: input,
  });
  for (const step of interaction.steps) {
    if (step.type === "model_output") {
      for (const contentBlock of step.content) {
        if (contentBlock.type === "text") {
          console.log(contentBlock.text);
        } else if (contentBlock.type === "image") {
          const buffer = Buffer.from(contentBlock.data, "base64");
          fs.writeFileSync("cat_with_hat.png", buffer);
        }
      }
    }
  }
}

main();
REST
curl -s -X POST \
  "https://generativelanguage.googleapis.com/v1beta/interactions" \
    -H "x-goog-api-key: $GEMINI_API_KEY" \
    -H 'Content-Type: application/json' \
    -d "{
      \"model\": \"gemini-3.1-flash-image\",
      \"input\": [
            {\"type\": \"text\", \"text\": \"Using the provided image of my cat, please add a small, knitted wizard hat on its head. Make it look like it's sitting comfortably and not falling off.\"},
            {\"type\": \"image\", \"mime_type\":\"image/png\", \"data\": \"<BASE64_IMAGE_DATA>\"}
        ]
    }"
इनपुट |
आउटपुट |
|
|
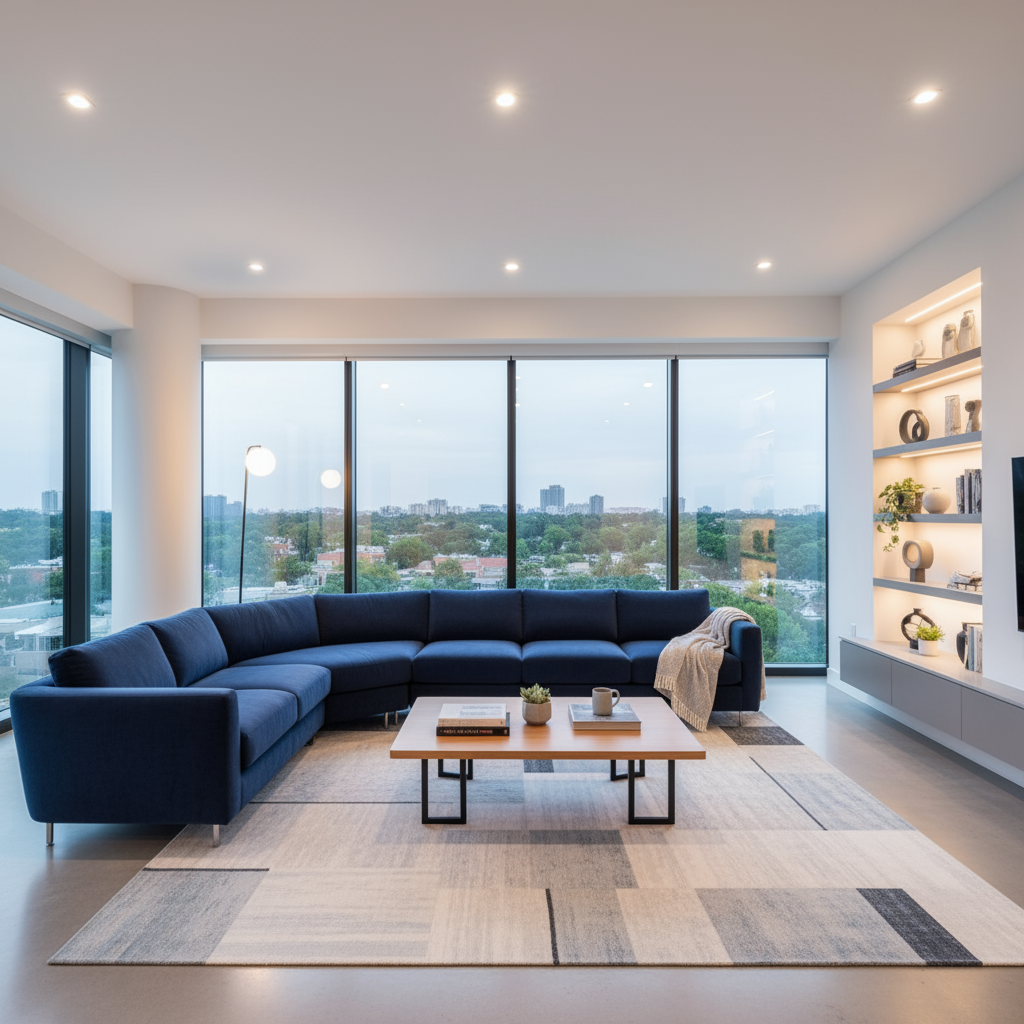
2. इनपेंटिंग (सिमेंटिक मास्किंग)
इमेज के किसी खास हिस्से में बदलाव करने के लिए, बातचीत के दौरान "मास्क" तय करें. इससे इमेज के बाकी हिस्सों में कोई बदलाव नहीं होगा.
टेंप्लेट
Using the provided image, change only the [specific element] to [new
element/description]. Keep everything else in the image exactly the same,
preserving the original style, lighting, and composition.
प्रॉम्प्ट
"Using the provided image of a living room, change only the blue sofa to be
a vintage, brown leather chesterfield sofa. Keep the rest of the room,
including the pillows on the sofa and the lighting, unchanged."
Python
from google import genai
from PIL import Image
import base64

client = genai.Client()

with open('/path/to/your/living_room.png', 'rb') as f:
    image_bytes = f.read()
text_input = """Using the provided image of a living room, change only the blue sofa to be a vintage, brown leather chesterfield sofa. Keep the rest of the room, including the pillows on the sofa and the lighting, unchanged."""

interaction = client.interactions.create(
    model="gemini-3.1-flash-image",
    input=[
        {
            "type": "image",
            "data": base64.b64encode(image_bytes).decode('utf-8'),
            "mime_type": "image/png"
        },
        {"type": "text", "text": text_input}
    ],
)

for step in interaction.steps:
    if step.type == "model_output":
        for content_block in step.content:
            if content_block.type == "text":
                print(content_block.text)
            elif content_block.type == "image":
                with open("living_room_edited.png", "wb") as f:
                    f.write(base64.b64decode(content_block.data))
JavaScript
import { GoogleGenAI } from "@google/genai";
import * as fs from "node:fs";

async function main() {
  const ai = new GoogleGenAI({});

  const imagePath = "/path/to/your/living_room.png";
  const imageData = fs.readFileSync(imagePath);
  const base64Image = imageData.toString("base64");

  const input = [
    {
      type: "image",
      mime_type: "image/png",
      data: base64Image
    },
    { type: "text", text: "Using the provided image of a living room, change only the blue sofa to be a vintage, brown leather chesterfield sofa. Keep the rest of the room, including the pillows on the sofa and the lighting, unchanged." },
  ];

  const interaction = await ai.interactions.create({
    model: "gemini-3.1-flash-image",
    input: input,
  });
  for (const step of interaction.steps) {
    if (step.type === "model_output") {
      for (const contentBlock of step.content) {
        if (contentBlock.type === "text") {
          console.log(contentBlock.text);
        } else if (contentBlock.type === "image") {
          const buffer = Buffer.from(contentBlock.data, "base64");
          fs.writeFileSync("living_room_edited.png", buffer);
        }
      }
    }
  }
}

main();
REST
curl -s -X POST \
  "https://generativelanguage.googleapis.com/v1beta/interactions" \
    -H "x-goog-api-key: $GEMINI_API_KEY" \
    -H 'Content-Type: application/json' \
    -d "{
      \"model\": \"gemini-3.1-flash-image\",
      \"input\": [
        {\"type\": \"image\", \"mime_type\":\"image/png\", \"data\": \"<BASE64_IMAGE_DATA>\"},
        {\"type\": \"text\", \"text\": \"Using the provided image of a living room, change only the blue sofa to be a vintage, brown leather chesterfield sofa. Keep the rest of the room, including the pillows on the sofa and the lighting, unchanged.\"}
      ]
    }"
इनपुट |
आउटपुट |
|

|
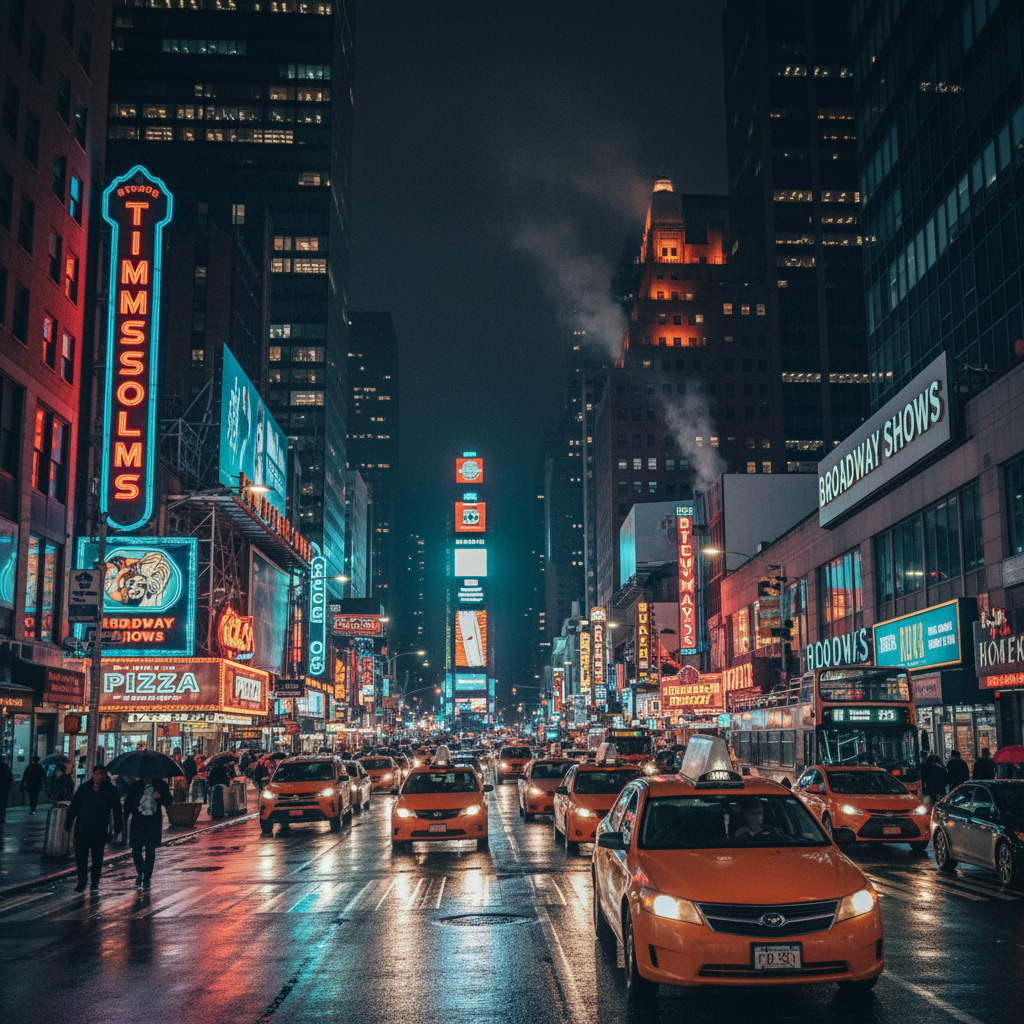
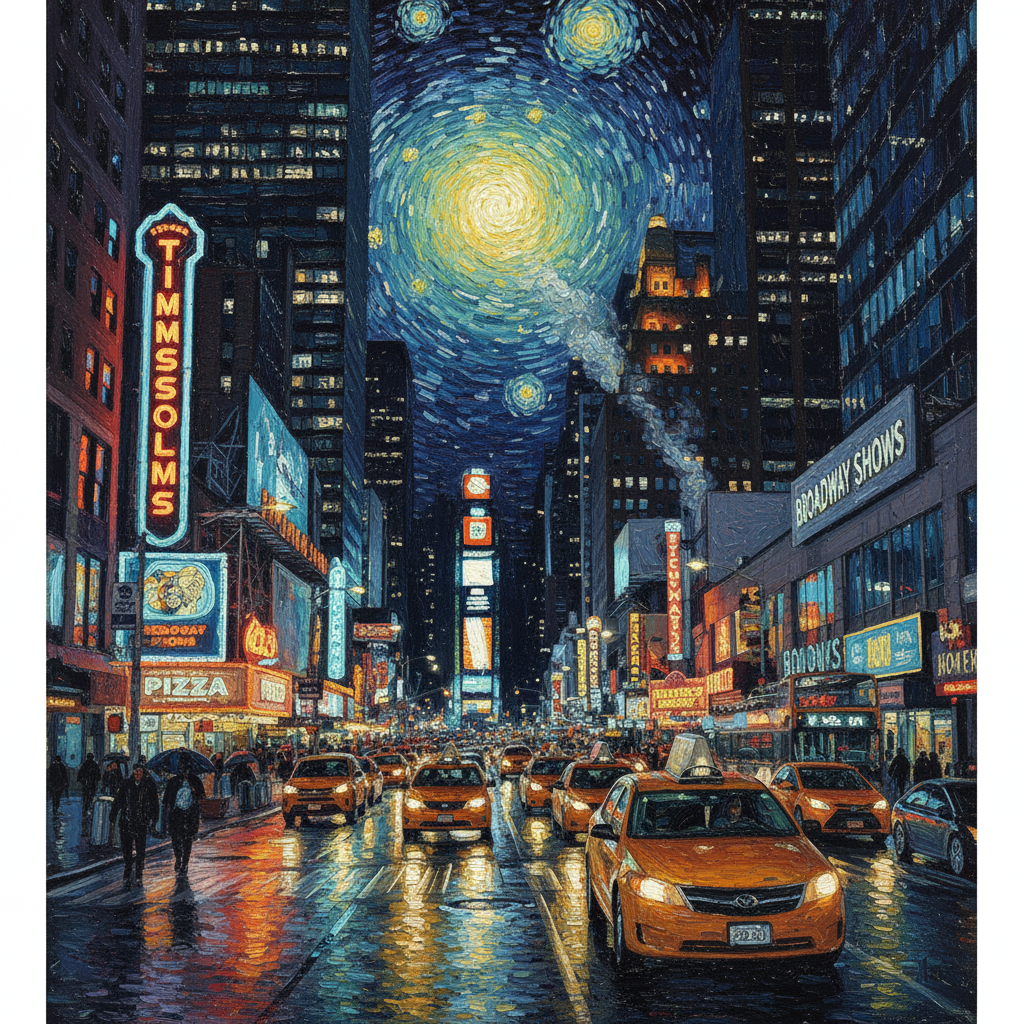
3. स्टाइल ट्रांसफ़र
कोई इमेज दें और मॉडल से कहें कि वह उसके कॉन्टेंट को किसी दूसरी कलात्मक स्टाइल में फिर से बनाए.
टेंप्लेट
Transform the provided photograph of [subject] into the artistic style of [artist/art style]. Preserve the original composition but render it with [description of stylistic elements].
प्रॉम्प्ट
"Transform the provided photograph of a modern city street at night into the artistic style of Vincent van Gogh's 'Starry Night'. Preserve the original composition of buildings and cars, but render all elements with swirling, impasto brushstrokes and a dramatic palette of deep blues and bright yellows."
Python
from google import genai
from PIL import Image
import base64

client = genai.Client()

with open('/path/to/your/city.png', 'rb') as f:
    image_bytes = f.read()
text_input = """Transform the provided photograph of a modern city street at night into the artistic style of Vincent van Gogh's 'Starry Night'. Preserve the original composition of buildings and cars, but render all elements with swirling, impasto brushstrokes and a dramatic palette of deep blues and bright yellows."""

interaction = client.interactions.create(
    model="gemini-3.1-flash-image",
    input=[
        {
            "type": "image",
            "data": base64.b64encode(image_bytes).decode('utf-8'),
            "mime_type": "image/png"
        },
        {"type": "text", "text": text_input}
    ],
)

for step in interaction.steps:
    if step.type == "model_output":
        for content_block in step.content:
            if content_block.type == "text":
                print(content_block.text)
            elif content_block.type == "image":
                with open("city_style_transfer.png", "wb") as f:
                    f.write(base64.b64decode(content_block.data))
JavaScript
import { GoogleGenAI } from "@google/genai";
import * as fs from "node:fs";

async function main() {
  const ai = new GoogleGenAI({});
  const imageData = fs.readFileSync("/path/to/your/city.png");
  const base64Image = imageData.toString("base64");

  const interaction = await ai.interactions.create({
    model: "gemini-3.1-flash-image",
    input: [
      {
        type: "image",
        mime_type: "image/png",
        data: base64Image
      },
      { type: "text", text: "Transform the provided photograph of a modern city street at night into the artistic style of Vincent van Gogh's 'Starry Night'. Preserve the original composition of buildings and cars, but render all elements with swirling, impasto brushstrokes and a dramatic palette of deep blues and bright yellows." },
    ],
  });
  for (const step of interaction.steps) {
    if (step.type === "model_output") {
      for (const contentBlock of step.content) {
        if (contentBlock.type === "text") {
          console.log(contentBlock.text);
        } else if (contentBlock.type === "image") {
          const buffer = Buffer.from(contentBlock.data, "base64");
          fs.writeFileSync("city_style_transfer.png", buffer);
        }
      }
    }
  }
}

main();
REST
curl -s -X POST \
  "https://generativelanguage.googleapis.com/v1beta/interactions" \
    -H "x-goog-api-key: $GEMINI_API_KEY" \
    -H 'Content-Type: application/json' \
    -d "{
      \"model\": \"gemini-3.1-flash-image\",
      \"input\": [
        {\"type\": \"image\", \"mime_type\":\"image/png\", \"data\": \"<BASE64_IMAGE_DATA>\"},
        {\"type\": \"text\", \"text\": \"Transform the provided photograph of a modern city street at night into the artistic style of Vincent van Gogh's 'Starry Night'. Preserve the original composition of buildings and cars, but render all elements with swirling, impasto brushstrokes and a dramatic palette of deep blues and bright yellows.\"}
      ]
    }"
इनपुट |
आउटपुट |
|
|
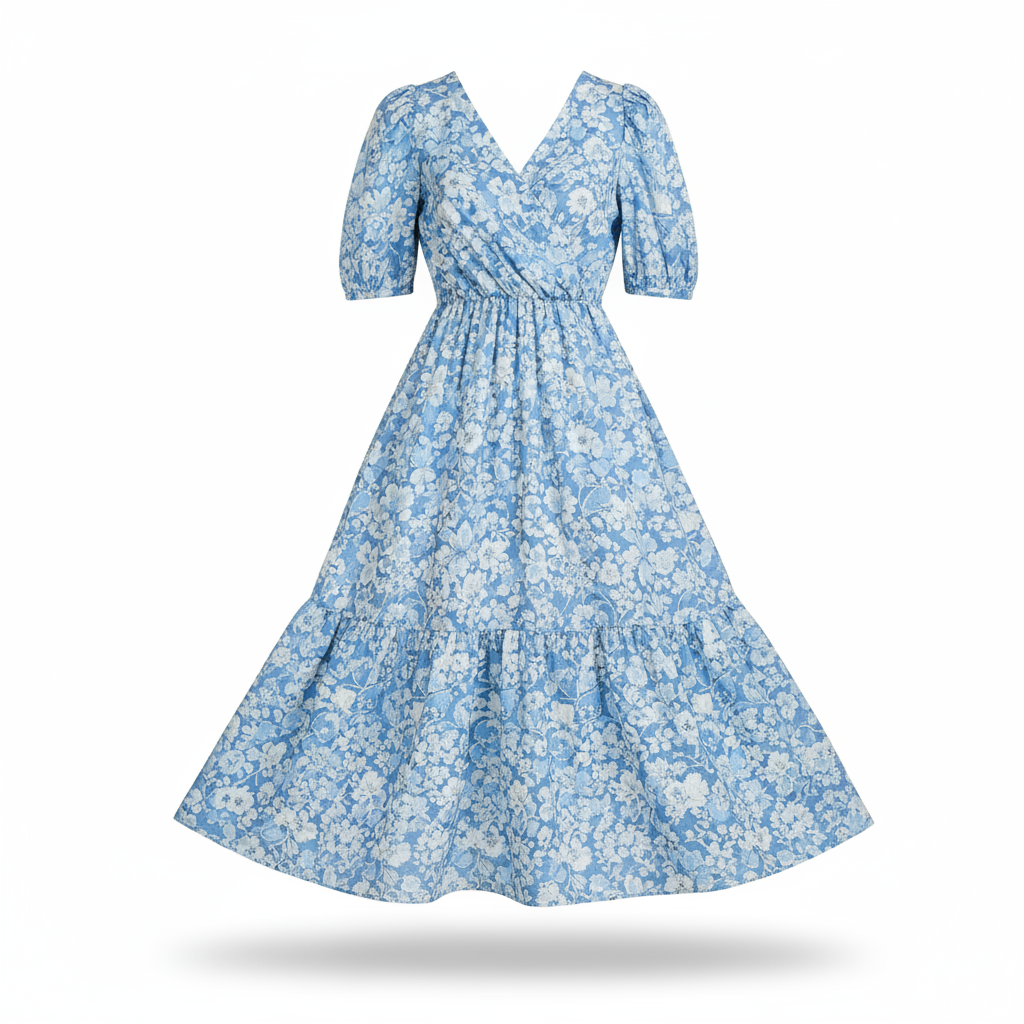
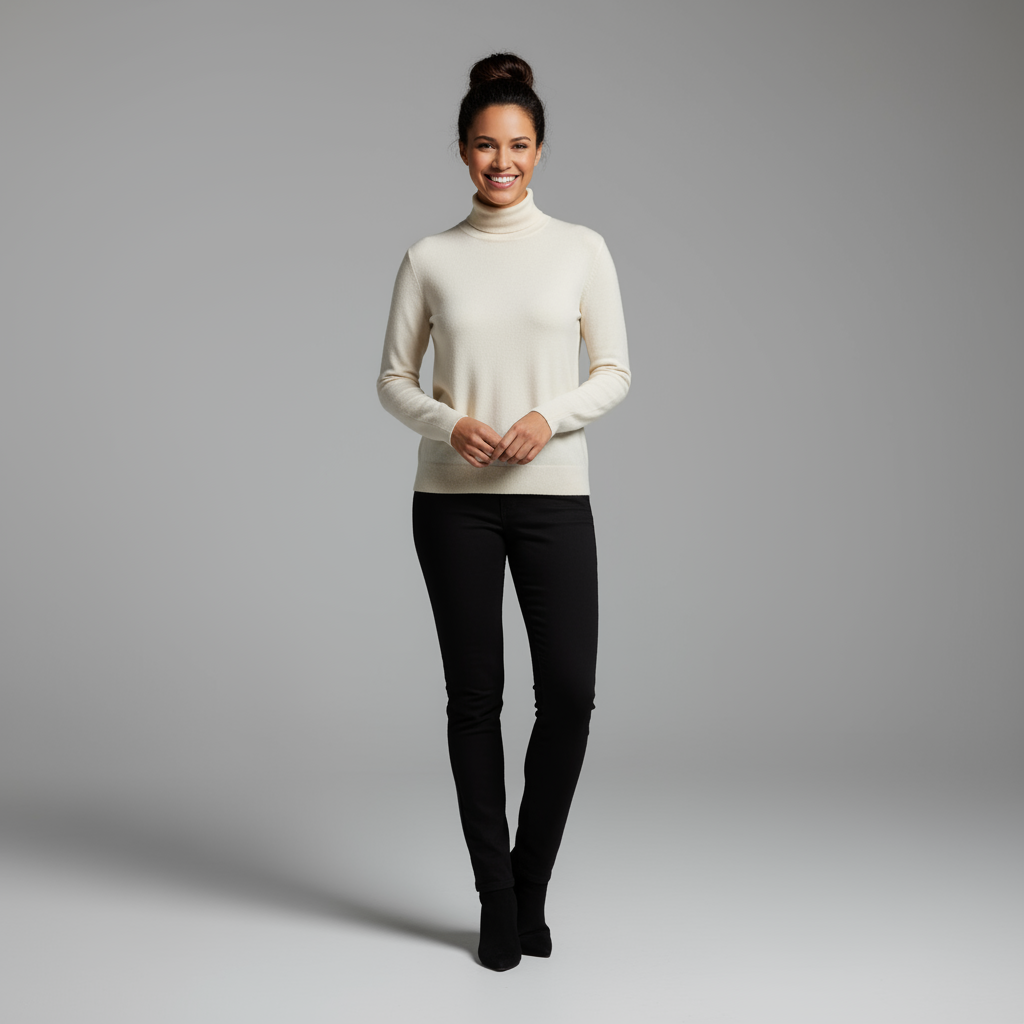
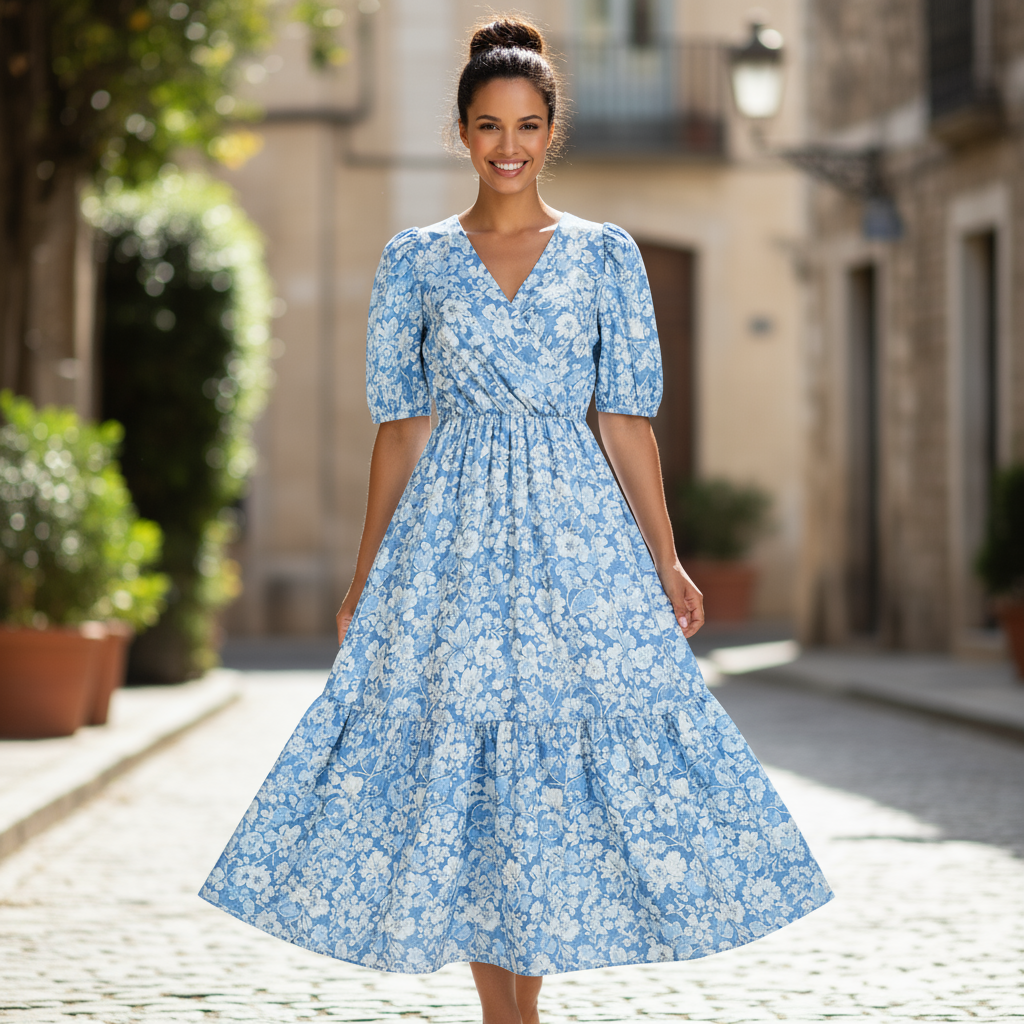
4. एडवांस कंपोज़िशन: एक साथ कई इमेज बनाना
एक नई कंपोज़िट इमेज बनाने के लिए, कॉन्टेक्स्ट के तौर पर कई इमेज उपलब्ध कराएं. यह प्रॉडक्ट के मॉकअप या क्रिएटिव कोलाज के लिए सबसे सही है.
टेंप्लेट
Create a new image by combining the elements from the provided images. Take
the [element from image 1] and place it with/on the [element from image 2].
The final image should be a [description of the final scene].
प्रॉम्प्ट
"Create a professional e-commerce fashion photo. Take the blue floral dress
from the first image and let the woman from the second image wear it.
Generate a realistic, full-body shot of the woman wearing the dress, with
the lighting and shadows adjusted to match the outdoor environment."
Python
from google import genai
from PIL import Image
import base64

client = genai.Client()

with open('/path/to/your/dress.png', 'rb') as f:
    dress_bytes = f.read()
with open('/path/to/your/model.png', 'rb') as f:
    model_bytes = f.read()
text_input = """Create a professional e-commerce fashion photo. Take the blue floral dress from the first image and let the woman from the second image wear it. Generate a realistic, full-body shot of the woman wearing the dress, with the lighting and shadows adjusted to match the outdoor environment."""

interaction = client.interactions.create(
    model="gemini-3.1-flash-image",
    input=[
        {
            "type": "image",
            "data": base64.b64encode(dress_bytes).decode('utf-8'),
            "mime_type": "image/png"
        },
        {
            "type": "image",
            "data": base64.b64encode(model_bytes).decode('utf-8'),
            "mime_type": "image/png"
        },
        {"type": "text", "text": text_input}
    ],
)

for step in interaction.steps:
    if step.type == "model_output":
        for content_block in step.content:
            if content_block.type == "text":
                print(content_block.text)
            elif content_block.type == "image":
                with open("fashion_ecommerce_shot.png", "wb") as f:
                    f.write(base64.b64decode(content_block.data))
JavaScript
import { GoogleGenAI } from "@google/genai";
import * as fs from "node:fs";

async function main() {
  const ai = new GoogleGenAI({});

  const imagePath1 = "/path/to/your/dress.png";
  const imageData1 = fs.readFileSync(imagePath1);
  const base64Image1 = imageData1.toString("base64");
  const imagePath2 = "/path/to/your/model.png";
  const imageData2 = fs.readFileSync(imagePath2);
  const base64Image2 = imageData2.toString("base64");

  const input = [
    {
      type: "image",
      mime_type: "image/png",
      data: base64Image1
    },
    {
      type: "image",
      mime_type: "image/png",
      data: base64Image2
    },
    { type: "text", text: "Create a professional e-commerce fashion photo. Take the blue floral dress from the first image and let the woman from the second image wear it. Generate a realistic, full-body shot of the woman wearing the dress, with the lighting and shadows adjusted to match the outdoor environment." },
  ];

  const interaction = await ai.interactions.create({
    model: "gemini-3.1-flash-image",
    input: input,
  });
  for (const step of interaction.steps) {
    if (step.type === "model_output") {
      for (const contentBlock of step.content) {
        if (contentBlock.type === "text") {
          console.log(contentBlock.text);
        } else if (contentBlock.type === "image") {
          const buffer = Buffer.from(contentBlock.data, "base64");
          fs.writeFileSync("fashion_ecommerce_shot.png", buffer);
        }
      }
    }
  }
}

main();
REST
curl -s -X POST \
  "https://generativelanguage.googleapis.com/v1beta/interactions" \
    -H "x-goog-api-key: $GEMINI_API_KEY" \
    -H 'Content-Type: application/json' \
    -d "{
      \"model\": \"gemini-3.1-flash-image\",
      \"input\": [
            {\"type\": \"image\", \"mime_type\":\"image/png\", \"data\": \"<BASE64_IMAGE_DATA_1>\"},
            {\"type\": \"image\", \"mime_type\":\"image/png\", \"data\": \"<BASE64_IMAGE_DATA_2>\"},
            {\"type\": \"text\", \"text\": \"Create a professional e-commerce fashion photo. Take the blue floral dress from the first image and let the woman from the second image wear it. Generate a realistic, full-body shot of the woman wearing the dress, with the lighting and shadows adjusted to match the outdoor environment.\"}
      }]
    }"
पहली इनपुट वैल्यू |
दूसरी इनपुट वैल्यू |
आउटपुट |
|
|
|
5. बारीकियों को हाई फ़िडेलिटी में बनाए रखना
बदलाव करते समय, यह पक्का करें कि ज़रूरी जानकारी (जैसे कि चेहरा या लोगो) सुरक्षित रहे. इसके लिए, बदलाव करने के अनुरोध के साथ-साथ, इनके बारे में ज़्यादा जानकारी दें.
टेंप्लेट
Using the provided images, place [element from image 2] onto [element from
image 1]. Ensure that the features of [element from image 1] remain
completely unchanged. The added element should [description of how the
element should integrate].
प्रॉम्प्ट
"Take the first image of the woman with brown hair, blue eyes, and a neutral
expression. Add the logo from the second image onto her black t-shirt.
Ensure the woman's face and features remain completely unchanged. The logo
should look like it's naturally printed on the fabric, following the folds
of the shirt."
Python
from google import genai
from PIL import Image
import base64

client = genai.Client()

with open('/path/to/your/woman.png', 'rb') as f:
    woman_bytes = f.read()
with open('/path/to/your/logo.png', 'rb') as f:
    logo_bytes = f.read()
text_input = """Take the first image of the woman with brown hair, blue eyes, and a neutral expression. Add the logo from the second image onto her black t-shirt. Ensure the woman's face and features remain completely unchanged. The logo should look like it's naturally printed on the fabric, following the folds of the shirt."""

interaction = client.interactions.create(
    model="gemini-3.1-flash-image",
    input=[
      {"type": "image", "mime_type":"image/png", "data": base64.b64encode(woman_bytes).decode('utf-8')},
      {"type": "image", "mime_type":"image/png", "data": base64.b64encode(logo_bytes).decode('utf-8')},
      {"type": "text", "text": text_input}
    ],
)

for step in interaction.steps:
    if step.type == "model_output":
        for content_block in step.content:
            if content_block.type == "text":
                print(content_block.text)
            elif content_block.type == "image":
                with open("woman_with_logo.png", "wb") as f:
                    f.write(base64.b64decode(content_block.data))
JavaScript
import { GoogleGenAI } from "@google/genai";
import * as fs from "node:fs";

async function main() {
  const ai = new GoogleGenAI({});

  const imagePath1 = "/path/to/your/woman.png";
  const imageData1 = fs.readFileSync(imagePath1);
  const base64Image1 = imageData1.toString("base64");
  const imagePath2 = "/path/to/your/logo.png";
  const imageData2 = fs.readFileSync(imagePath2);
  const base64Image2 = imageData2.toString("base64");

  const input = [
    {"type": "image", "mime_type":"image/png", "data": base64Image1},
    {"type": "image", "mime_type":"image/png", "data": base64Image2},
    {"type": "text", "text": "Take the first image of the woman with brown hair, blue eyes, and a neutral expression. Add the logo from the second image onto her black t-shirt. Ensure the woman's face and features remain completely unchanged. The logo should look like it's naturally printed on the fabric, following the folds of the shirt."},
  ];

  const interaction = await ai.interactions.create({
    model: "gemini-3.1-flash-image",
    input: input,
  });
  for (const step of interaction.steps) {
    if (step.type === "model_output") {
      for (const contentBlock of step.content) {
        if (contentBlock.type === "text") {
          console.log(contentBlock.text);
        } else if (contentBlock.type === "image") {
          const buffer = Buffer.from(contentBlock.data, "base64");
          fs.writeFileSync("woman_with_logo.png", buffer);
        }
      }
    }
  }
}

main();
REST
curl -s -X POST \
  "https://generativelanguage.googleapis.com/v1beta/interactions" \
    -H "x-goog-api-key: $GEMINI_API_KEY" \
    -H 'Content-Type: application/json' \
    -d "{
      \"model\": \"gemini-3.1-flash-image\",
      \"input\": [
        {\"type\": \"image\", \"mime_type\":\"image/png\", \"data\": \"<BASE64_IMAGE_DATA_1>\"},
        {\"type\": \"image\", \"mime_type\":\"image/png\", \"data\": \"<BASE64_IMAGE_DATA_2>\"},
        {\"type\": \"text\", \"text\": \"Take the first image of the woman with brown hair, blue eyes, and a neutral expression. Add the logo from the second image onto her black t-shirt. Ensure the woman's face and features remain completely unchanged. The logo should look like it's naturally printed on the fabric, following the folds of the shirt.\"}
      ]
    }"
पहली इनपुट वैल्यू |
दूसरी इनपुट वैल्यू |
आउटपुट |

|
|
|
6. किसी चीज़ को दिलचस्प बनाना
कोई रफ़ स्केच या ड्राइंग अपलोड करें और मॉडल से उसे बेहतर इमेज में बदलने के लिए कहें.
टेंप्लेट
Turn this rough [medium] sketch of a [subject] into a [style description]
photo. Keep the [specific features] from the sketch but add [new details/materials].
प्रॉम्प्ट
"Turn this rough pencil sketch of a futuristic car into a polished photo of the finished concept car in a showroom. Keep the sleek lines and low profile from the sketch but add metallic blue paint and neon rim lighting."
Python
from google import genai
from PIL import Image
import base64

client = genai.Client()

with open('/path/to/your/car_sketch.png', 'rb') as f:
    sketch_bytes = f.read()
text_input = """Turn this rough pencil sketch of a futuristic car into a polished photo of the finished concept car in a showroom. Keep the sleek lines and low profile from the sketch but add metallic blue paint and neon rim lighting."""

interaction = client.interactions.create(
    model="gemini-3.1-flash-image",
    input=[
      {"type": "image", "mime_type":"image/png", "data": base64.b64encode(sketch_bytes).decode('utf-8')},
      {"type": "text", "text": text_input}
    ],
)

for step in interaction.steps:
    if step.type == "model_output":
        for content_block in step.content:
            if content_block.type == "text":
                print(content_block.text)
            elif content_block.type == "image":
                with open("car_photo.png", "wb") as f:
                    f.write(base64.b64decode(content_block.data))
JavaScript
import { GoogleGenAI } from "@google/genai";
import * as fs from "node:fs";

async function main() {
  const ai = new GoogleGenAI({});

  const imagePath = "/path/to/your/car_sketch.png";
  const imageData = fs.readFileSync(imagePath);
  const base64Image = imageData.toString("base64");

  const input = [
    {"type": "image", "mime_type":"image/png", "data": base64Image},
    {"type": "text", "text": "Turn this rough pencil sketch of a futuristic car into a polished photo of the finished concept car in a showroom. Keep the sleek lines and low profile from the sketch but add metallic blue paint and neon rim lighting."},
  ];

  const interaction = await ai.interactions.create({
    model: "gemini-3.1-flash-image",
    input: input,
  });
  for (const step of interaction.steps) {
    if (step.type === "model_output") {
      for (const contentBlock of step.content) {
        if (contentBlock.type === "text") {
          console.log(contentBlock.text);
        } else if (contentBlock.type === "image") {
          const buffer = Buffer.from(contentBlock.data, "base64");
          fs.writeFileSync("car_photo.png", buffer);
        }
      }
    }
  }
}

main();
REST
curl -s -X POST \
  "https://generativelanguage.googleapis.com/v1beta/interactions" \
    -H "x-goog-api-key: $GEMINI_API_KEY" \
    -H 'Content-Type: application/json' \
    -d "{
      \"model\": \"gemini-3.1-flash-image\",
      \"input\": [
        {\"type\": \"image\", \"mime_type\":\"image/png\", \"data\": \"<BASE64_IMAGE_DATA>\"},
        {\"type\": \"text\", \"text\": \"Turn this rough pencil sketch of a futuristic car into a polished photo of the finished concept car in a showroom. Keep the sleek lines and low profile from the sketch but add metallic blue paint and neon rim lighting.\"}
      ]
    }"
इनपुट |
आउटपुट |

|

|
7. कैरेक्टर की स्टाइल एक जैसी रखना: 360 व्यू
अलग-अलग ऐंगल से प्रॉम्प्ट देकर, किसी किरदार के 360 डिग्री व्यू जनरेट किए जा सकते हैं. बेहतर नतीजे पाने के लिए, बाद के प्रॉम्प्ट में पहले जनरेट की गई इमेज शामिल करें, ताकि एक जैसी इमेज जनरेट की जा सकें. जटिल पोज़ के लिए, चुने गए पोज़ की रेफ़रंस इमेज शामिल करें.
टेंप्लेट
A studio portrait of [person] against [background], [looking forward/in profile looking right/etc.]
प्रॉम्प्ट
A studio portrait of this man against white, in profile looking right
Python
from google import genai
from PIL import Image
import base64

client = genai.Client()

with open('/path/to/your/man_in_white_glasses.jpg', 'rb') as f:
    image_bytes = f.read()
text_input = """A studio portrait of this man against white, in profile looking right"""

interaction = client.interactions.create(
    model="gemini-3.1-flash-image",
    input={
      {"type": "text", "text": text_input},
      {"type": "image", "mime_type":"image/png", "data": base64.b64encode(image_bytes).decode('utf-8')}
    },
)

for step in interaction.steps:
    if step.type == "model_output":
        for content_block in step.content:
            if content_block.type == "text":
                print(content_block.text)
            elif content_block.type == "image":
                with open("man_right_profile.png", "wb") as f:
                    f.write(base64.b64decode(content_block.data))
इनपुट |
आउटपुट 1 |
दूसरा आउटपुट |
|
|

|

|
सबसे सही तरीके
अपने नतीजों को बेहतर बनाने के लिए, इन पेशेवर रणनीतियों को अपने वर्कफ़्लो में शामिल करें.
- ज़्यादा सटीक जानकारी दें: जितनी ज़्यादा जानकारी दी जाएगी, आपको उतना ज़्यादा कंट्रोल मिलेगा. "फ़ैंटसी आर्मर" के बजाय, इसके बारे में जानकारी दें: "सिल्वर लीफ़ पैटर्न से बना, नक्काशी किया हुआ, और सजावटी एल्विन प्लेट आर्मर. इसमें फ़ैल्कन के पंखों के आकार के ऊँचे कॉलर और पॉल्ड्रॉन हैं."
- कॉन्टेक्स्ट और मकसद बताएं: इमेज का मकसद बताएं. कॉन्टेक्स्ट को समझने की मॉडल की क्षमता, फ़ाइनल आउटपुट पर असर डालेगी. उदाहरण के लिए, "एक हाई-एंड, कम से कम डिज़ाइन वाले स्किनकेयर ब्रैंड के लिए लोगो बनाओ" प्रॉम्प्ट से, "एक लोगो बनाओ" प्रॉम्प्ट की तुलना में बेहतर नतीजे मिलेंगे.
- बदलाव करना और बेहतर बनाना: पहली बार में ही बेहतरीन इमेज मिलने की उम्मीद न रखें. मॉडल की बातचीत वाली सुविधा का इस्तेमाल करके, छोटे-मोटे बदलाव करें. इसके बाद, "यह बहुत अच्छा है, लेकिन क्या रोशनी को थोड़ा और बेहतर किया जा सकता है?" या "सब कुछ वैसा ही रखो, लेकिन किरदार के चेहरे के भाव को थोड़ा और गंभीर बनाओ" जैसे प्रॉम्प्ट का इस्तेमाल करें.
- सिलसिलेवार निर्देशों का इस्तेमाल करें: कई एलिमेंट वाले जटिल सीन के लिए, अपने प्रॉम्प्ट को चरणों में बांटें. "सबसे पहले, सुबह के समय शांत और धुंधले जंगल का बैकग्राउंड बनाओ. इसके बाद, फ़ोरग्राउंड में काई से ढका हुआ पत्थर का एक पुराना वेदी जोड़ो. आखिर में, वेदी के ऊपर एक चमकती हुई तलवार रख दो."
- "सिमैंटिक नेगेटिव प्रॉम्प्ट" का इस्तेमाल करें: "कोई कार नहीं" कहने के बजाय, सीन के बारे में सकारात्मक तरीके से बताएं: "एक खाली, सुनसान सड़क जिस पर ट्रैफ़िक का कोई निशान नहीं है."
- कैमरे को कंट्रोल करना: फ़ोटोग्राफ़ी और सिनेमैटिक भाषा का इस्तेमाल करके, कंपोज़िशन को कंट्रोल करें.
wide-angle shot,macro shot,low-angle perspectiveजैसे शब्द.
सीमाएं
- बेहतर परफ़ॉर्मेंस के लिए, इन भाषाओं का इस्तेमाल करें: EN, ar-EG, de-DE, es-MX, fr-FR, hi-IN, id-ID, it-IT, ja-JP, ko-KR, pt-BR, ru-RU, ua-UA, vi-VN, zh-CN.
- इमेज जनरेट करने की सुविधा, ऑडियो इनपुट के साथ काम नहीं करती. वीडियो इनपुट सिर्फ़ Gemini 3.1 Flash Image के लिए इस्तेमाल किए जा सकते हैं.
- मॉडल, हमेशा उतनी ही इमेज जनरेट नहीं करेगा जितनी उपयोगकर्ता ने मांगी हैं.
gemini-2.5-flash-imageके लिए, इनपुट के तौर पर ज़्यादा से ज़्यादा तीन इमेज इस्तेमाल की जा सकती हैं. वहीं,gemini-3-pro-imageके लिए, अच्छी क्वालिटी वाली पांच इमेज और कुल 14 इमेज इस्तेमाल की जा सकती हैं.gemini-3.1-flash-imageएक ही वर्कफ़्लो में, ज़्यादा से ज़्यादा चार वर्णों के मिलते-जुलते होने और ज़्यादा से ज़्यादा 10 ऑब्जेक्ट के सटीक होने की सुविधा देता है.- किसी इमेज के लिए टेक्स्ट जनरेट करते समय, Gemini सबसे अच्छा काम तब करता है, जब पहले टेक्स्ट जनरेट किया जाए. इसके बाद, टेक्स्ट वाली इमेज जनरेट करने के लिए कहा जाए.
gemini-3.1-flash-imageफ़िलहाल, Google Search की मदद से भरोसेमंद स्रोतों से जानकारी लेने की सुविधा, वेब खोज से लोगों की असल दुनिया की इमेज का इस्तेमाल करने की सुविधा के साथ काम नहीं करती.- जनरेट की गई सभी इमेज में SynthID वॉटरमार्क शामिल होता है.
वैकल्पिक कॉन्फ़िगरेशन
response_format पैरामीटर का इस्तेमाल करके, आउटपुट फ़ॉर्मैट, आसपेक्ट रेशियो (लंबाई-चौड़ाई का अनुपात), और इमेज का साइज़ कॉन्फ़िगर किया जा सकता है.
आउटपुट फ़ॉर्मैट
मॉडल डिफ़ॉल्ट रूप से, टेक्स्ट और इमेज, दोनों तरह के जवाब देता है. response_format पैरामीटर में इमेज का फ़ॉर्मैट तय करके, जवाब को सिर्फ़ जनरेट की गई इमेज दिखाने के लिए कॉन्फ़िगर किया जा सकता है. इससे बातचीत वाला टेक्स्ट नहीं दिखेगा.
अगर आपको एक से ज़्यादा मोडैलिटी (उदाहरण के लिए, टेक्स्ट और जनरेट की गई इमेज, दोनों) का अनुरोध करना है, तो response_format को फ़ॉर्मैट एंट्री की एक ऐरे पास करें.
Python
interaction = client.interactions.create(
    model="gemini-3.1-flash-image",
    input="Write a short poem about a starry night and generate an image of it.",
    response_format=[
        {"type": "text"},
        {"type": "image"},
    ],
)
JavaScript
const interaction = await ai.interactions.create({
  model: "gemini-3.1-flash-image",
  input: "Write a short poem about a starry night and generate an image of it.",
  response_format: [
    { type: "text" },
    { type: "image" },
  ],
});
REST
curl -s -X POST \
  "https://generativelanguage.googleapis.com/v1beta/interactions" \
  -H "x-goog-api-key: $GEMINI_API_KEY" \
  -H 'Content-Type: application/json' \
  -d '{
    "model": "gemini-3.1-flash-image",
    "input": "Write a short poem about a starry night and generate an image of it.",
    "response_format": [
      { "type": "text" },
      { "type": "image" }
    ]
  }'
आस्पेक्ट रेशियो (लंबाई-चौड़ाई का अनुपात) और इमेज का साइज़
डिफ़ॉल्ट रूप से, मॉडल आउटपुट इमेज के साइज़ को आपकी इनपुट इमेज के साइज़ से मैच करता है. अगर ऐसा नहीं होता है, तो 1:1 स्क्वेयर जनरेट करता है. type को "image" पर सेट करने पर, response_format में मौजूद aspect_ratio और image_size फ़ील्ड का इस्तेमाल करके, आउटपुट इमेज के आसपेक्ट रेशियो और साइज़ को कंट्रोल किया जा सकता है.
Python
interaction = client.interactions.create(
    model="gemini-3.1-flash-image",
    input=prompt,
    response_format={
        "type": "image",
        "aspect_ratio": "16:9",
        "image_size": "2K",
    },
)
JavaScript
const interaction = await ai.interactions.create({
    model: "gemini-3.1-flash-image",
    input: prompt,
    response_format: {
      type: "image",
      aspect_ratio: "16:9",
      image_size: "2K",
    },
  });
REST
curl -s -X POST \
  "https://generativelanguage.googleapis.com/v1beta/interactions" \
  -H "x-goog-api-key: $GEMINI_API_KEY" \
  -H 'Content-Type: application/json' \
  -d '{
    "model": "gemini-3.1-flash-image",
    "input": "Create a picture of a nano banana dish in a fancy restaurant with a Gemini theme",
    "response_format": {
      "type": "image",
      "aspect_ratio": "16:9",
      "image_size": "2K"
    }
  }'
उपलब्ध अलग-अलग रेशियो और जनरेट की गई इमेज के साइज़ की जानकारी, यहां दी गई टेबल में दी गई है:
3.1 Flash Image
| आसपेक्ट रेशियो | 512 पिक्सल का रिज़ॉल्यूशन | 500 टोकन | 1K रिज़ॉल्यूशन | 1,000 टोकन | 2K रिज़ॉल्यूशन | 2,000 टोकन | 4K रिज़ॉल्यूशन | 4 हज़ार टोकन |
|---|---|---|---|---|---|---|---|---|
| 1:1 | 512x512 | 747 | 1024x1024 | 1120 | 2048x2048 | 1120 | 4096x4096 | 2000 |
| 1:4 | 256x1024 | 747 | 512x2048 | 1120 | 1024x4096 | 1120 | 2048x8192 | 2000 |
| 1:8 | 192x1536 | 747 | 384x3072 | 1120 | 768x6144 | 1120 | 1536x12288 | 2000 |
| 2:3 | 424x632 | 747 | 848x1264 | 1120 | 1696x2528 | 1120 | 3392x5056 | 2000 |
| 3:2 | 632x424 | 747 | 1264x848 | 1120 | 2528x1696 | 1120 | 5056x3392 | 2000 |
| 3:4 | 448x600 | 747 | 896x1200 | 1120 | 1792x2400 | 1120 | 3584x4800 | 2000 |
| 4:1 | 1024x256 | 747 | 2048x512 | 1120 | 4096x1024 | 1120 | 8192x2048 | 2000 |
| 4:3 | 600x448 | 747 | 1200x896 | 1120 | 2400x1792 | 1120 | 4800x3584 | 2000 |
| 4:5 | 464x576 | 747 | 928x1152 | 1120 | 1856x2304 | 1120 | 3712x4608 | 2000 |
| 5:4 | 576x464 | 747 | 1152x928 | 1120 | 2304x1856 | 1120 | 4608x3712 | 2000 |
| 8:1 | 1536x192 | 747 | 3072x384 | 1120 | 6144x768 | 1120 | 12288x1536 | 2000 |
| 9:16 | 384x688 | 747 | 768x1376 | 1120 | 1536x2752 | 1120 | 3072x5504 | 2000 |
| 16:9 | 688x384 | 747 | 1376x768 | 1120 | 2752x1536 | 1120 | 5504x3072 | 2000 |
| 21:9 | 792x168 | 747 | 1584x672 | 1120 | 3168x1344 | 1120 | 6336x2688 | 2000 |
3.1 Pro Image
| आसपेक्ट रेशियो | 1K रिज़ॉल्यूशन | 1,000 टोकन | 2K रिज़ॉल्यूशन | 2,000 टोकन | 4K रिज़ॉल्यूशन | 4 हज़ार टोकन |
|---|---|---|---|---|---|---|
| 1:1 | 1024x1024 | 1120 | 2048x2048 | 1120 | 4096x4096 | 2000 |
| 2:3 | 848x1264 | 1120 | 1696x2528 | 1120 | 3392x5056 | 2000 |
| 3:2 | 1264x848 | 1120 | 2528x1696 | 1120 | 5056x3392 | 2000 |
| 3:4 | 896x1200 | 1120 | 1792x2400 | 1120 | 3584x4800 | 2000 |
| 4:3 | 1200x896 | 1120 | 2400x1792 | 1120 | 4800x3584 | 2000 |
| 4:5 | 928x1152 | 1120 | 1856x2304 | 1120 | 3712x4608 | 2000 |
| 5:4 | 1152x928 | 1120 | 2304x1856 | 1120 | 4608x3712 | 2000 |
| 9:16 | 768x1376 | 1120 | 1536x2752 | 1120 | 3072x5504 | 2000 |
| 16:9 | 1376x768 | 1120 | 2752x1536 | 1120 | 5504x3072 | 2000 |
| 21:9 | 1584x672 | 1120 | 3168x1344 | 1120 | 6336x2688 | 2000 |
Gemini 2.5 Flash की इमेज
| आसपेक्ट रेशियो | रिज़ॉल्यूशन | टोकन |
|---|---|---|
| 1:1 | 1024x1024 | 1290 |
| 2:3 | 832x1248 | 1290 |
| 3:2 | 1248x832 | 1290 |
| 3:4 | 864x1184 | 1290 |
| 4:3 | 1184x864 | 1290 |
| 4:5 | 896x1152 | 1290 |
| 5:4 | 1152x896 | 1290 |
| 9:16 | 768x1344 | 1290 |
| 16:9 | 1344x768 | 1290 |
| 21:9 | 1536x672 | 1290 |
मॉडल चुनना
इस्तेमाल के अपने उदाहरण के लिए, सबसे सही मॉडल चुनें.
Gemini 3.1 Flash Image (Nano Banana 2) को इमेज जनरेट करने के लिए इस्तेमाल करें. यह सबसे अच्छा मॉडल है. यह कीमत और इंतज़ार के समय के हिसाब से सबसे अच्छा परफ़ॉर्म करता है और इसमें सबसे ज़्यादा इंटेलिजेंस है. ज़्यादा जानकारी के लिए, मॉडल की कीमत और क्षमताएं वाला पेज देखें.
Gemini 3.1 Flash Lite Image (Nano Banana 2 Lite), इमेज जनरेट करने वाले मॉडल में सबसे कारगर मॉडल है. यह बहुत कम समय में इमेज जनरेट करता है. साथ ही, इमेज जनरेट करने और उनमें बदलाव करने के लिए कम शुल्क लेता है. ज़्यादा जानकारी के लिए, मॉडल की कीमत और सुविधाओं वाला पेज देखें.
Gemini 3 Pro Image (Nano Banana Pro) को प्रोफ़ेशनल ऐसेट प्रोडक्शन और मुश्किल निर्देशों के लिए डिज़ाइन किया गया है. इस मॉडल में ये सुविधाएं हैं: Google Search का इस्तेमाल करके, असल दुनिया से जुड़ी जानकारी देना. इसमें "सोचना" प्रोसेस डिफ़ॉल्ट रूप से शामिल होती है. यह प्रोसेस, जवाब जनरेट करने से पहले कंपोज़िशन को बेहतर बनाती है. साथ ही, यह 4K रिज़ॉल्यूशन तक की इमेज जनरेट कर सकता है. ज़्यादा जानकारी के लिए, मॉडल की कीमत और क्षमताएं वाला पेज देखें.
Gemini 2.5 Flash Image (Nano Banana) को तेज़ी से और असरदार तरीके से काम करने के लिए डिज़ाइन किया गया है. इस मॉडल को ज़्यादा वॉल्यूम और कम समय में पूरे होने वाले टास्क के लिए ऑप्टिमाइज़ किया गया है. साथ ही, यह 1024 पिक्सल के रिज़ॉल्यूशन पर इमेज जनरेट करता है. ज़्यादा जानकारी के लिए, मॉडल की कीमत और क्षमताएं पेज देखें.
Imagen का इस्तेमाल कब करें
Gemini में इमेज जनरेट करने की सुविधा के साथ-साथ, Gemini API के ज़रिए Imagen को भी ऐक्सेस किया जा सकता है. यह इमेज जनरेट करने वाला हमारा खास मॉडल है. बंद होने की तारीख से पहले माइग्रेट करने का प्लान बनाएं.
आगे क्या करना है
- Gemini API की मदद से वीडियो जनरेट करने का तरीका जानने के लिए, Veo गाइड देखें.
- Gemini के मॉडल के बारे में ज़्यादा जानने के लिए, Gemini के मॉडल लेख पढ़ें.