透過 Live API,您可以與 Gemini 展開低延遲的即時語音和視覺互動。這項服務可處理連續的音訊、圖片和文字,並立即以擬真語音回應,為使用者打造自然的對話體驗。
用途
Live API 可用於為各種產業建構即時語音代理程式,包括:
- 電子商務和零售:提供個人化建議的購物助理,以及解決顧客問題的支援代理。
- 遊戲:互動式非玩家角色 (NPC)、遊戲內輔助助理,以及遊戲內容的即時翻譯。
- 新一代介面:在機器人、智慧眼鏡和車輛中,提供支援語音和視訊的體驗。
- 醫療保健:為病患提供支援和教育資訊的健康夥伴。
- 金融服務:AI 顧問提供財富管理和投資建議。
- 教育:AI 導師和學習夥伴,提供個人化指導和意見回饋。
- 翻譯和本地化:即時翻譯口語對話,延遲時間短,可順暢進行多語言溝通。
主要功能與特色
Live API 提供完整的功能,可建構強大的語音代理程式:
- 支援多種語言: 支援 70 種語言。
- 插話: 使用者隨時可以打斷模型,進行回應式互動。
- 使用工具: 整合函式呼叫和 Google 搜尋等工具,進行動態互動。
- 音訊轉錄稿: 提供使用者輸入內容和模型輸出內容的文字轉錄稿。
- 主動式語音: 可控制模型的回覆時間和情境。
- 情感對話: 根據使用者輸入內容的措辭調整回覆風格和語氣。
- 即時翻譯: 即時翻譯語音內容,支援超過 70 種語言。
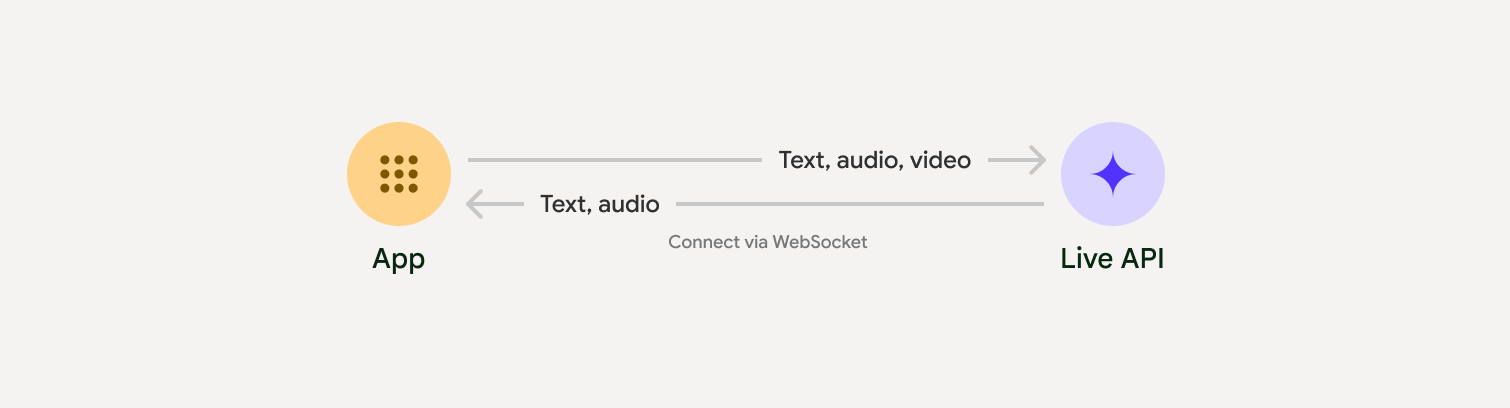
技術規格
下表列出 Live API 的技術規格:
| 類別 | 詳細資料 |
|---|---|
| 輸入模態 | 音訊 (原始 16 位元 PCM 音訊,16 kHz,小端序)、圖片 (JPEG <= 1 FPS)、文字 |
| 輸出模態 | 音訊 (原始 16 位元 PCM 音訊,24 kHz,小端序) |
| 通訊協定 | 具狀態的 WebSocket 連線 (WSS) |
選擇導入方式
整合 Live API 時,您需要選擇下列其中一種實作方式:
- 伺服器對伺服器:後端會使用 WebSockets 連線至 Live API。一般來說,用戶端會將串流資料 (音訊、影片、文字) 傳送至伺服器,然後伺服器會將資料轉送至 Live API。
- 用戶端到伺服器:前端程式碼會使用 WebSockets 直接連線至 Live API 來串流資料,略過後端。
開始使用
選取與開發環境相符的指南:
與合作夥伴整合
如要簡化即時音訊和視訊應用程式的開發作業,您可以透過 WebRTC 或 WebSocket 使用支援 Gemini Live API 的第三方整合服務。
LiveKit
搭配 LiveKit Agents 使用 Gemini Live API。
Pipecat by Daily
使用 Gemini Live 和 Pipecat 建立即時 AI 聊天機器人。
Software Mansion 的 Fishjam
使用 Fishjam 建立即時影像和音訊串流應用程式。
Stream 的 Vision Agents
使用 Vision Agents 建構即時語音和視訊 AI 應用程式。
Voximplant
使用 Voximplant 將撥入和撥出電話連線至 Live API。
Agora
使用 Agora 建構即時對話式 AI 應用程式。
Firebase AI SDK
使用 Firebase AI Logic 開始使用 Gemini Live API。