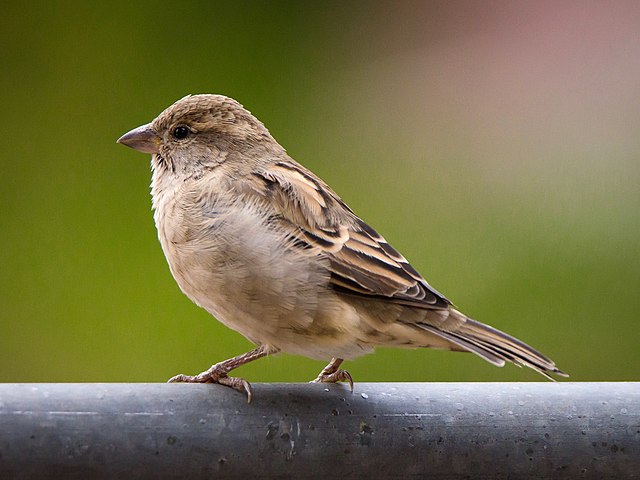
圖片分類器工作可讓您對圖片進行分類。您可以使用這項工作,在訓練期間定義的一組類別中,找出圖片代表的內容。本操作說明將說明如何在 iOS 應用程式中使用圖片分類器。您可以在 GitHub 上找到這些操作說明中所述的程式碼範例。
您可以查看這個網頁示範,瞭解這項工作的實際運作情形。如要進一步瞭解此任務的功能、模型和設定選項,請參閱總覽。
程式碼範例
MediaPipe Tasks 範例程式碼是 iOS 圖像分類器應用程式的基本實作。這個範例會使用實體 iOS 裝置的相機持續分類物件,也可以使用裝置相片庫中的圖片和影片,以靜態方式分類物件。
您可以使用這個應用程式做為自有 iOS 應用程式的起點,或是在修改現有應用程式時參考。圖像分類器範例程式碼託管於 GitHub。
下載程式碼
以下操作說明說明如何使用 git 指令列工具,建立範例程式碼的本機副本。
下載程式碼範例:
使用下列指令複製 Git 存放區:
git clone https://github.com/google-ai-edge/mediapipe-samples您可以選擇將 Git 例項設定為使用稀疏檢查,這樣您就只會取得 Image Classifier 範例應用程式的檔案:
cd mediapipe-samples
git sparse-checkout init --cone
git sparse-checkout set examples/image_classification/ios/
建立範例程式碼的本機版本後,您可以安裝 MediaPipe 工作程式庫、使用 Xcode 開啟專案,然後執行應用程式。如需操作說明,請參閱 iOS 設定指南。
重要元件
以下檔案包含圖像分類器範例應用程式的重要程式碼:
- ImageClassifierService.swift:初始化圖片分類器、處理模型選取作業,並對輸入資料執行推論。
- CameraViewController.swift:實作即時攝影機動態饋給輸入模式的 UI,並將結果以視覺化方式呈現。
- MediaLibraryViewController.swift 為靜態影像和影片檔案輸入模式實作 UI,並將結果以視覺化方式呈現。
設定
本節將說明設定開發環境和程式碼專案以使用圖像分類器的關鍵步驟。如要進一步瞭解如何設定開發環境以使用 MediaPipe 工作,包括平台版本需求,請參閱 iOS 專用設定指南。
依附元件
Image Classifier 會使用 MediaPipeTasksVision 程式庫,必須使用 CocoaPods 安裝。這個程式庫與 Swift 和 Objective-C 應用程式相容,且不需要任何額外的語言專屬設定。
如需在 macOS 上安裝 CocoaPods 的操作說明,請參閱 CocoaPods 安裝指南。如需有關如何為應用程式建立包含必要 Pod 的 Podfile 的操作說明,請參閱「使用 CocoaPods」一文。
使用下列程式碼,在 Podfile 中新增 MediaPipeTasksVision pod:
target 'MyImageClassifierApp' do
  use_frameworks!
  pod 'MediaPipeTasksVision'
end
如果您的應用程式包含單元測試目標,請參閱「iOS 設定指南」,進一步瞭解如何設定 Podfile。
型號
MediaPipe 圖片分類器工作需要訓練的模型與此工作相容。如要進一步瞭解 Image Classifier 可用的訓練模型,請參閱任務總覽的「模型」一節。
選取並下載模型,然後使用 Xcode 將模型新增至專案目錄。如需在 Xcode 專案中新增檔案的操作說明,請參閱「管理 Xcode 專案中的檔案和資料夾」。
使用 BaseOptions.modelAssetPath 屬性指定應用程式套件中的模型路徑。如需程式碼範例,請參閱下一節。
建立工作
您可以呼叫其中一個初始化器,建立 Image Classifier 工作。ImageClassifier(options:) 初始化函式會設定設定選項的值,包括執行模式、顯示名稱語言代碼、結果上限、信心閾值、類別許可清單和拒絕清單。
如果您不需要使用自訂設定選項來初始化 Image Classifier,可以使用 ImageClassifier(modelPath:) 初始化工具,以預設選項建立 Image Classifier。如要進一步瞭解設定選項,請參閱「設定總覽」。
圖片分類器工作支援 3 種輸入資料類型:靜態圖片、影片檔案和即時影片串流。根據預設,ImageClassifier(modelPath:) 會初始化靜態圖片的工作。如果您希望工作能夠初始化,以便處理影片檔案或直播影片串流,請使用 ImageClassifier(options:) 指定影片或直播的執行模式。直播模式也需要額外的 imageClassifierLiveStreamDelegate 設定選項,才能讓圖片分類器以非同步方式將圖片分類結果傳送至委派函式。
請選擇對應於執行模式的分頁,瞭解如何建立工作並執行推論。
Swift
圖片
import MediaPipeTasksVision

let modelPath = Bundle.main.path(forResource: "model",
                                      ofType: "tflite")

let options = ImageClassifierOptions()
options.baseOptions.modelAssetPath = modelPath
options.runningMode = .image
options.maxResults = 5

let imageClassifier = try ImageClassifier(options: options)
影片
import MediaPipeTasksVision

let modelPath = Bundle.main.path(forResource: "model",
                                      ofType: "tflite")

let options = ImageClassifierOptions()
options.baseOptions.modelAssetPath = modelPath
options.runningMode = .video
options.maxResults = 5

let imageClassifier = try ImageClassifier(options: options)
直播
import MediaPipeTasksVision

// Class that conforms to the `ImageClassifierLiveStreamDelegate` protocol and
// implements the method that the image classifier calls once it
// finishes performing classification on each input frame.
class ImageClassifierResultProcessor: NSObject, ImageClassifierLiveStreamDelegate {

   func imageClassifier(
    _ imageClassifier: ImageClassifier,
    didFinishClassification result: ImageClassifierResult?,
    timestampInMilliseconds: Int,
    error: Error?) {

    // Process the image classifier result or errors here.

  }
}

let modelPath = Bundle.main.path(
  forResource: "model",
  ofType: "tflite")

let options = ImageClassifierOptions()
options.baseOptions.modelAssetPath = modelPath
options.runningMode = .liveStream
options.maxResults = 5

// Assign an object of the class to the `imageClassifierLiveStreamDelegate`
// property.
let processor = ImageClassifierResultProcessor()
options.imageClassifierLiveStreamDelegate = processor

let imageClassifier = try ImageClassifier(options: options)
Objective-C
圖片
@import MediaPipeTasksVision;

NSString *modelPath = [[NSBundle mainBundle] pathForResource:@"model"
                                                      ofType:@"tflite"];

MPPImageClassifierOptions *options = [[MPPImageClassifierOptions alloc] init];
options.baseOptions.modelAssetPath = modelPath;
options.runningMode = MPPRunningModeImage;
options.maxResults = 5;

MPPImageClassifier *imageClassifier =
      [[MPPImageClassifier alloc] initWithOptions:options error:nil];
影片
@import MediaPipeTasksVision;

NSString *modelPath = [[NSBundle mainBundle] pathForResource:@"model"
                                                      ofType:@"tflite"];

MPPImageClassifierOptions *options = [[MPPImageClassifierOptions alloc] init];
options.baseOptions.modelAssetPath = modelPath;
options.runningMode = MPPRunningModeVideo;
options.maxResults = 5;

MPPImageClassifier *imageClassifier =
      [[MPPImageClassifier alloc] initWithOptions:options error:nil];
直播
@import MediaPipeTasksVision; // Class that conforms to the `MPPImageClassifierLiveStreamDelegate` protocol // and implements the method that the image classifier calls once it finishes // performing classification on each input frame. @interface APPImageClassifierResultProcessor : NSObject@end @implementation APPImageClassifierResultProcessor - (void)imageClassifier:(MPPImageClassifier *)imageClassifier didFinishClassificationWithResult:(MPPImageClassifierResult *)imageClassifierResult timestampInMilliseconds:(NSInteger)timestampInMilliseconds error:(NSError *)error { // Process the image classifier result or errors here. } @end NSString *modelPath = [[NSBundle mainBundle] pathForResource:@"model" ofType:@"tflite"]; MPPImageClassifierOptions *options = [[MPPImageClassifierOptions alloc] init]; options.baseOptions.modelAssetPath = modelPath; options.runningMode = MPPRunningModeLiveStream; options.maxResults = 5; // Assign an object of the class to the `imageClassifierLiveStreamDelegate` // property. APPImageClassifierResultProcessor *processor = [APPImageClassifierResultProcessor new]; options.imageClassifierLiveStreamDelegate = processor; MPPImageClassifier *imageClassifier = [[MPPImageClassifier alloc] initWithOptions:options error:nil];
設定選項
此工作包含下列 iOS 應用程式的設定選項:
| 選項名稱 | 說明 | 值範圍 | 預設值 |
|---|---|---|---|
runningMode |
設定工作執行模式。共有三種模式: IMAGE:單一圖片輸入模式。 VIDEO:影片解碼影格模式。 LIVE_STREAM:輸入資料 (例如來自攝影機的資料) 的直播模式。在這個模式中,必須呼叫 resultListener,才能設定事件監聽器,以非同步方式接收結果。 |
{RunningMode.image, RunningMode.video, RunningMode.liveStream} |
RunningMode.image |
displayNamesLocale |
設定標籤語言,用於工作模型中繼資料中提供的顯示名稱 (如有)。預設值為英文的 en。您可以使用 TensorFlow Lite Metadata Writer API,在自訂模型的中繼資料中新增本地化標籤 |
語言代碼 | en |
maxResults |
設定要傳回的最高分數分類結果選用數量上限。如果小於 0,則會傳回所有可用的結果。 | 任何正數 | -1 |
scoreThreshold |
設定預測分數門檻,覆寫模型中繼資料中提供的門檻 (如果有)。低於這個值的結果會遭到拒絕。 | 任何浮點 | 未設定 |
categoryAllowlist |
設定允許的選項類別名稱清單。如果不為空白,系統會篩除類別名稱不在這個集合中的分類結果。系統會忽略重複或不明的類別名稱。這個選項與 categoryDenylist 互斥,如果同時使用這兩個選項,系統會傳回錯誤。 |
任何字串 | 未設定 |
categoryDenylist |
設定選用的不允許類別名稱清單。如果不為空白,則系統會篩除類別名稱位於此組合的分類結果。系統會忽略重複或不明的類別名稱。這個選項與 categoryAllowlist 互斥,如果同時使用這兩個選項,會導致錯誤。 |
任何字串 | 未設定 |
resultListener |
在 Image Classifier 處於即時串流模式時,將結果事件監聽器設為以非同步方式接收分類結果。只有在執行模式設為 LIVE_STREAM 時,才能使用 |
不適用 | 未設定 |
直播設定
當執行模式設為即時串流時,圖像分類器需要額外的 imageClassifierLiveStreamDelegate 設定選項,才能讓分類器以非同步方式提供分類結果。委派程式會實作 imageClassifier(_:didFinishClassification:timestampInMilliseconds:error:) 方法,Image Classifier 會在處理每個影格的分類結果後呼叫這個方法。
| 選項名稱 | 說明 | 值範圍 | 預設值 |
|---|---|---|---|
imageClassifierLiveStreamDelegate |
讓圖片分類工具在直播模式下以非同步方式接收分類結果。將例項設為此屬性的類別必須實作 imageClassifier(_:didFinishClassification:timestampInMilliseconds:error:) 方法。 |
不適用 | 未設定 |
準備資料
您必須先將輸入圖片或影格轉換為 MPImage 物件,再傳送至圖片分類器。MPImage 支援不同類型的 iOS 圖片格式,並可在任何執行模式下用於推論。如要進一步瞭解 MPImage,請參閱 MPImage API。
請根據用途和應用程式所需的執行模式,選擇 iOS 圖片格式。MPImage 接受 UIImage、CVPixelBuffer 和 CMSampleBuffer iOS 圖片格式。
UIImage
UIImage 格式非常適合下列執行模式:
圖片:應用程式套件、使用者相片庫或檔案系統中的圖片,如果以
UIImage圖片格式編碼,即可轉換為MPImage物件。影片:使用 AVAssetImageGenerator 將影片影格擷取為 CGImage 格式,然後轉換為
UIImage圖片。
Swift
// Load an image on the user's device as an iOS `UIImage` object.

// Convert the `UIImage` object to a MediaPipe's Image object having the default
// orientation `UIImage.Orientation.up`.
let image = try MPImage(uiImage: image)
Objective-C
// Load an image on the user's device as an iOS `UIImage` object.

// Convert the `UIImage` object to a MediaPipe's Image object having the default
// orientation `UIImageOrientationUp`.
MPImage *image = [[MPPImage alloc] initWithUIImage:image error:nil];
這個範例會使用預設的 UIImage.Orientation.Up 方向初始化 MPImage。您可以使用任何支援的 UIImage.Orientation 值初始化 MPImage。圖像分類器不支援鏡像方向,例如 .upMirrored、.downMirrored、.leftMirrored、.rightMirrored。
如要進一步瞭解 UIImage,請參閱 UIImage Apple 開發人員說明文件。
CVPixelBuffer
CVPixelBuffer 格式非常適合用於產生影格,並使用 iOS CoreImage 架構進行處理的應用程式。
CVPixelBuffer 格式非常適合下列執行模式:
圖片:如果應用程式在使用 iOS 的
CoreImage架構進行一些處理後產生CVPixelBuffer圖片,則可在圖片執行模式下傳送至圖片分類器。影片:可將影片影格轉換為
CVPixelBuffer格式進行處理,然後以影片模式傳送至圖片分類器。直播:使用 iOS 相機產生影格時,應用程式可能會先將影格轉換為
CVPixelBuffer格式進行處理,再以直播模式傳送至圖像分類器。
Swift
// Obtain a CVPixelBuffer.

// Convert the `CVPixelBuffer` object to a MediaPipe's Image object having the default
// orientation `UIImage.Orientation.up`.
let image = try MPImage(pixelBuffer: pixelBuffer)
Objective-C
// Obtain a CVPixelBuffer.

// Convert the `CVPixelBuffer` object to a MediaPipe's Image object having the
// default orientation `UIImageOrientationUp`.
MPImage *image = [[MPPImage alloc] initWithUIImage:image error:nil];
如要進一步瞭解 CVPixelBuffer,請參閱 CVPixelBuffer Apple 開發人員說明文件。
CMSampleBuffer
CMSampleBuffer 格式會儲存統一媒體類型的媒體樣本,非常適合直播執行模式。iOS AVCaptureVideoDataOutput 會以 CMSampleBuffer 格式,以非同步方式傳送 iOS 攝影機的即時影格。
Swift
// Obtain a CMSampleBuffer.

// Convert the `CMSampleBuffer` object to a MediaPipe's Image object having the default
// orientation `UIImage.Orientation.up`.
let image = try MPImage(sampleBuffer: sampleBuffer)
Objective-C
// Obtain a `CMSampleBuffer`.

// Convert the `CMSampleBuffer` object to a MediaPipe's Image object having the
// default orientation `UIImageOrientationUp`.
MPImage *image = [[MPPImage alloc] initWithSampleBuffer:sampleBuffer error:nil];
如要進一步瞭解 CMSampleBuffer,請參閱 CMSampleBuffer Apple 開發人員說明文件。
執行工作
如要執行圖片分類器,請使用指派的執行模式專用的 classify() 方法:
- 靜態圖片:
classify(image:) - 影片:
classify(videoFrame:timestampInMilliseconds:) - livestream:
classifyAsync(image:timestampInMilliseconds:)
圖片分類器會傳回輸入圖片或影格內物件的可能類別。
以下程式碼範例顯示如何在這些不同執行模式中執行 Image Classifier 的基本範例:
Swift
圖片
let result = try imageClassifier.classify(image: image)
影片
let result = try imageClassifier.classify(
  videoFrame: image,
  timestampInMilliseconds: timestamp)
直播
try imageClassifier.classifyAsync(
  image: image,
  timestampInMilliseconds: timestamp)
Objective-C
圖片
MPPImageClassifierResult *result = [imageClassifier classifyImage:image
                                                            error:nil];
影片
MPPImageClassifierResult *result = [imageClassifier classifyVideoFrame:image
                                               timestampInMilliseconds:timestamp
                                                                 error:nil];
直播
BOOL success = [imageClassifier classifyAsyncImage:image
                          timestampInMilliseconds:timestamp
                                            error:nil];
圖像分類器程式碼範例會進一步說明這些模式的實作方式,包括 classify(image:)、classify(videoFrame:timestampInMilliseconds:) 和 classifyAsync(image:timestampInMilliseconds:)。程式碼範例可讓使用者在處理模式之間切換,但這可能不是您使用情境所需的功能。
注意事項:
在影片模式或直播模式下執行時,您也必須向圖像分類器工作提供輸入影格時間戳記。
在圖片或影片模式下執行時,圖片分類器工作會阻斷目前執行緒,直到處理完輸入圖片或影格為止。為避免阻斷目前執行緒,請使用 iOS Dispatch 或 NSOperation 架構,在背景執行緒中執行處理作業。
在直播模式下執行時,圖像分類器工作會立即傳回,且不會封鎖目前的執行緒。在處理每個輸入影格後,會使用分類結果呼叫
imageClassifier(_:didFinishClassification:timestampInMilliseconds:error:)方法。Image Classifier 會在專屬的逐一調度佇列上以非同步方式叫用此方法。如要在使用者介面上顯示結果,請在處理結果後將結果調度至主佇列。如果在圖像分類器工作忙於處理其他影格時呼叫classifyAsync函式,圖像分類器會忽略新的輸入影格。
處理及顯示結果
執行推論時,圖片分類器工作會傳回 ImageClassifierResult 物件,其中包含輸入圖片或影格內物件的可能類別清單。
以下是這項工作的輸出資料範例:
ImageClassifierResult:
 Classifications #0 (single classification head):
  head index: 0
  category #0:
   category name: "/m/01bwb9"
   display name: "Passer domesticus"
   score: 0.91406
   index: 671
  category #1:
   category name: "/m/01bwbt"
   display name: "Passer montanus"
   score: 0.00391
   index: 670
這項結果是透過以下方式取得:在以下裝置上執行鳥類分類器:

圖像分類器範例程式碼示範如何顯示工作傳回的分類結果,詳情請參閱程式碼範例。

