Nano Banana image generation
- Or build your own from prompts:
-


-
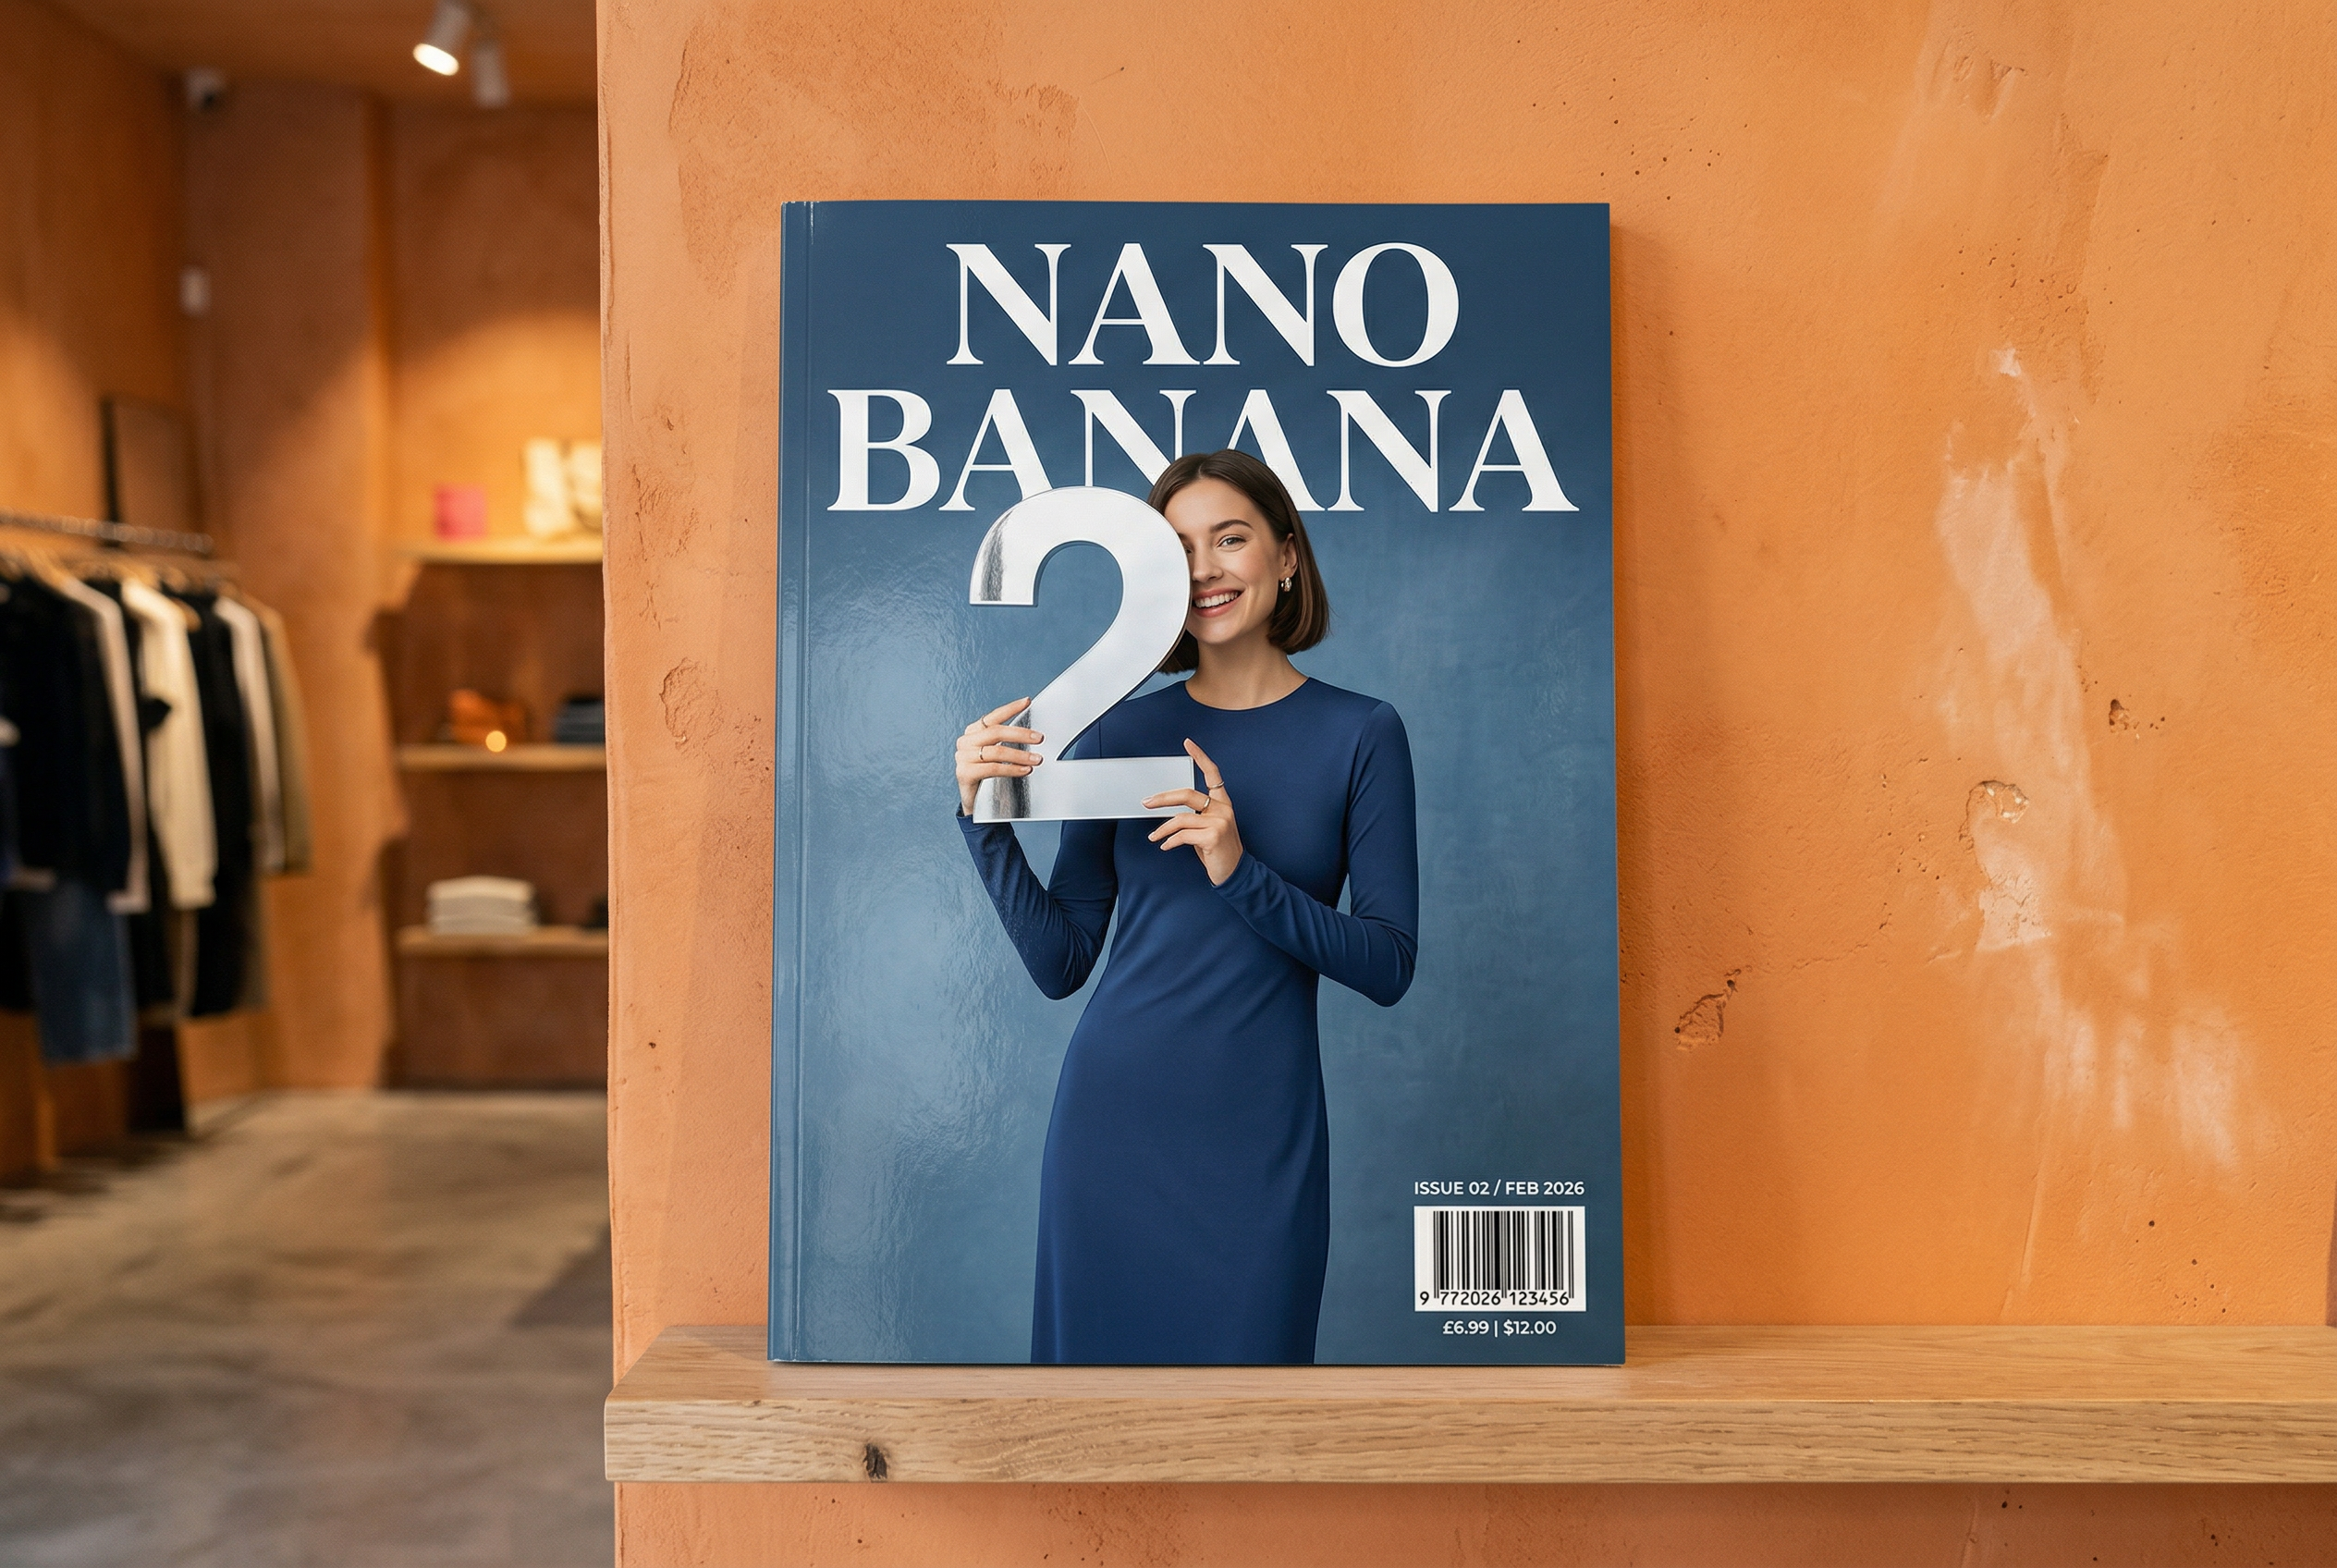
Generated by Nano Banana 2 Prompt: "A photo of a glossy magazine cover, the minimal blue cover has the large bold words Nano Banana. The text is in a serif font and fills the view. No other text. In front of the text there is a portrait of a person in a sleek and minimal dress. She is playfully holding the number 2, which is the focal point.
Put the issue number and "Feb 2026" date in the corner along with a barcode. The magazine is on a shelf against an orange plastered wall, within a designer store." -
Generated by Nano Banana Pro Prompt: "Present a clear, 45° top-down isometric miniature 3D cartoon scene of London, featuring its most iconic landmarks and architectural elements. Use soft, refined textures with realistic PBR materials and gentle, lifelike lighting and shadows. Integrate the current weather conditions directly into the city environment to create an immersive atmospheric mood. Use a clean, minimalistic composition with a soft, solid-colored background. At the top-center, place the title "London" in large bold text, a prominent weather icon beneath it, then the date (small text) and temperature (medium text). All text must be centered with consistent spacing, and may subtly overlap the tops of the buildings." -
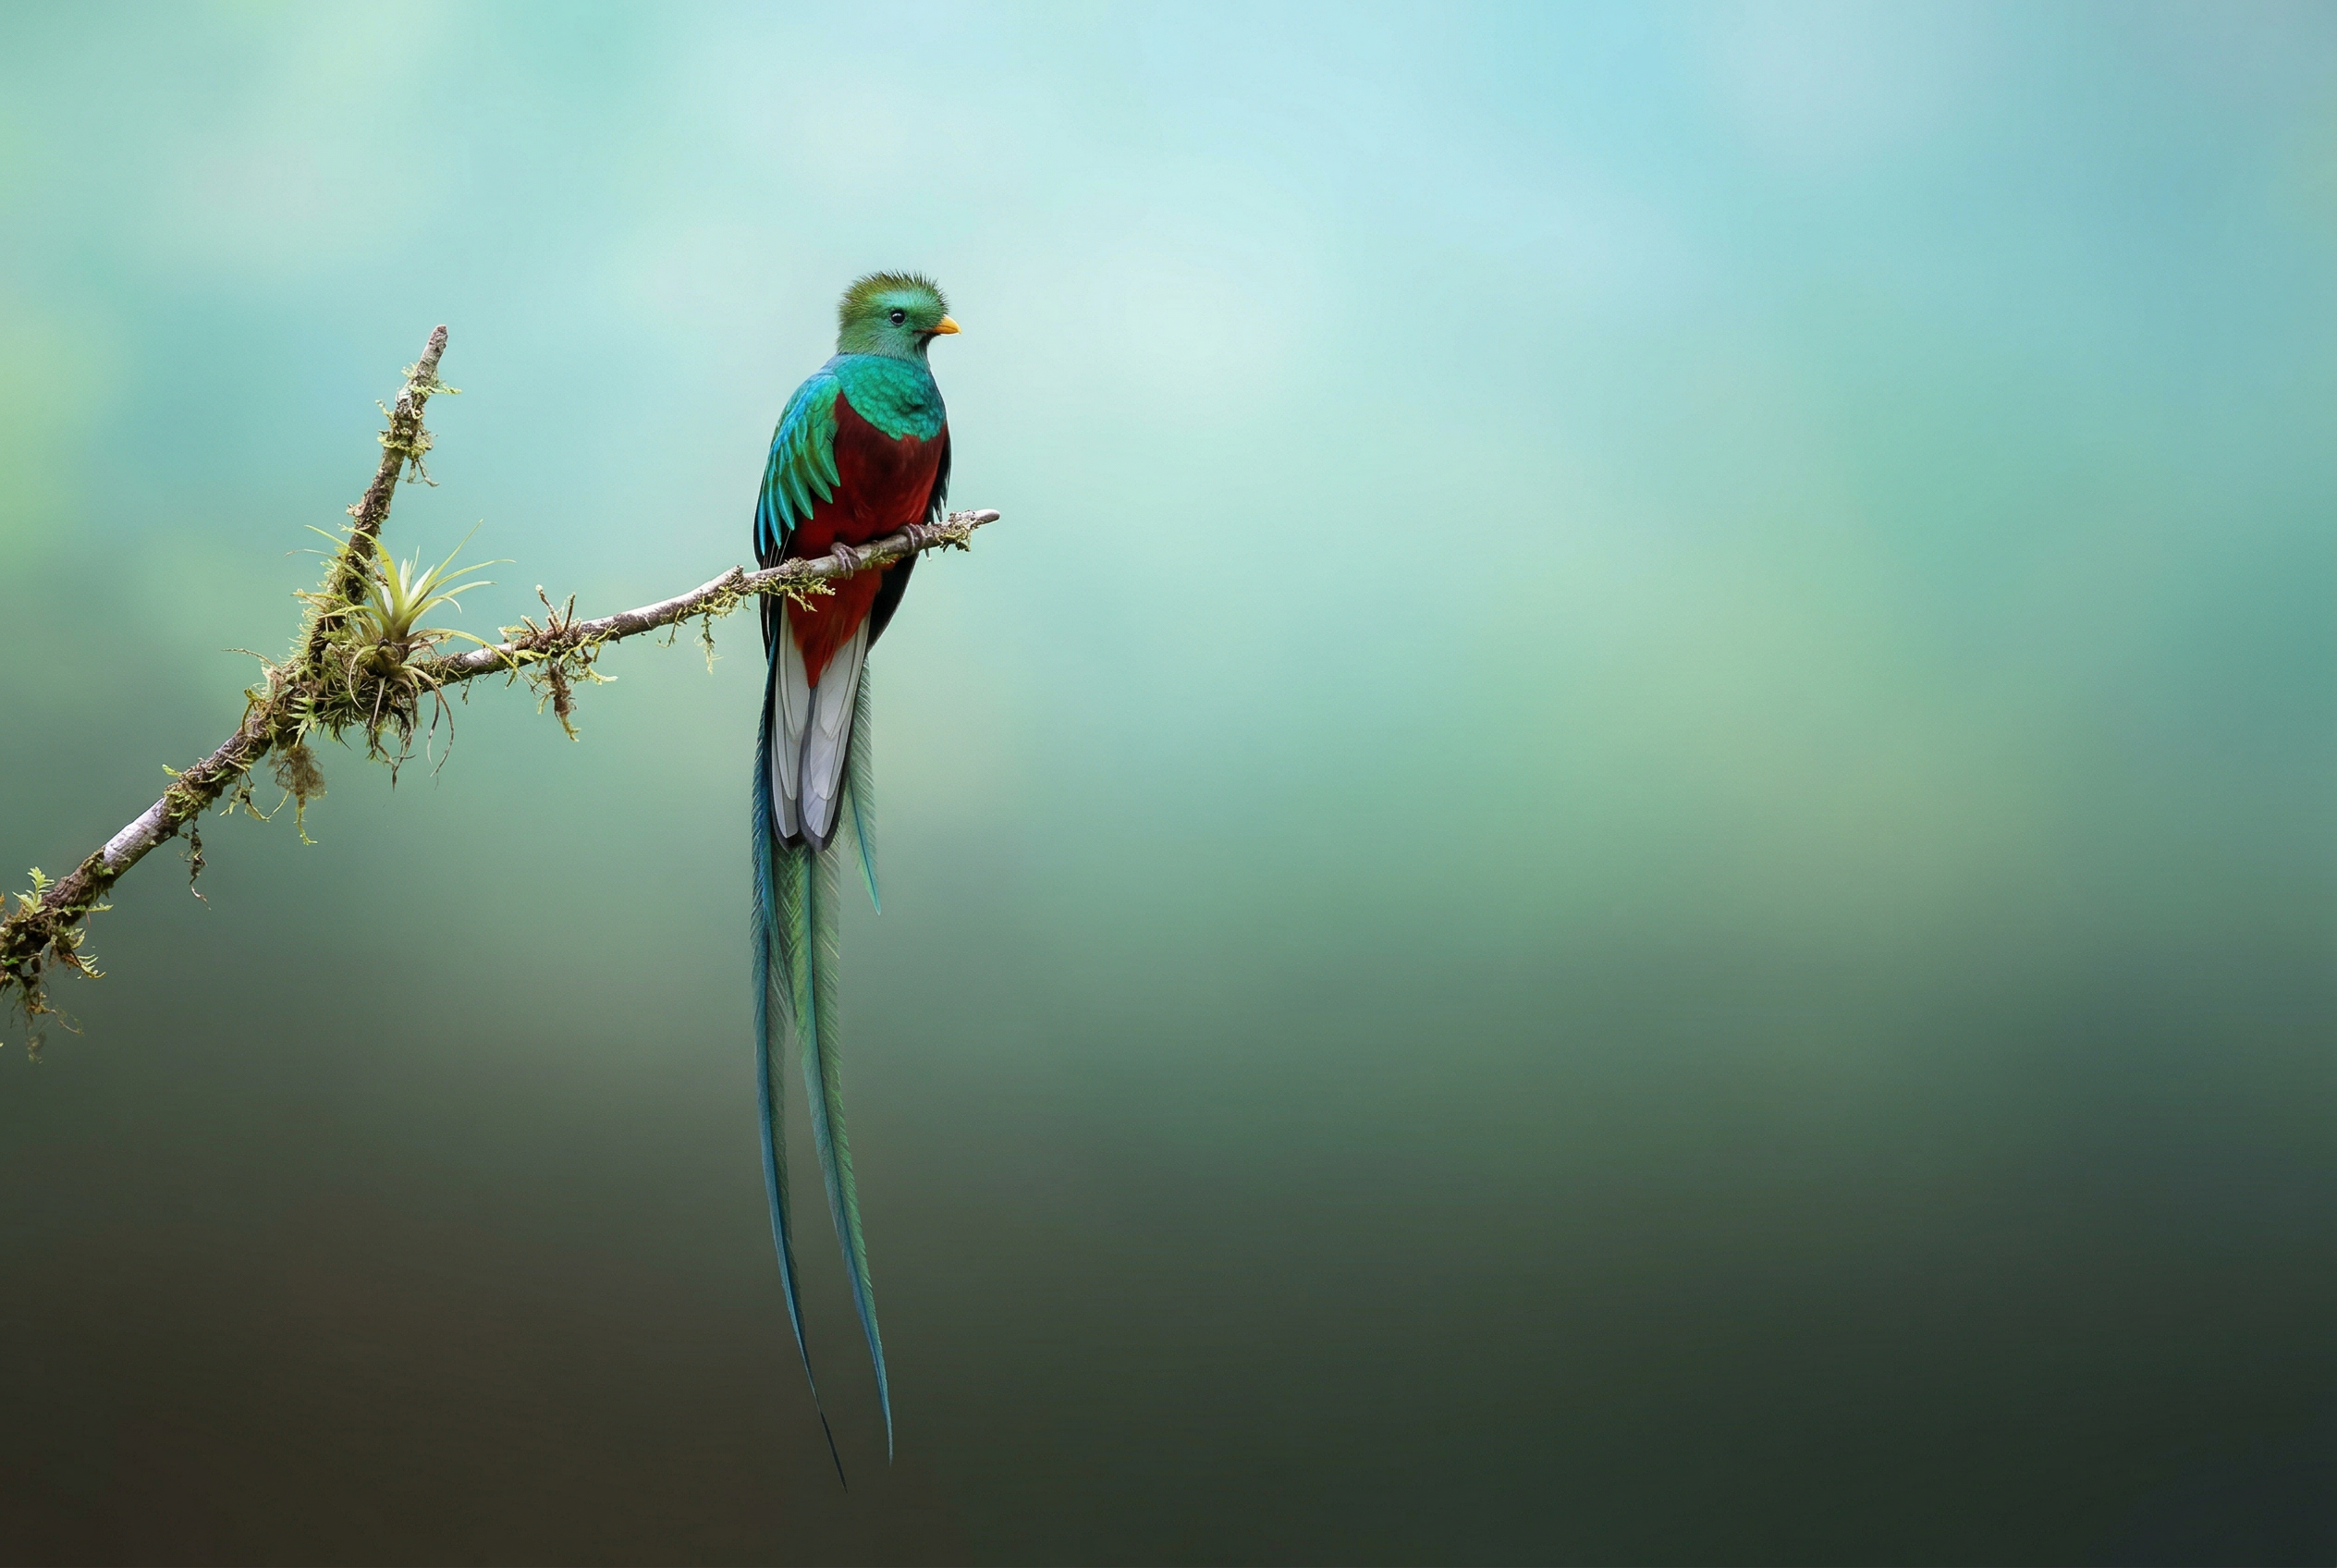
Generated by Nano Banana 2 Prompt: "Use image search to find accurate images of a resplendent quetzal bird. Create a beautiful 3:2 wallpaper of this bird, with a natural top to bottom gradient and minimal composition." -

Generated by Nano Banana Pro Prompt: "Put this logo on a high-end ad for a banana scented perfume. The logo is perfectly integrated into the bottle." -
Generated by Nano Banana Pro Prompt: "A photo of an everyday scene at a busy cafe serving breakfast. In the foreground is an anime man with blue hair, one of the people is a pencil sketch, another is a claymation person" -
Generated by Nano Banana Pro Prompt: "Use search to find how the Gemini 3 Flash launch has been received. Use this information to write a short article about it (with headings). Return a photo of the article as it appeared in a design focused glossy magazine. It is a photo of a single folded over page, showing the article about Gemini 3 Flash. One hero photo. Headline in serif." -
Generated by Nano Banana Pro Prompt: "An icon representing a cute dog. The background is white. Make the icons in a colorful and tactile 3D style. No text." -
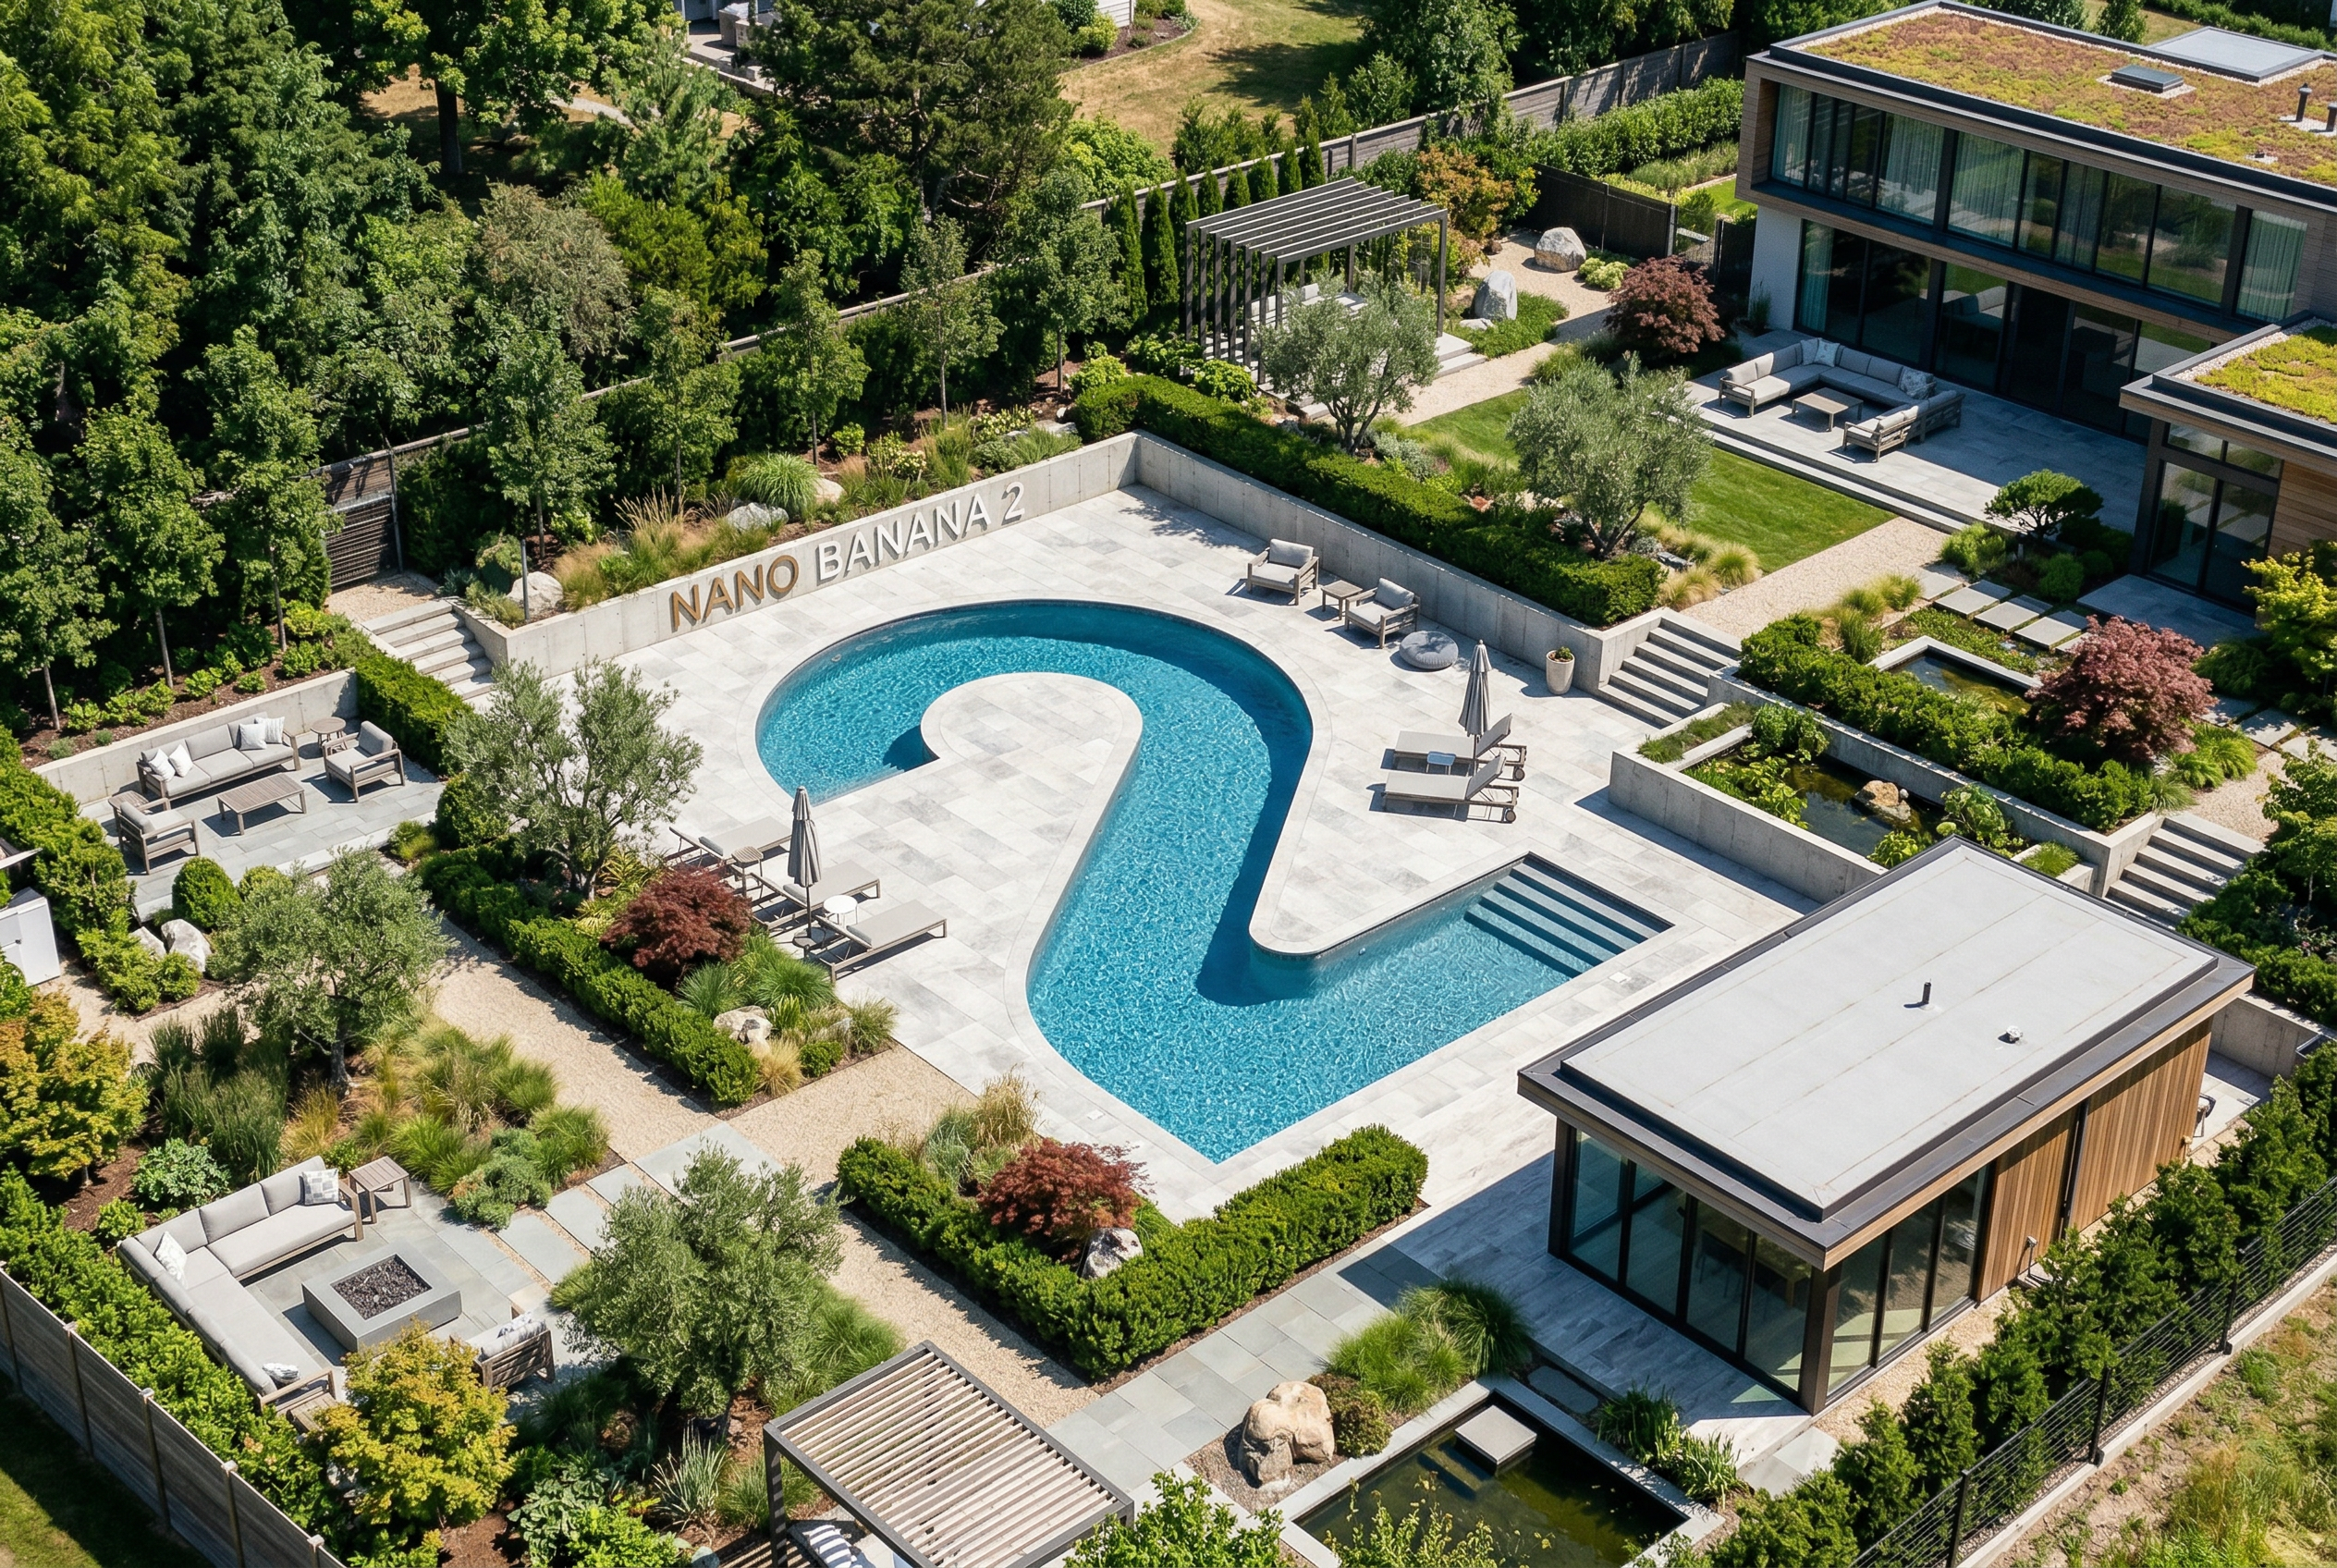
Generated by Nano Banana 2 Prompt: "Make a photo that is perfectly isometric. It is not a miniature, it is a captured photo that just happened to be perfectly isometric. It is a photo of a beautiful modern garden. There's a large 2 shaped pool and the words: Nano Banana 2."
Nano Banana is the name for Gemini's native image generation capabilities. Gemini can generate and process images conversationally with text, images, or a combination of both. This lets you create, edit, and iterate on visuals with unprecedented control.
Nano Banana refers to two distinct models available in the Gemini API:
- Nano Banana 2: The Gemini 3.1 Flash Image
model (
gemini-3.1-flash-image). This model serves as the high-efficiency counterpart to Gemini 3 Pro Image, optimized for speed and high-volume developer use cases. - Nano Banana Pro: The Gemini 3 Pro Image model
(
gemini-3-pro-image). This model is designed for professional asset production, utilizing advanced reasoning ("Thinking") to follow complex instructions and render high-fidelity text. - Nano Banana: The Gemini 2.5 Flash Image model
(
gemini-2.5-flash-image). This model is designed for speed and efficiency, optimized for high-volume, low-latency tasks.
All generated images include a SynthID watermark.
Image generation (text-to-image)
Python
from google import genai
from PIL import Image
import base64

client = genai.Client()

interaction = client.interactions.create(
    model="gemini-3.1-flash-image",
    input="Create a picture of a nano banana dish in a fancy restaurant with a Gemini theme",
)

with open("generated_image.png", "wb") as f:

    f.write(base64.b64decode(interaction.output_image.data))
JavaScript
import { GoogleGenAI } from "@google/genai";
import * as fs from "node:fs";

async function main() {

  const ai = new GoogleGenAI({});

  const prompt =
    "Create a picture of a nano banana dish in a fancy restaurant with a Gemini theme";

  const interaction = await ai.interactions.create({
    model: "gemini-3.1-flash-image",
    input: prompt,
  });
  const generatedImage = interaction.output_image;
  if (generatedImage) {
    const buffer = Buffer.from(generatedImage.data, "base64");
    fs.writeFileSync("gemini-native-image.png", buffer);
    console.log("Image saved as gemini-native-image.png");
  }
}

main();
REST
curl -s -X POST \
  "https://generativelanguage.googleapis.com/v1beta/interactions" \
  -H "x-goog-api-key: $GEMINI_API_KEY" \
  -H "Content-Type: application/json" \
  -d '{
    "model": "gemini-3.1-flash-image",
    "input": [
      {"type": "text", "text": "Create a picture of a nano banana dish in a fancy restaurant with a Gemini theme"}
    ]
  }'
You can retrieve generated image data by using the interaction.output_image
property, which returns the last generated image block. For details on
convenience properties, see the
Interactions overview.
Image editing (text-and-image-to-image)
Reminder: Make sure you have the necessary rights to any images you upload. Don't generate content that infringe on others' rights, including videos or images that deceive, harass, or harm. Your use of this generative AI service is subject to our Prohibited Use Policy.
Provide an image and use text prompts to add, remove, or modify elements, change the style, or adjust the color grading.
The following example demonstrates uploading base64 encoded images.
For multiple images, larger payloads, and supported MIME types, check the Image
understanding page.
Python
from google import genai
from PIL import Image
import base64

client = genai.Client()

with open("/path/to/cat_image.png", "rb") as f:
    image_bytes = f.read()

interaction = client.interactions.create(
    model="gemini-3.1-flash-image",
    input=[
        {
          "type": "text",
          "text": "Create a picture of a nano banana dish in a fancy restaurant with a Gemini theme"
        },
        {
            "type": "image",
            "data": base64.b64encode(image_bytes).decode('utf-8'),
            "mime_type": "image/png"
        }
    ],
)

with open("generated_image.png", "wb") as f:

    f.write(base64.b64decode(interaction.output_image.data))
JavaScript
import { GoogleGenAI } from "@google/genai";
import * as fs from "node:fs";

async function main() {

  const ai = new GoogleGenAI({});

  const imagePath = "path/to/cat_image.png";
  const imageData = fs.readFileSync(imagePath);
  const base64Image = imageData.toString("base64");

  const prompt = [
    { type: "text", text: "Create a picture of my cat eating a nano-banana in a" +
            "fancy restaurant under the Gemini constellation" },
    {
      type: "image",
      mime_type: "image/png",
      data: base64Image
    },
  ];

  const interaction = await ai.interactions.create({
    model: "gemini-3.1-flash-image",
    input: prompt,
  });
  const generatedImage = interaction.output_image;
  if (generatedImage) {
    const buffer = Buffer.from(generatedImage.data, "base64");
    fs.writeFileSync("gemini-native-image.png", buffer);
    console.log("Image saved as gemini-native-image.png");
  }
}

main();
REST
curl -s -X POST \
  "https://generativelanguage.googleapis.com/v1beta/interactions" \
    -H "x-goog-api-key: $GEMINI_API_KEY" \
    -H 'Content-Type: application/json' \
    -d "{
      \"model\": \"gemini-3.1-flash-image\",
      \"input\": [
        {\"type\": \"text\", \"text\": \"Create a picture of my cat eating a nano-banana in a fancy restaurant under the Gemini constellation\"},
        {
          \"type\": \"image\",
          \"mime_type\": \"image/jpeg\",
          \"data\": \"<BASE64_IMAGE_DATA>\"
        }
      ]
    }"
Multi-turn image editing
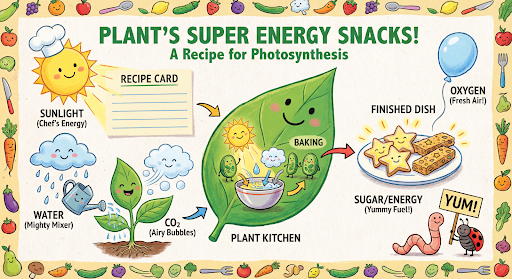
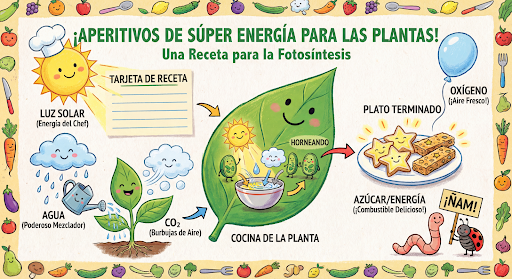
Keep generating and editing images conversationally. Multi-turn conversation is the recommended way to iterate on images. The following example shows a prompt to generate an infographic about photosynthesis.
Python
from google import genai
import base64

client = genai.Client()

interaction = client.interactions.create(
    model="gemini-3.1-flash-image",
    input="Create a vibrant infographic that explains photosynthesis as if it were a recipe for a plant's favorite food. Show the \"ingredients\" (sunlight, water, CO2) and the \"finished dish\" (sugar/energy). The style should be like a page from a colorful kids' cookbook, suitable for a 4th grader.",
    tools=[{"type": "google_search"}],
)

with open("photosynthesis.png", "wb") as f:

    f.write(base64.b64decode(interaction.output_image.data))
JavaScript
import { GoogleGenAI } from "@google/genai";
import * as fs from "node:fs";

const ai = new GoogleGenAI({});

async function main() {
  const interaction = await ai.interactions.create({
    model: "gemini-3.1-flash-image",
    input: "Create a vibrant infographic that explains photosynthesis as if it were a recipe for a plant's favorite food. Show the \"ingredients\" (sunlight, water, CO2) and the \"finished dish\" (sugar/energy). The style should be like a page from a colorful kids' cookbook, suitable for a 4th grader.",
    tools: [{"type": "google_search"}],
  });

  const generatedImage = interaction.output_image;
  if (generatedImage) {
    const buffer = Buffer.from(generatedImage.data, "base64");
    fs.writeFileSync("photosynthesis.png", buffer);
    console.log("Image saved as photosynthesis.png");
  }
}

await main();
REST
curl -s -X POST \
  "https://generativelanguage.googleapis.com/v1beta/interactions" \
  -H "x-goog-api-key: $GEMINI_API_KEY" \
  -H "Content-Type: application/json" \
  -d '{
    "model": "gemini-3.1-flash-image",
    "input": [
      {"type": "text", "text": "Create a vibrant infographic that explains photosynthesis as if it were a recipe for a plants favorite food. Show the \"ingredients\" (sunlight, water, CO2) and the \"finished dish\" (sugar/energy). The style should be like a page from a colorful kids cookbook, suitable for a 4th grader."}
    ],
    "tools": [{"type": "google_search"}]
  }'
You can then use the previous_interaction_id to change the language on the graphic to Spanish.
Python
interaction_2 = client.interactions.create(
    model="gemini-3.1-flash-image",
    input="Update this infographic to be in Spanish. Do not change any other elements of the image.",
    previous_interaction_id=interaction.id,
    response_format={
        "type": "image",
        "mime_type": "image/jpeg",
        "aspect_ratio": "16:9",
        "image_size": "2K"
    },
)

generated_image = interaction_2.output_image
if generated_image:
    with open("photosynthesis_spanish.png", "wb") as f:
        f.write(base64.b64decode(generated_image.data))
JavaScript
const interaction2 = await ai.interactions.create({
  model: "gemini-3.1-flash-image",
  input: "Update this infographic to be in Spanish. Do not change any other elements of the image.",
  previous_interaction_id: interaction.id,
  response_format: {
    type: "image",
    mime_type: "image/png",
    aspect_ratio: "16:9",
    image_size: "2K"
  },
});

const generatedImage = interaction2.output_image;
if (generatedImage) {
  const buffer = Buffer.from(generatedImage.data, "base64");
  fs.writeFileSync("photosynthesis_spanish.png", buffer);
}
REST
curl -s -X POST \
  "https://generativelanguage.googleapis.com/v1beta/interactions" \
  -H "x-goog-api-key: $GEMINI_API_KEY" \
  -H 'Content-Type: application/json' \
  -d '{
    "model": "gemini-3.1-flash-image",
    "input": "Update this infographic to be in Spanish. Do not change any other elements of the image.",
    "previous_interaction_id": "<PREVIOUS_INTERACTION_ID>",
    "response_format": {
      "type": "image",
      "mime_type": "image/jpeg",
      "aspect_ratio": "16:9",
      "image_size": "2K"
    }
  }'
New with Gemini 3 Image models
Gemini 3 offers state-of-the-art image generation and editing models. Gemini 3.1 Flash Image is optimized for speed and high-volume use-cases, and Gemini 3 Pro Image is optimized for professional asset production. Designed to tackle the most challenging workflows through advanced reasoning, they excel at complex, multi-turn creation and modification tasks.
- High-resolution output: Built-in generation capabilities for 1K, 2K, and 4K visuals.
- Gemini 3.1 Flash Image adds the smaller 512px (0.5K) resolution.
- Advanced text rendering: Capable of generating legible, stylized text for infographics, menus, diagrams, and marketing assets.
- Grounding with Google Search: The model can use Google Search as a tool to
verify facts and generate imagery based on real-time data (e.g., current
weather maps, stock charts, recent events).
- Gemini 3.1 Flash Image adds the integration of Google Image Search Grounding alongside Web Search.
- Thinking mode: The model utilizes a "thinking" process to reason through complex prompts. It generates interim "thought images" (visible in the backend but not charged) to refine the composition before producing the final high-quality output.
- Up to 14 reference images: You can now mix up to 14 reference images to produce the final image.
- New aspect ratios: Gemini 3.1 Flash Image adds 1:4, 4:1, 1:8, and 8:1 aspect ratios.
Use up to 14 reference images
Gemini 3 image models let you to mix up to 14 reference images. These 14 images can include the following:
| Gemini 3.1 Flash Image | Gemini 3 Pro Image |
|---|---|
| Up to 10 images of objects with high-fidelity to include in the final image | Up to 6 images of objects with high-fidelity to include in the final image |
| Up to 4 images of characters to maintain character consistency | Up to 5 images of characters to maintain character consistency |
| N/A | Up to 3 images to be used as style references |
Python
from google import genai
from google.genai import types
from PIL import Image
import base64

prompt = "An office group photo of these people, they are making funny faces."

client = genai.Client()

interaction = client.interactions.create(
    model="gemini-3.1-flash-image",
    input=[
        {
            "type": "text",
            "text": prompt,
        },
        {
            "type": "image",
            "data": base64.b64encode(image_bytes).decode('utf-8'),
            "mime_type": "image/png"
        },
        {
            "type": "image",
            "data": base64.b64encode(image_bytes).decode('utf-8'),
            "mime_type": "image/png"
        },
        {
            "type": "image",
            "data": base64.b64encode(image_bytes).decode('utf-8'),
            "mime_type": "image/png"
        },
        {
            "type": "image",
            "data": base64.b64encode(image_bytes).decode('utf-8'),
            "mime_type": "image/png"
        },
        {
            "type": "image",
            "data": base64.b64encode(image_bytes).decode('utf-8'),
            "mime_type": "image/png"
        },
    ],
    response_format={
        "type": "image",
        "aspect_ratio": "5:4",
        "image_size": "2K"
    },
)

with open("office.png", "wb") as f:

    f.write(base64.b64decode(interaction.output_image.data))
JavaScript
import { GoogleGenAI } from "@google/genai";
import * as fs from "node:fs";

async function main() {
  const ai = new GoogleGenAI({});

  const input = [
    {
      type: "text",
      text: "An office group photo of these people, they are making funny faces.",
    },
    { type: "image", mime_type: "image/jpeg", data: base64ImageFile1 },
    { type: "image", mime_type: "image/jpeg", data: base64ImageFile2 },
    { type: "image", mime_type: "image/jpeg", data: base64ImageFile3 },
    { type: "image", mime_type: "image/jpeg", data: base64ImageFile4 },
    { type: "image", mime_type: "image/jpeg", data: base64ImageFile5 },
  ];

  const interaction = await ai.interactions.create({
    model: "gemini-3.1-flash-image",
    input: input,
    response_format: {
      type: "image",
      aspect_ratio: "5:4",
      image_size: "2K",
    },
  });

  const buffer = Buffer.from(interaction.output_image.data, 'base64');

  fs.writeFileSync('office.png', buffer);
}

main();
REST
curl -s -X POST \
  "https://generativelanguage.googleapis.com/v1beta/interactions" \
    -H "x-goog-api-key: $GEMINI_API_KEY" \
    -H 'Content-Type: application/json' \
    -d "{
      \"model\": \"gemini-3.1-flash-image\",
      \"input\": [
        {\"type\": \"text\", \"text\": \"An office group photo of these people, they are making funny faces.\"},
        {\"type\": \"image\", \"mime_type\": \"image/png\", \"data\": \"<BASE64_DATA_IMG_1>\"},
        {\"type\": \"image\", \"mime_type\": \"image/png\", \"data\": \"<BASE64_DATA_IMG_2>\"},
        {\"type\": \"image\", \"mime_type\": \"image/png\", \"data\": \"<BASE64_DATA_IMG_3>\"},
        {\"type\": \"image\", \"mime_type\": \"image/png\", \"data\": \"<BASE64_DATA_IMG_4>\"},
        {\"type\": \"image\", \"mime_type\": \"image/png\", \"data\": \"<BASE64_DATA_IMG_5>\"}
      ],
      \"response_format\": {
        \"type\": \"image\",
        \"aspect_ratio\": \"5:4\",
        \"image_size\": \"2K\"
      }
    }"

Grounding with Google Search
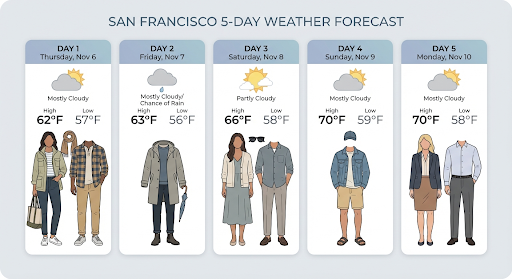
Use the Google Search tool to generate images based on real-time information, such as weather forecasts, stock charts, or recent events.
Note that when using Grounding with Google Search with image generation, image-based search results are not passed to the generation model and are excluded from the response (see Grounding with Google Image Search)
Python
from google import genai
from google.genai import types
import base64
prompt = "Visualize the current weather forecast for the next 5 days in San Francisco as a clean, modern weather chart. Add a visual on what I should wear each day"

client = genai.Client()

interaction = client.interactions.create(
    model="gemini-3.1-flash-image",
    input=prompt,
    tools=[{"type": "google_search"}],
    response_format={
        "type": "image",
        "mime_type": "image/jpeg",
        "aspect_ratio": "16:9"
    },
)

with open("weather.png", "wb") as f:

    f.write(base64.b64decode(interaction.output_image.data))
JavaScript
import { GoogleGenAI } from "@google/genai";
import * as fs from "node:fs";

async function main() {
  const ai = new GoogleGenAI({});

  const interaction = await ai.interactions.create({
    model: "gemini-3.1-flash-image",
    input: "Visualize the current weather forecast for the next 5 days in San Francisco as a clean, modern weather chart. Add a visual on what I should wear each day",
    tools: [{"type": "google_search"}],
    response_format: {
      type: "image",
      mime_type: "image/png",
      aspect_ratio: "16:9",
      image_size: "2K"
    },
  });

  const buffer = Buffer.from(interaction.output_image.data, 'base64');

  fs.writeFileSync('weather.png', buffer);
}

main();
REST
curl -s -X POST \
  "https://generativelanguage.googleapis.com/v1beta/interactions" \
  -H "x-goog-api-key: $GEMINI_API_KEY" \
  -H "Content-Type: application/json" \
  -d '{
    "model": "gemini-3.1-flash-image",
    "input": [
      {"type": "text", "text": "Visualize the current weather forecast for the next 5 days in San Francisco as a clean, modern weather chart. Add a visual on what I should wear each day"}
    ],
    "tools": [{"type": "google_search"}],
    "response_format": {
      "type": "image",
      "mime_type": "image/jpeg",
      "aspect_ratio": "16:9"
    }
  }'
The response includes google_search_call and google_search_result steps,
along with inline url_citation annotations on the text step:
google_search_result: Containssearch_suggestions, an HTML snippet for rendering search suggestions in your UI.url_citationannotations: Inline citations on the text step linking parts of the response to their web sources.
Grounding with Google Search for Images (3.1 Flash)
Grounding with Google Image Search allows models to use web images retrieved via Google Image Search as visual context for image generation. Image Search is a new search type within the existing Grounding with Google Search tool, functioning alongside standard Web Search.
To enable Image Search, configure the google_search tool in your API request
and specify image_search within the search_types array. Image Search can be
used independently or together with Web Search.
Python
from google import genai

client = genai.Client()

interaction = client.interactions.create(
    model="gemini-3.1-flash-image",
    input="A detailed painting of a Timareta butterfly resting on a flower",
    tools=[{
      "type": "google_search",
      "search_types": ["web_search", "image_search"]
    }]
)
JavaScript
import { GoogleGenAI } from "@google/genai";

async function main() {
  const ai = new GoogleGenAI({});

  const interaction = await ai.interactions.create({
    model: "gemini-3.1-flash-image",
    input: "A detailed painting of a Timareta butterfly resting on a flower",
    tools: [{
      "type": "google_search",
      "search_types": ["web_search", "image_search"]
    }]
  });
}

main();
REST
curl -s -X POST \
  "https://generativelanguage.googleapis.com/v1beta/interactions" \
  -H "x-goog-api-key: $GEMINI_API_KEY" \
  -H "Content-Type: application/json" \
  -d '{
    "model": "gemini-3.1-flash-image",
    "input": "A detailed painting of a Timareta butterfly resting on a flower",
    "tools": [{"type": "google_search", "search_types": ["web_search", "image_search"]}]
  }'
Display requirements
When you use Image Search within Grounding with Google Search, you must display
the search_suggestions from the google_search_result step. Full usage
requirements are detailed in the
Terms of Service.
Response
For grounded responses using image search, the API returns inline citations and attribution metadata as part of the response steps:
url_citationannotations: Inline citations on the text content block withinmodel_output, linking the generated content to its source.google_search_result: Containssearch_suggestions, an HTML snippet for rendering search suggestions in your UI.
Video-to-image generation (3.1 Flash)
Video-to-image generation allows you to generate new images using a video's context as a multimodal reference. This is useful for creating high-quality video thumbnails, cinematic posters, summary infographics, or new artwork inspired by a video scene.
During generation, the model analyzes the video frames in context to extract visual themes and key events, then uses them alongside your text prompt to synthesize the output image.
You can pass public YouTube URLs directly in your API request or upload local video files using the Files API.
Python
from google import genai
from google.genai import types
import base64

client = genai.Client()

interaction = client.interactions.create(
    model="gemini-3.1-flash-image",
    input=[
        {
            "type": "video",
            "uri": "https://www.youtube.com/watch?v=UTdfxFyOQTI",
            "mime_type": "video/mp4"
        },
        {"type": "text", "text": "Generate a poster image that captures the key themes of this video."}
    ],
    response_format={"type": "image", "aspect_ratio": "16:9"}
)

# Save the generated image part
for step in interaction.steps:
    if step.type == "model_output":
        for content_block in step.content:
            if content_block.type == "text":
                print(content_block.text)
            elif content_block.type == "image":
                with open("video_poster.png", "wb") as f:
                    f.write(base64.b64decode(content_block.data))
                print("Image saved as video_poster.png")
JavaScript
import { GoogleGenAI } from "@google/genai";
import * as fs from "node:fs";

async function main() {
  const ai = new GoogleGenAI({});

  const interaction = await ai.interactions.create({
    model: "gemini-3.1-flash-image",
    input: [
      {
        type: "video",
        uri: "https://www.youtube.com/watch?v=UTdfxFyOQTI",
        mime_type: "video/mp4"
      },
      { type: "text", text: "Generate a poster image that captures the key themes of this video." }
    ],
    response_format: {
      type: "image",
      aspect_ratio: "16:9"
    }
  });

  for (const step of interaction.steps) {
    if (step.type === "model_output") {
      for (const contentBlock of step.content) {
        if (contentBlock.type === "text") {
          console.log(contentBlock.text);
        } else if (contentBlock.type === "image") {
          const buffer = Buffer.from(contentBlock.data, "base64");
          fs.writeFileSync("video_poster.png", buffer);
          console.log("Image saved as video_poster.png");
        }
      }
    }
  }
}

main();
REST
curl -s -X POST \
  "https://generativelanguage.googleapis.com/v1beta/interactions" \
  -H "x-goog-api-key: $GEMINI_API_KEY" \
  -H 'Content-Type: application/json' \
  -d '{
    "model": "gemini-3.1-flash-image",
    "input": [
      {
        "type": "video",
        "uri": "https://www.youtube.com/watch?v=UTdfxFyOQTI",
        "mime_type": "video/mp4"
      },
      {
        "type": "text",
        "text": "Generate a poster image that captures the key themes of this video."
      }
    ],
    "response_format": {
      "type": "image",
      "aspect_ratio": "16:9"
    }
  }'
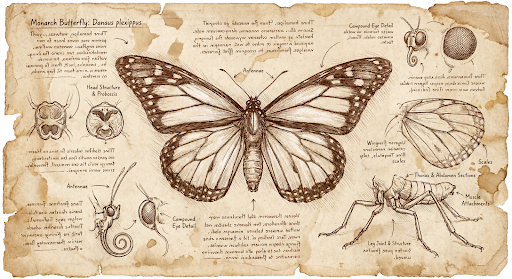
Generate images up to 4K resolution
Gemini 3 image models generate 1K images by default but can also output 2K,
4K, and 512px (05.K) (Gemini 3.1 Flash Image only) images. To generate higher
resolution assets, specify the image_size in the response_format.
You must use an uppercase 'K' (e.g. 512px (05.K), 1K, 2K, 4K). Lowercase parameters (e.g., 1k) will be rejected.
Python
from google import genai
from google.genai import types
import base64

prompt = "Da Vinci style anatomical sketch of a dissected Monarch butterfly. Detailed drawings of the head, wings, and legs on textured parchment with notes in English."

client = genai.Client()

interaction = client.interactions.create(
    model="gemini-3.1-flash-image",
    input=prompt,
    response_format={
        "type": "image",
        "mime_type": "image/jpeg",
        "aspect_ratio": "1:1",
        "image_size": "1K"
    },
)

print(interaction.output_text)

with open("butterfly.png", "wb") as f:

    f.write(base64.b64decode(interaction.output_image.data))
JavaScript
import { GoogleGenAI } from "@google/genai";
import * as fs from "node:fs";

async function main() {
  const ai = new GoogleGenAI({});

  const interaction = await ai.interactions.create({
    model: "gemini-3.1-flash-image",
    input: "Da Vinci style anatomical sketch of a dissected Monarch butterfly. Detailed drawings of the head, wings, and legs on textured parchment with notes in English.",
    response_format: {
      type: "image",
      mime_type: "image/png",
      aspect_ratio: "1:1",
      image_size: "1K",
    },
  });

  console.log(interaction.output_text);

  const buffer = Buffer.from(interaction.output_image.data, 'base64');

  fs.writeFileSync('butterfly.png', buffer);
}

main();
REST
curl -s -X POST \
  "https://generativelanguage.googleapis.com/v1beta/interactions" \
  -H "x-goog-api-key: $GEMINI_API_KEY" \
  -H "Content-Type: application/json" \
  -d '{
    "model": "gemini-3.1-flash-image",
    "input": "Da Vinci style anatomical sketch of a dissected Monarch butterfly. Detailed drawings of the head, wings, and legs on textured parchment with notes in English.",
    "response_format": {
      "type": "image",
      "mime_type": "image/jpeg",
      "aspect_ratio": "1:1",
      "image_size": "1K"
    }
  }'
The following is an example image generated from this prompt:
Thinking Process
Gemini 3 image models are thinking models that use a reasoning process ("Thinking") for complex prompts. This feature is enabled by default and cannot be disabled in the API. To learn more about the thinking process, see the Gemini Thinking guide.
The model generates up to two interim images to test composition and logic. The last image within Thinking is also the final rendered image.
You can check the thoughts that lead to the final image being produced.
Python
for step in interaction.steps:
    if step.type == "thought":
        for content_block in step.summary:
            if content_block.type == "text":
                print(content_block.text)
            elif content_block.type == "image":
                image = Image.open(io.BytesIO(base64.b64decode(content_block.data)))
                image.show()
JavaScript
for (const step of interaction.steps) {
  if (step.type === "thought") {
    for (const contentBlock of step.summary) {
      if (contentBlock.type === "text") {
        console.log(contentBlock.text);
      } else if (contentBlock.type === "image") {
        const buffer = Buffer.from(contentBlock.data, 'base64');
        fs.writeFileSync('thought_image.png', buffer);
      }
    }
  }
}
Interleaved text and images
While standard image generation models only output images, some advanced Gemini
3 models (such as gemini-3-pro-image) can generate interleaved
content—like stories or instructional guides containing both text blocks and
illustrations inside the same response.
Because the output is complex and interleaved, convenience properties like
.output_image or .output_text will not capture the full sequence. To access
and save interleaved content, you must manually iterate over steps:
Python
interaction = client.interactions.create(
    model="gemini-3-pro-image",
    input="Write the story of the lifecycle of a monarch butterfly, interleave illustrations",
)

image_counter = 1
for step in interaction.steps:
    if step.type == "model_output":
        for content_block in step.content:
            if content_block.type == "text":
                print(content_block.text)
            elif content_block.type == "image":
                filename = f"butterfly_lifecycle_{image_counter}.png"
                with open(filename, "wb") as f:
                    f.write(base64.b64decode(content_block.data))
                print(f"\n[Saved illustration: {filename}]\n")
                image_counter += 1
JavaScript
const interaction = await ai.interactions.create({
    model: "gemini-3-pro-image",
    input: "Write the story of the lifecycle of a monarch butterfly, interleave illustrations",
});

let imageCounter = 1;
for (const step of interaction.steps) {
  if (step.type === "model_output") {
    for (const contentBlock of step.content) {
      if (contentBlock.type === "text") {
        console.log(contentBlock.text);
      } else if (contentBlock.type === "image") {
        const buffer = Buffer.from(contentBlock.data, "base64");
        const filename = `butterfly_lifecycle_${imageCounter}.png`;
        fs.writeFileSync(filename, buffer);
        console.log(`\n[Saved illustration: ${filename}]\n`);
        imageCounter++;
      }
    }
  }
}
Controlling thinking levels
With Gemini 3.1 Flash Image, you can control the amount of thinking the model
uses to balance quality and latency. The default thinking_level is minimal,
and the supported levels are minimal and high.
Python
from google import genai
from PIL import Image
import base64
import io

client = genai.Client()

interaction = client.interactions.create(
    model="gemini-3.1-flash-image",
    input="A futuristic city built inside a giant glass bottle floating in space",
    generation_config={"thinking_level": "high"},
)

print(interaction.output_text)

image = Image.open(io.BytesIO(base64.b64decode(interaction.output_image.data)))

image.show()
JavaScript
import { GoogleGenAI } from "@google/genai";
import * as fs from "node:fs";

async function main() {
  const ai = new GoogleGenAI({});

  const interaction = await ai.interactions.create({
    model: "gemini-3.1-flash-image",
    input: "A futuristic city built inside a giant glass bottle floating in space",
    generation_config: { thinking_level: "high" },
  });

  console.log(interaction.output_text);

  const buffer = Buffer.from(interaction.output_image.data, 'base64');

  fs.writeFileSync('image.png', buffer);
}
main();
REST
curl -s -X POST \
  "https://generativelanguage.googleapis.com/v1beta/interactions" \
  -H "x-goog-api-key: $GEMINI_API_KEY" \
  -H "Content-Type: application/json" \
  -d '{
    "model": "gemini-3.1-flash-image",
    "input": "A futuristic city built inside a giant glass bottle floating in space",
    "generation_config": {
      "thinking_level": "high"
    }
  }'
Note that thinking tokens are billed by default for thinking models, as the thinking process always happens by default whether you view the process or not.
Other image generation modes
Although Nano Banana image generation models are recommended for most use cases, you can also explore dedicated image generation models:
- Imagen: Google's text-to-image models optimized for generating high-quality images.
- Veo: Google's video generation model.
Generate images in batch
All of the image generation capabilities described on this page can also be run as batch jobs using the Batch API, which is ideal if you need to generate many images.You get higher rate limits in exchange for a turnaround of up to 24 hours.
Prompting guide and strategies
This section provides prompt examples and templates for common image generation and editing workflows. Each example includes a re-usable template and a sample prompt for the Interactions API.
Prompts for generating images
The following examples show how to use text prompts to generate various types of images.
1. Photorealistic scenes
Describe a scene in rich detail. The more specific you are, the more control you have over the results.
Template
A photorealistic [type of shot] of a [subject description] in a [setting
description]. [Description of the light]. Shot from a [camera angle]
with a [lens type].
Prompt
A photorealistic wide-angle shot of a vibrant coral reef teeming with tropical fish. Crystal-clear turquoise water with sunbeams filtering down from the surface, illuminating a sea turtle gliding gracefully over the coral. Shot from a low perspective with a wide-angle lens. Aspect ratio 16:9.
Python
from google import genai
from google.genai import types
import base64

client = genai.Client()

interaction = client.interactions.create(
    model="gemini-3.1-flash-image",
    input="A photorealistic wide-angle shot of a vibrant coral reef teeming with tropical fish. Crystal-clear turquoise water with sunbeams filtering down from the surface, illuminating a sea turtle gliding gracefully over the coral. Shot from a low perspective with a wide-angle lens. Aspect ratio 16:9.",
    response_format=[
        {
            "type": "image",
            "mime_type": "image/jpeg",
            "aspect_ratio": "16:9",
        }
    ],
)

print(interaction.output_text)

with open("coral_reef.png", "wb") as f:

    f.write(base64.b64decode(interaction.output_image.data))
JavaScript
import { GoogleGenAI } from "@google/genai";
import * as fs from "node:fs";

async function main() {
  const ai = new GoogleGenAI({});

  const interaction = await ai.interactions.create({
    model: "gemini-3.1-flash-image",
    input: "A photorealistic wide-angle shot of a vibrant coral reef teeming with tropical fish. Crystal-clear turquoise water with sunbeams filtering down from the surface, illuminating a sea turtle gliding gracefully over the coral. Shot from a low perspective with a wide-angle lens. Aspect ratio 16:9.",
    response_format: [
      {
        type: "image",
        mime_type: "image/jpeg",
        aspect_ratio: "16:9",
      }
    ],
  });
  console.log(interaction.output_text);

  const buffer = Buffer.from(interaction.output_image.data, 'base64');

  fs.writeFileSync('coral_reef.png', buffer);
}

main();
REST
curl -s -X POST \
  "https://generativelanguage.googleapis.com/v1beta/interactions" \
  -H "x-goog-api-key: $GEMINI_API_KEY" \
  -H "Content-Type: application/json" \
  -d '{
    "model": "gemini-3.1-flash-image",
    "input": "A photorealistic wide-angle shot of a vibrant coral reef teeming with tropical fish. Crystal-clear turquoise water with sunbeams filtering down from the surface, illuminating a sea turtle gliding gracefully over the coral. Shot from a low perspective with a wide-angle lens. Aspect ratio 16:9.",
    "response_format": {
      "type": "image",
      "mime_type": "image/png",
      "aspect_ratio": "16:9"
    }
  }'

2. Stylized illustrations & stickers
Describe the artistic style, subject, and medium. Be specific about the visual detail (bold lines, colors, etc.) for consistent results.
Template
A [style] of a [subject, with details about accessories or actions]
doing [activity]. The design features [visual qualities, e.g., bold outlines,
cel-shading, etc.] and [color/background preference].
Prompt
A kawaii-style sticker of a happy red panda wearing a tiny bamboo hat. It's munching on a green bamboo leaf. The design features bold, clean outlines, simple cel-shading, and a vibrant color palette. The background must be white.
Python
from google import genai
import base64

client = genai.Client()

interaction = client.interactions.create(
    model="gemini-3.1-flash-image",
    input="A kawaii-style sticker of a happy red panda wearing a tiny bamboo hat. It's munching on a green bamboo leaf. The design features bold, clean outlines, simple cel-shading, and a vibrant color palette. The background must be white.",
)

for step in interaction.steps:
    if step.type == "model_output":
        for content_block in step.content:
            if content_block.type == "text":
                print(content_block.text)
            elif content_block.type == "image":
                with open("red_panda_sticker.png", "wb") as f:
                    f.write(base64.b64decode(content_block.data))
JavaScript
import { GoogleGenAI } from "@google/genai";
import * as fs from "node:fs";

async function main() {
  const ai = new GoogleGenAI({});

  const interaction = await ai.interactions.create({
    model: "gemini-3.1-flash-image",
    input: "A kawaii-style sticker of a happy red panda wearing a tiny bamboo hat. It's munching on a green bamboo leaf. The design features bold, clean outlines, simple cel-shading, and a vibrant color palette. The background must be white.",
  });
  for (const step of interaction.steps) {
    if (step.type === "model_output") {
      for (const contentBlock of step.content) {
        if (contentBlock.type === "text") {
          console.log(contentBlock.text);
        } else if (contentBlock.type === "image") {
          const buffer = Buffer.from(contentBlock.data, "base64");
          fs.writeFileSync("red_panda_sticker.png", buffer);
        }
      }
    }
  }
}

main();
REST
curl -s -X POST \
  "https://generativelanguage.googleapis.com/v1beta/interactions" \
  -H "x-goog-api-key: $GEMINI_API_KEY" \
  -H "Content-Type: application/json" \
  -d '{
    "model": "gemini-3.1-flash-image",
    "input": "A kawaii-style sticker of a happy red panda wearing a tiny bamboo hat. It is munching on a green bamboo leaf. The design features bold, clean outlines, simple cel-shading, and a vibrant color palette. The background must be white."
  }'

3. Accurate text in images
Gemini excels at rendering text. Be clear about the text, the font style (descriptively), and the overall design. Use Gemini 3 Pro Image for professional asset production.
Template
Create a [image type] for [brand/concept] with the text "[text to render]"
in a [font style]. The design should be [style description], with a
[color scheme].
Prompt
Create a modern, minimalist logo for a coffee shop called 'The Daily Grind'. The text should be in a clean, bold, sans-serif font. The color scheme is black and white. Put the logo in a circle. Use a coffee bean in a clever way.
Python
from google import genai
import base64

client = genai.Client()

interaction = client.interactions.create(
    model="gemini-3.1-flash-image",
    input="Create a modern, minimalist logo for a coffee shop called 'The Daily Grind'. The text should be in a clean, bold, sans-serif font. The color scheme is black and white. Put the logo in a circle. Use a coffee bean in a clever way.",
    response_format={"type": "image", "aspect_ratio": "1:1"},
)

for step in interaction.steps:
    if step.type == "model_output":
        for content_block in step.content:
            if content_block.type == "text":
                print(content_block.text)
            elif content_block.type == "image":
                with open("logo_example.jpg", "wb") as f:
                    f.write(base64.b64decode(content_block.data))
JavaScript
import { GoogleGenAI } from "@google/genai";
import * as fs from "node:fs";

async function main() {
  const ai = new GoogleGenAI({});

  const interaction = await ai.interactions.create({
    model: "gemini-3.1-flash-image",
    input: "Create a modern, minimalist logo for a coffee shop called 'The Daily Grind'. The text should be in a clean, bold, sans-serif font. The color scheme is black and white. Put the logo in a circle. Use a coffee bean in a clever way.",
    response_format: { type: "image", aspect_ratio: "1:1" },
  });
  for (const step of interaction.steps) {
    if (step.type === "model_output") {
      for (const contentBlock of step.content) {
        if (contentBlock.type === "text") {
          console.log(contentBlock.text);
        } else if (contentBlock.type === "image") {
          const buffer = Buffer.from(contentBlock.data, "base64");
          fs.writeFileSync("logo_example.jpg", buffer);
        }
      }
    }
  }
}

main();
REST
curl -s -X POST \
  "https://generativelanguage.googleapis.com/v1beta/interactions" \
  -H "x-goog-api-key: $GEMINI_API_KEY" \
  -H "Content-Type: application/json" \
  -d '{
    "model": "gemini-3.1-flash-image",
    "input": "Create a modern, minimalist logo for a coffee shop called The Daily Grind. The text should be in a clean, bold, sans-serif font. The color scheme is black and white. Put the logo in a circle. Use a coffee bean in a clever way.",
    "response_format": {
      "type": "image",
      "aspect_ratio": "1:1"
    }
  }'
4. Product mockups & commercial photography
Perfect for creating clean, professional product shots for ecommerce, advertising, or branding.
Template
A high-resolution, studio-lit product photograph of a [product description]
on a [background surface/description]. The lighting is a [lighting setup,
e.g., three-point softbox setup] to [lighting purpose]. The camera angle is
a [angle type] to showcase [specific feature]. Ultra-realistic, with sharp
focus on [key detail]. [Aspect ratio].
Prompt
A high-resolution, studio-lit product photograph of a minimalist ceramic
coffee mug in matte black, presented on a polished concrete surface. The
lighting is a three-point softbox setup designed to create soft, diffused
highlights and eliminate harsh shadows. The camera angle is a slightly
elevated 45-degree shot to showcase its clean lines. Ultra-realistic, with
sharp focus on the steam rising from the coffee. Square image.
Python
from google import genai
import base64

client = genai.Client()

interaction = client.interactions.create(
    model="gemini-3.1-flash-image",
    input="A high-resolution, studio-lit product photograph of a minimalist ceramic coffee mug in matte black, presented on a polished concrete surface. The lighting is a three-point softbox setup designed to create soft, diffused highlights and eliminate harsh shadows. The camera angle is a slightly elevated 45-degree shot to showcase its clean lines. Ultra-realistic, with sharp focus on the steam rising from the coffee. Square image.",
)

for step in interaction.steps:
    if step.type == "model_output":
        for content_block in step.content:
            if content_block.type == "text":
                print(content_block.text)
            elif content_block.type == "image":
                with open("product_mockup.png", "wb") as f:
                    f.write(base64.b64decode(content_block.data))
JavaScript
import { GoogleGenAI } from "@google/genai";
import * as fs from "node:fs";

async function main() {
  const ai = new GoogleGenAI({});

  const interaction = await ai.interactions.create({
    model: "gemini-3.1-flash-image",
    input: "A high-resolution, studio-lit product photograph of a minimalist ceramic coffee mug in matte black, presented on a polished concrete surface. The lighting is a three-point softbox setup designed to create soft, diffused highlights and eliminate harsh shadows. The camera angle is a slightly elevated 45-degree shot to showcase its clean lines. Ultra-realistic, with sharp focus on the steam rising from the coffee. Square image.",
  });
  for (const step of interaction.steps) {
    if (step.type === "model_output") {
      for (const contentBlock of step.content) {
        if (contentBlock.type === "text") {
          console.log(contentBlock.text);
        } else if (contentBlock.type === "image") {
          const buffer = Buffer.from(contentBlock.data, "base64");
          fs.writeFileSync("product_mockup.png", buffer);
        }
      }
    }
  }
}

main();
REST
curl -s -X POST \
  "https://generativelanguage.googleapis.com/v1beta/interactions" \
  -H "x-goog-api-key: $GEMINI_API_KEY" \
  -H "Content-Type: application/json" \
  -d '{
    "model": "gemini-3.1-flash-image",
    "input": "A high-resolution, studio-lit product photograph of a minimalist ceramic coffee mug in matte black, presented on a polished concrete surface. The lighting is a three-point softbox setup designed to create soft, diffused highlights and eliminate harsh shadows. The camera angle is a slightly elevated 45-degree shot to showcase its clean lines. Ultra-realistic, with sharp focus on the steam rising from the coffee. Square image."
  }'

5. Minimalist & negative space design
Excellent for creating backgrounds for websites, presentations, or marketing materials where text will be overlaid.
Template
A minimalist composition featuring a single [subject] positioned in the
[bottom-right/top-left/etc.] of the frame. The background is a vast, empty
[color] canvas, creating significant negative space. Soft, subtle lighting.
[Aspect ratio].
Prompt
A minimalist composition featuring a single, delicate red maple leaf
positioned in the bottom-right of the frame. The background is a vast, empty
off-white canvas, creating significant negative space for text. Soft,
diffused lighting from the top left. Square image.
Python
from google import genai
import base64

client = genai.Client()

interaction = client.interactions.create(
    model="gemini-3.1-flash-image",
    input="A minimalist composition featuring a single, delicate red maple leaf positioned in the bottom-right of the frame. The background is a vast, empty off-white canvas, creating significant negative space for text. Soft, diffused lighting from the top left. Square image.",
)

for step in interaction.steps:
    if step.type == "model_output":
        for content_block in step.content:
            if content_block.type == "text":
                print(content_block.text)
            elif content_block.type == "image":
                with open("minimalist_design.png", "wb") as f:
                    f.write(base64.b64decode(content_block.data))
JavaScript
import { GoogleGenAI } from "@google/genai";
import * as fs from "node:fs";

async function main() {
  const ai = new GoogleGenAI({});

  const interaction = await ai.interactions.create({
    model: "gemini-3.1-flash-image",
    input: "A minimalist composition featuring a single, delicate red maple leaf positioned in the bottom-right of the frame. The background is a vast, empty off-white canvas, creating significant negative space for text. Soft, diffused lighting from the top left. Square image.",
  });
  for (const step of interaction.steps) {
    if (step.type === "model_output") {
      for (const contentBlock of step.content) {
        if (contentBlock.type === "text") {
          console.log(contentBlock.text);
        } else if (contentBlock.type === "image") {
          const buffer = Buffer.from(contentBlock.data, "base64");
          fs.writeFileSync("minimalist_design.png", buffer);
        }
      }
    }
  }
}

main();
REST
curl -s -X POST \
  "https://generativelanguage.googleapis.com/v1beta/interactions" \
  -H "x-goog-api-key: $GEMINI_API_KEY" \
  -H "Content-Type: application/json" \
  -d '{
    "model": "gemini-3.1-flash-image",
    "input": "A minimalist composition featuring a single, delicate red maple leaf positioned in the bottom-right of the frame. The background is a vast, empty off-white canvas, creating significant negative space for text. Soft, diffused lighting from the top left. Square image."
  }'

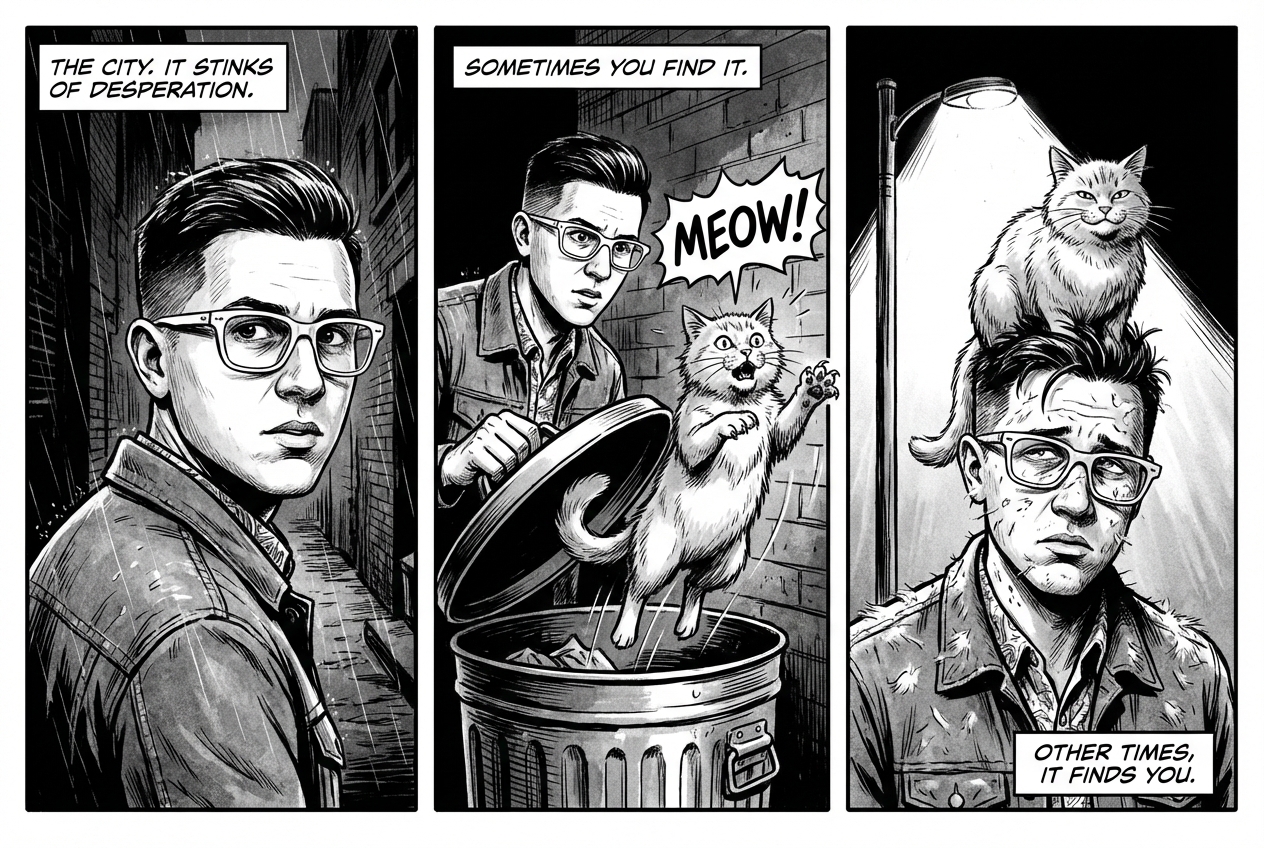
6. Sequential art (Comic panel / Storyboard)
Builds on character consistency and scene description to create panels for visual storytelling. For accuracy with text and storytelling ability, these prompts work best with Gemini 3 Pro and Gemini 3.1 Flash Image.
Template
Make a 3 panel comic in a [style]. Put the character in a [type of scene].
Prompt
Make a 3 panel comic in a gritty, noir art style with high-contrast black and white inks. Put the character in a humurous scene.
Python
from google import genai
from PIL import Image
import base64

client = genai.Client()

with open('/path/to/your/man_in_white_glasses.jpg', 'rb') as f:
    image_bytes = f.read()
text_input = "Make a 3 panel comic in a gritty, noir art style with high-contrast black and white inks. Put the character in a humurous scene."

interaction = client.interactions.create(
    model="gemini-3.1-flash-image",
    input=[
        {"type": "text", "text": text_input},
        {
            "type": "image",
            "data": base64.b64encode(image_bytes).decode('utf-8'),
            "mime_type": "image/jpeg"
        }
    ],
)

for step in interaction.steps:
    if step.type == "model_output":
        for content_block in step.content:
            if content_block.type == "text":
                print(content_block.text)
            elif content_block.type == "image":
                with open("comic_panel.jpg", "wb") as f:
                    f.write(base64.b64decode(content_block.data))
JavaScript
import { GoogleGenAI } from "@google/genai";
import * as fs from "node:fs";

async function main() {
  const ai = new GoogleGenAI({});

  const imagePath = "/path/to/your/man_in_white_glasses.jpg";
  const imageData = fs.readFileSync(imagePath);
  const base64Image = imageData.toString("base64");

  const input = [
    { type: "text", text: "Make a 3 panel comic in a gritty, noir art style with high-contrast black and white inks. Put the character in a humurous scene." },
    {
      type: "image",
      mime_type: "image/jpeg",
      data: base64Image
    },
  ];

  const interaction = await ai.interactions.create({
    model: "gemini-3.1-flash-image",
    input: input,
  });
  for (const step of interaction.steps) {
    if (step.type === "model_output") {
      for (const contentBlock of step.content) {
        if (contentBlock.type === "text") {
          console.log(contentBlock.text);
        } else if (contentBlock.type === "image") {
          const buffer = Buffer.from(contentBlock.data, "base64");
          fs.writeFileSync("comic_panel.jpg", buffer);
        }
      }
    }
  }
}

main();
REST
curl -s -X POST \
  "https://generativelanguage.googleapis.com/v1beta/interactions" \
  -H "x-goog-api-key: $GEMINI_API_KEY" \
  -H "Content-Type: application/json" \
  -d '{
    "model": "gemini-3.1-flash-image",
    "input": [
      {"type": "text", "text": "Make a 3 panel comic in a gritty, noir art style with high-contrast black and white inks. Put the character in a humurous scene."},
      {"type": "image", "data": "<BASE64_IMAGE_DATA>", "mime_type": "image/jpeg"}
    ]
  }'
Input |
Output |

|
|
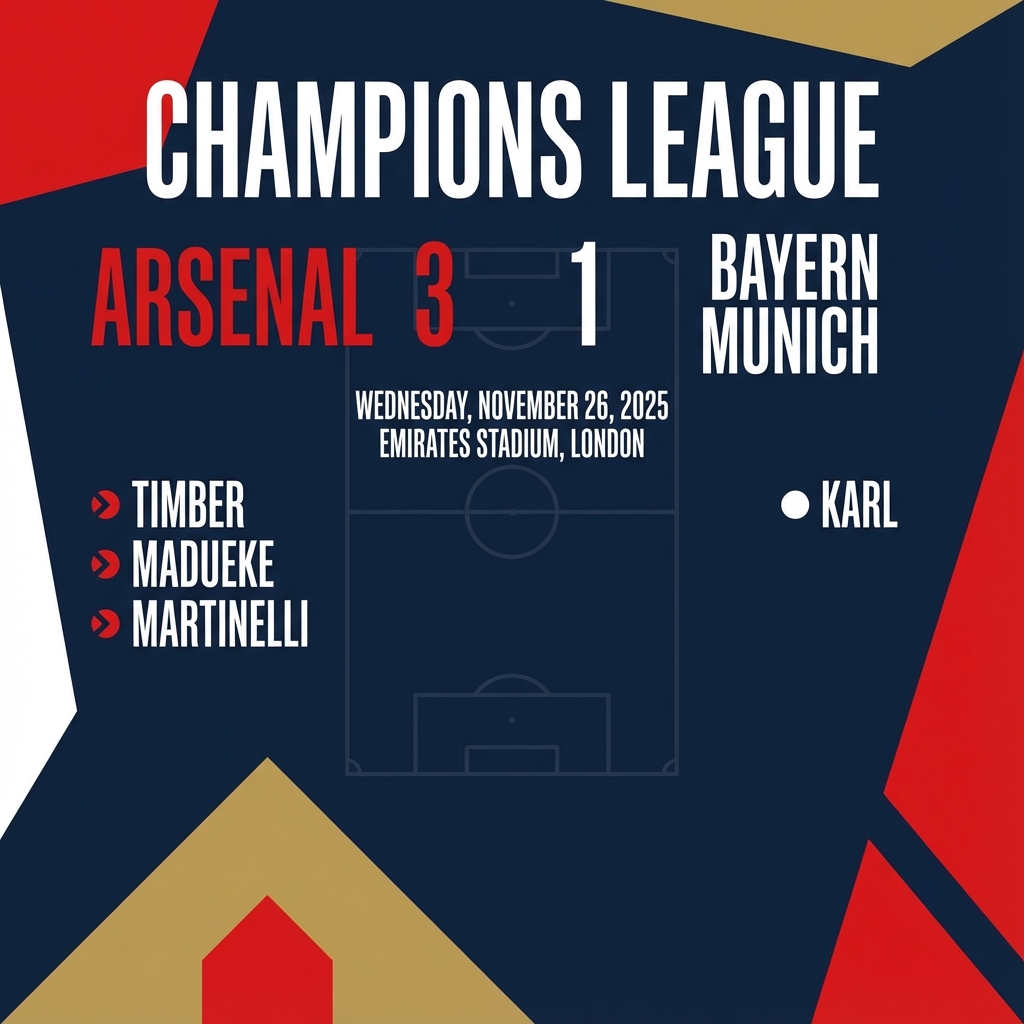
7. Grounding with Google Search
Use Google Search to generate images based on recent or real-time information. This is useful for news, weather, and other time-sensitive topics.
Prompt
Make a simple but stylish graphic of last night's Arsenal game in the Champion's League
Python
from google import genai
from google.genai import types
import base64

client = genai.Client()

interaction = client.interactions.create(
    model="gemini-3.1-flash-image",
    input="Make a simple but stylish graphic of last night's Arsenal game in the Champion's League",
    tools=[{"type": "google_search"}],
    response_format={"type": "image", "aspect_ratio": "16:9"},
)

for step in interaction.steps:
    if step.type == "model_output":
        for content_block in step.content:
            if content_block.type == "text":
                print(content_block.text)
            elif content_block.type == "image":
                with open("football-score.jpg", "wb") as f:
                    f.write(base64.b64decode(content_block.data))
JavaScript
import { GoogleGenAI } from "@google/genai";
import * as fs from "node:fs";

async function main() {
  const ai = new GoogleGenAI({});

  const interaction = await ai.interactions.create({
    model: "gemini-3.1-flash-image",
    input: "Make a simple but stylish graphic of last night's Arsenal game in the Champion's League",
    tools: [{ type: "google_search" }],
    response_format: { type: "image", aspect_ratio: "16:9", image_size: "2K" },
  });

  for (const step of interaction.steps) {
    if (step.type === "model_output") {
      for (const contentBlock of step.content) {
        if (contentBlock.type === "text") {
          console.log(contentBlock.text);
        } else if (contentBlock.type === "image") {
          const buffer = Buffer.from(contentBlock.data, "base64");
          fs.writeFileSync("football-score.jpg", buffer);
        }
      }
    }
  }
}

main();
REST
curl -s -X POST \
  "https://generativelanguage.googleapis.com/v1beta/interactions" \
  -H "x-goog-api-key: $GEMINI_API_KEY" \
  -H "Content-Type: application/json" \
  -d '{
    "model": "gemini-3.1-flash-image",
    "input": "Make a simple but stylish graphic of last nights Arsenal game in the Champions League",
    "tools": [{"type": "google_search"}],
    "response_format": {
      "type": "image",
      "aspect_ratio": "16:9"
    }
  }'
Prompts for editing images
These examples show how to provide images alongside your text prompts for editing, composition, and style transfer.
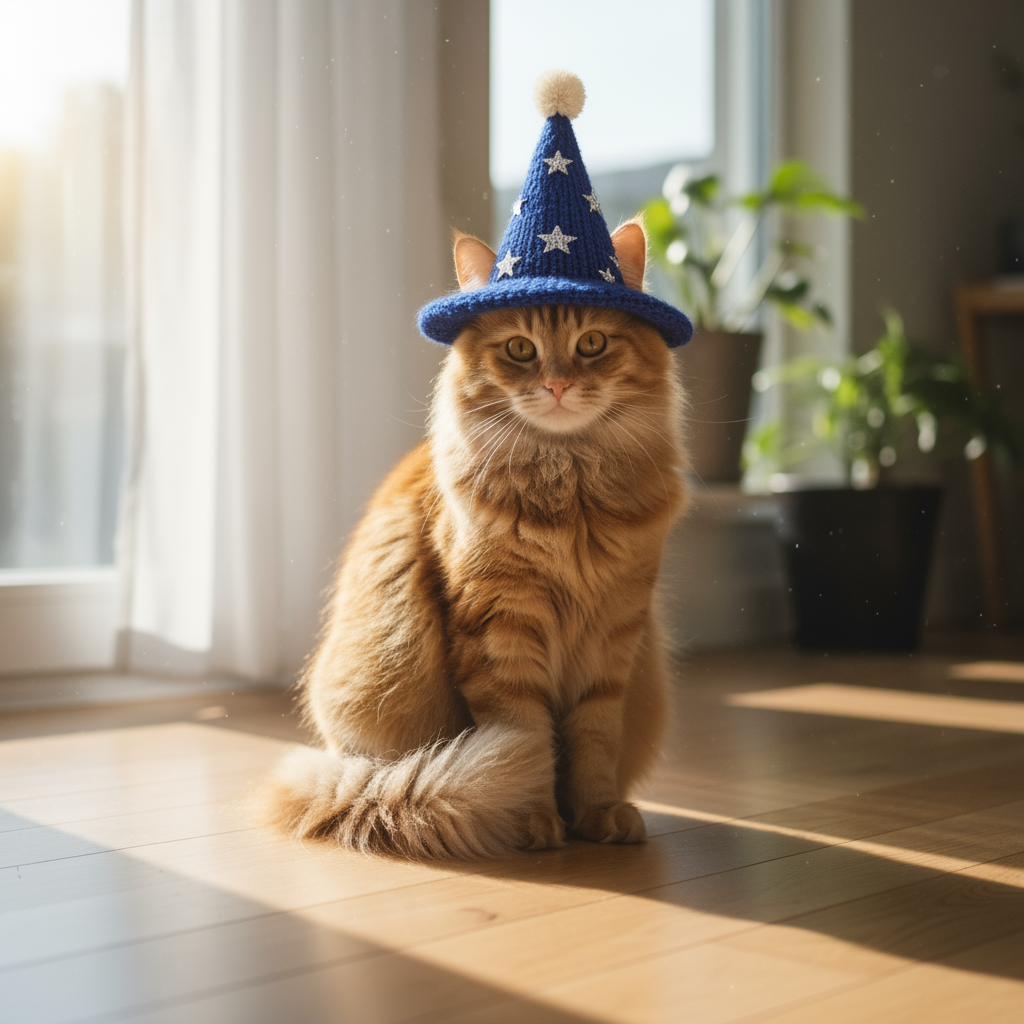
1. Adding and removing elements
Provide an image and describe your change. The model will match the original image's style, lighting, and perspective.
Template
Using the provided image of [subject], please [add/remove/modify] [element]
to/from the scene. Ensure the change is [description of how the change should
integrate].
Prompt
"Using the provided image of my cat, please add a small, knitted wizard hat
on its head. Make it look like it's sitting comfortably and matches the soft
lighting of the photo."
Python
from google import genai
from PIL import Image
import base64

client = genai.Client()

with open('/path/to/your/cat_photo.png', 'rb') as f:
    image_bytes = f.read()
text_input = """Using the provided image of my cat, please add a small, knitted wizard hat on its head. Make it look like it's sitting comfortably and not falling off."""

interaction = client.interactions.create(
    model="gemini-3.1-flash-image",
    input=[
        {"type": "text", "text": text_input},
        {
            "type": "image",
            "data": base64.b64encode(image_bytes).decode('utf-8'),
            "mime_type": "image/png"
        }
    ],
)

for step in interaction.steps:
    if step.type == "model_output":
        for content_block in step.content:
            if content_block.type == "text":
                print(content_block.text)
            elif content_block.type == "image":
                with open("cat_with_hat.png", "wb") as f:
                    f.write(base64.b64decode(content_block.data))
JavaScript
import { GoogleGenAI } from "@google/genai";
import * as fs from "node:fs";

async function main() {
  const ai = new GoogleGenAI({});

  const imagePath = "/path/to/your/cat_photo.png";
  const imageData = fs.readFileSync(imagePath);
  const base64Image = imageData.toString("base64");

  const input = [
    { type: "text", text: "Using the provided image of my cat, please add a small, knitted wizard hat on its head. Make it look like it's sitting comfortably and not falling off." },
    {
      type: "image",
      mime_type: "image/png",
      data: base64Image
    },
  ];

  const interaction = await ai.interactions.create({
    model: "gemini-3.1-flash-image",
    input: input,
  });
  for (const step of interaction.steps) {
    if (step.type === "model_output") {
      for (const contentBlock of step.content) {
        if (contentBlock.type === "text") {
          console.log(contentBlock.text);
        } else if (contentBlock.type === "image") {
          const buffer = Buffer.from(contentBlock.data, "base64");
          fs.writeFileSync("cat_with_hat.png", buffer);
        }
      }
    }
  }
}

main();
REST
curl -s -X POST \
  "https://generativelanguage.googleapis.com/v1beta/interactions" \
    -H "x-goog-api-key: $GEMINI_API_KEY" \
    -H 'Content-Type: application/json' \
    -d "{
      \"model\": \"gemini-3.1-flash-image\",
      \"input\": [
            {\"type\": \"text\", \"text\": \"Using the provided image of my cat, please add a small, knitted wizard hat on its head. Make it look like it's sitting comfortably and not falling off.\"},
            {\"type\": \"image\", \"mime_type\":\"image/png\", \"data\": \"<BASE64_IMAGE_DATA>\"}
        ]
    }"
Input |
Output |

|
|
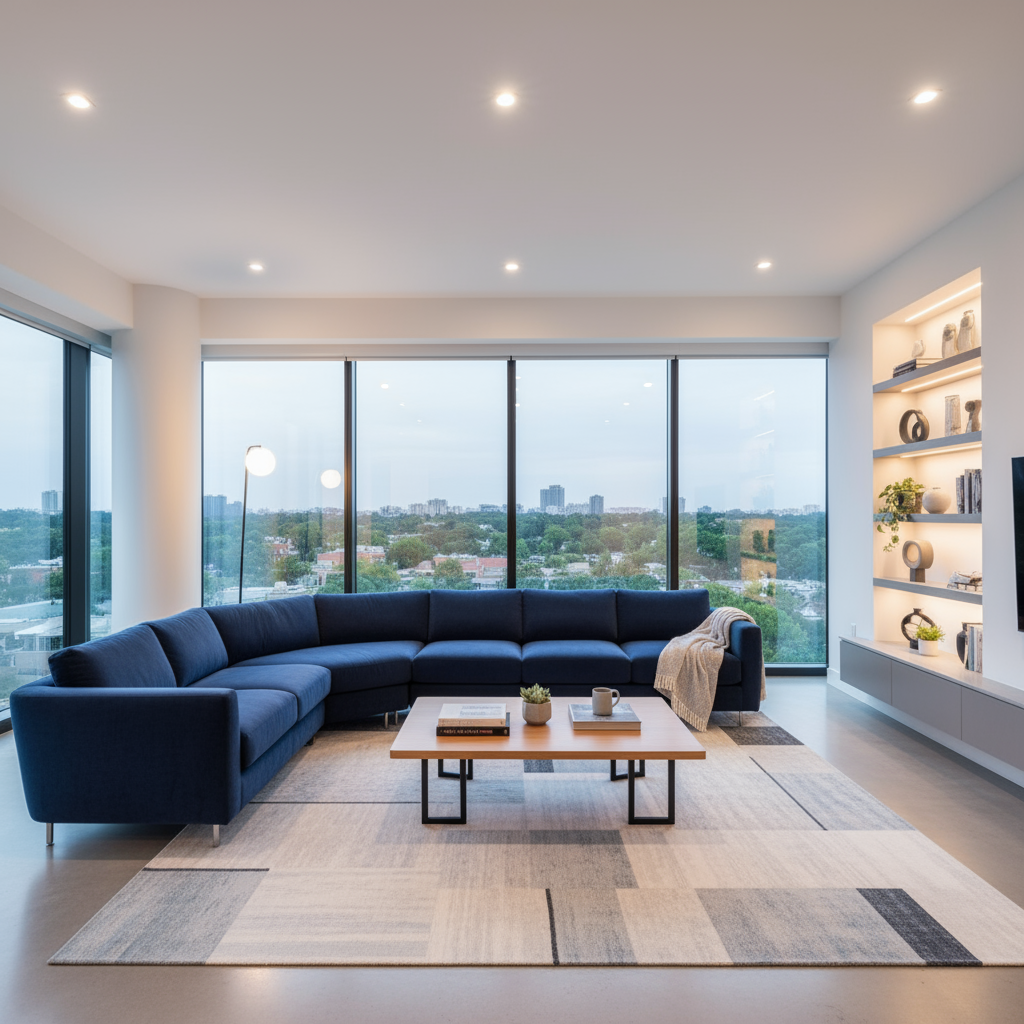
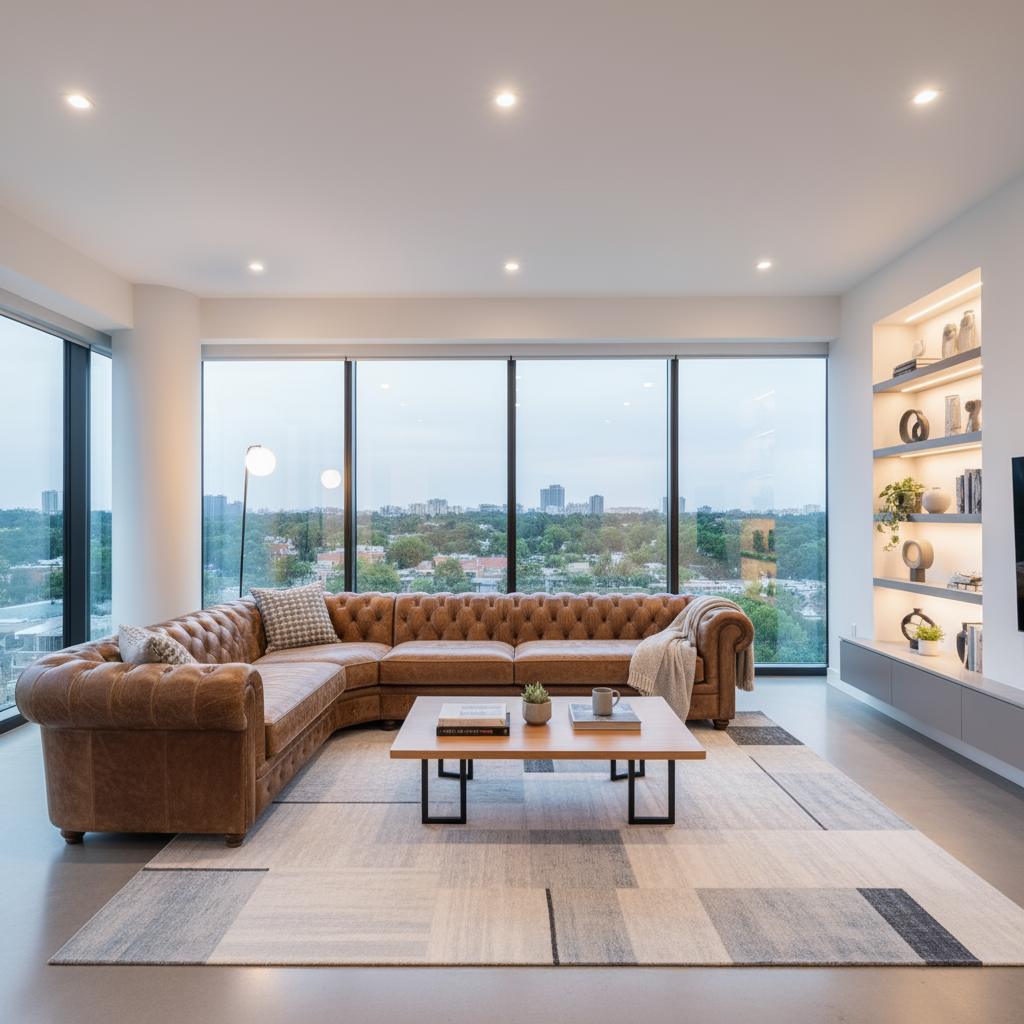
2. Inpainting (Semantic masking)
Conversationally define a "mask" to edit a specific part of an image while leaving the rest untouched.
Template
Using the provided image, change only the [specific element] to [new
element/description]. Keep everything else in the image exactly the same,
preserving the original style, lighting, and composition.
Prompt
"Using the provided image of a living room, change only the blue sofa to be
a vintage, brown leather chesterfield sofa. Keep the rest of the room,
including the pillows on the sofa and the lighting, unchanged."
Python
from google import genai
from PIL import Image
import base64

client = genai.Client()

with open('/path/to/your/living_room.png', 'rb') as f:
    image_bytes = f.read()
text_input = """Using the provided image of a living room, change only the blue sofa to be a vintage, brown leather chesterfield sofa. Keep the rest of the room, including the pillows on the sofa and the lighting, unchanged."""

interaction = client.interactions.create(
    model="gemini-3.1-flash-image",
    input=[
        {
            "type": "image",
            "data": base64.b64encode(image_bytes).decode('utf-8'),
            "mime_type": "image/png"
        },
        {"type": "text", "text": text_input}
    ],
)

for step in interaction.steps:
    if step.type == "model_output":
        for content_block in step.content:
            if content_block.type == "text":
                print(content_block.text)
            elif content_block.type == "image":
                with open("living_room_edited.png", "wb") as f:
                    f.write(base64.b64decode(content_block.data))
JavaScript
import { GoogleGenAI } from "@google/genai";
import * as fs from "node:fs";

async function main() {
  const ai = new GoogleGenAI({});

  const imagePath = "/path/to/your/living_room.png";
  const imageData = fs.readFileSync(imagePath);
  const base64Image = imageData.toString("base64");

  const input = [
    {
      type: "image",
      mime_type: "image/png",
      data: base64Image
    },
    { type: "text", text: "Using the provided image of a living room, change only the blue sofa to be a vintage, brown leather chesterfield sofa. Keep the rest of the room, including the pillows on the sofa and the lighting, unchanged." },
  ];

  const interaction = await ai.interactions.create({
    model: "gemini-3.1-flash-image",
    input: input,
  });
  for (const step of interaction.steps) {
    if (step.type === "model_output") {
      for (const contentBlock of step.content) {
        if (contentBlock.type === "text") {
          console.log(contentBlock.text);
        } else if (contentBlock.type === "image") {
          const buffer = Buffer.from(contentBlock.data, "base64");
          fs.writeFileSync("living_room_edited.png", buffer);
        }
      }
    }
  }
}

main();
REST
curl -s -X POST \
  "https://generativelanguage.googleapis.com/v1beta/interactions" \
    -H "x-goog-api-key: $GEMINI_API_KEY" \
    -H 'Content-Type: application/json' \
    -d "{
      \"model\": \"gemini-3.1-flash-image\",
      \"input\": [
        {\"type\": \"image\", \"mime_type\":\"image/png\", \"data\": \"<BASE64_IMAGE_DATA>\"},
        {\"type\": \"text\", \"text\": \"Using the provided image of a living room, change only the blue sofa to be a vintage, brown leather chesterfield sofa. Keep the rest of the room, including the pillows on the sofa and the lighting, unchanged.\"}
      ]
    }"
Input |
Output |
|
|
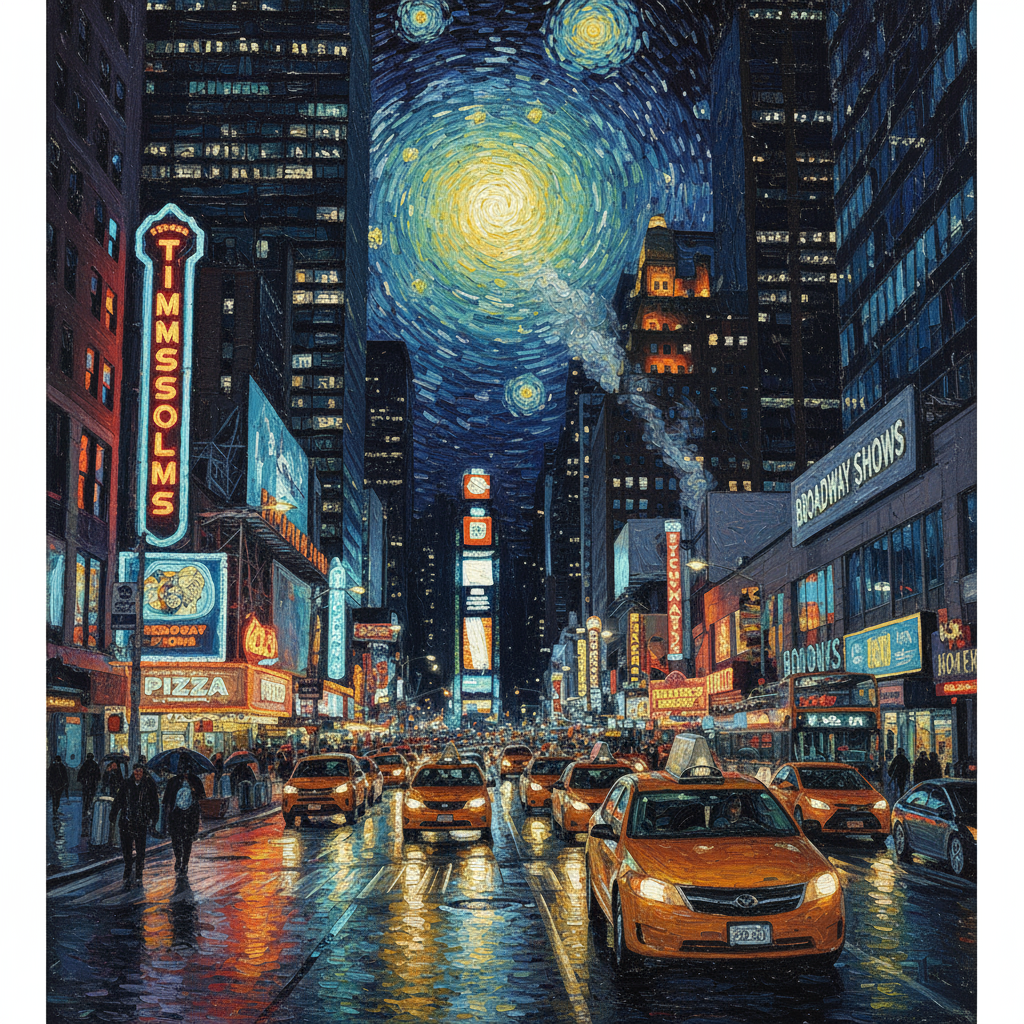
3. Style transfer
Provide an image and ask the model to recreate its content in a different artistic style.
Template
Transform the provided photograph of [subject] into the artistic style of [artist/art style]. Preserve the original composition but render it with [description of stylistic elements].
Prompt
"Transform the provided photograph of a modern city street at night into the artistic style of Vincent van Gogh's 'Starry Night'. Preserve the original composition of buildings and cars, but render all elements with swirling, impasto brushstrokes and a dramatic palette of deep blues and bright yellows."
Python
from google import genai
from PIL import Image
import base64

client = genai.Client()

with open('/path/to/your/city.png', 'rb') as f:
    image_bytes = f.read()
text_input = """Transform the provided photograph of a modern city street at night into the artistic style of Vincent van Gogh's 'Starry Night'. Preserve the original composition of buildings and cars, but render all elements with swirling, impasto brushstrokes and a dramatic palette of deep blues and bright yellows."""

interaction = client.interactions.create(
    model="gemini-3.1-flash-image",
    input=[
        {
            "type": "image",
            "data": base64.b64encode(image_bytes).decode('utf-8'),
            "mime_type": "image/png"
        },
        {"type": "text", "text": text_input}
    ],
)

for step in interaction.steps:
    if step.type == "model_output":
        for content_block in step.content:
            if content_block.type == "text":
                print(content_block.text)
            elif content_block.type == "image":
                with open("city_style_transfer.png", "wb") as f:
                    f.write(base64.b64decode(content_block.data))
JavaScript
import { GoogleGenAI } from "@google/genai";
import * as fs from "node:fs";

async function main() {
  const ai = new GoogleGenAI({});
  const imageData = fs.readFileSync("/path/to/your/city.png");
  const base64Image = imageData.toString("base64");

  const interaction = await ai.interactions.create({
    model: "gemini-3.1-flash-image",
    input: [
      {
        type: "image",
        mime_type: "image/png",
        data: base64Image
      },
      { type: "text", text: "Transform the provided photograph of a modern city street at night into the artistic style of Vincent van Gogh's 'Starry Night'. Preserve the original composition of buildings and cars, but render all elements with swirling, impasto brushstrokes and a dramatic palette of deep blues and bright yellows." },
    ],
  });
  for (const step of interaction.steps) {
    if (step.type === "model_output") {
      for (const contentBlock of step.content) {
        if (contentBlock.type === "text") {
          console.log(contentBlock.text);
        } else if (contentBlock.type === "image") {
          const buffer = Buffer.from(contentBlock.data, "base64");
          fs.writeFileSync("city_style_transfer.png", buffer);
        }
      }
    }
  }
}

main();
REST
curl -s -X POST \
  "https://generativelanguage.googleapis.com/v1beta/interactions" \
    -H "x-goog-api-key: $GEMINI_API_KEY" \
    -H 'Content-Type: application/json' \
    -d "{
      \"model\": \"gemini-3.1-flash-image\",
      \"input\": [
        {\"type\": \"image\", \"mime_type\":\"image/png\", \"data\": \"<BASE64_IMAGE_DATA>\"},
        {\"type\": \"text\", \"text\": \"Transform the provided photograph of a modern city street at night into the artistic style of Vincent van Gogh's 'Starry Night'. Preserve the original composition of buildings and cars, but render all elements with swirling, impasto brushstrokes and a dramatic palette of deep blues and bright yellows.\"}
      ]
    }"
Input |
Output |

|
|
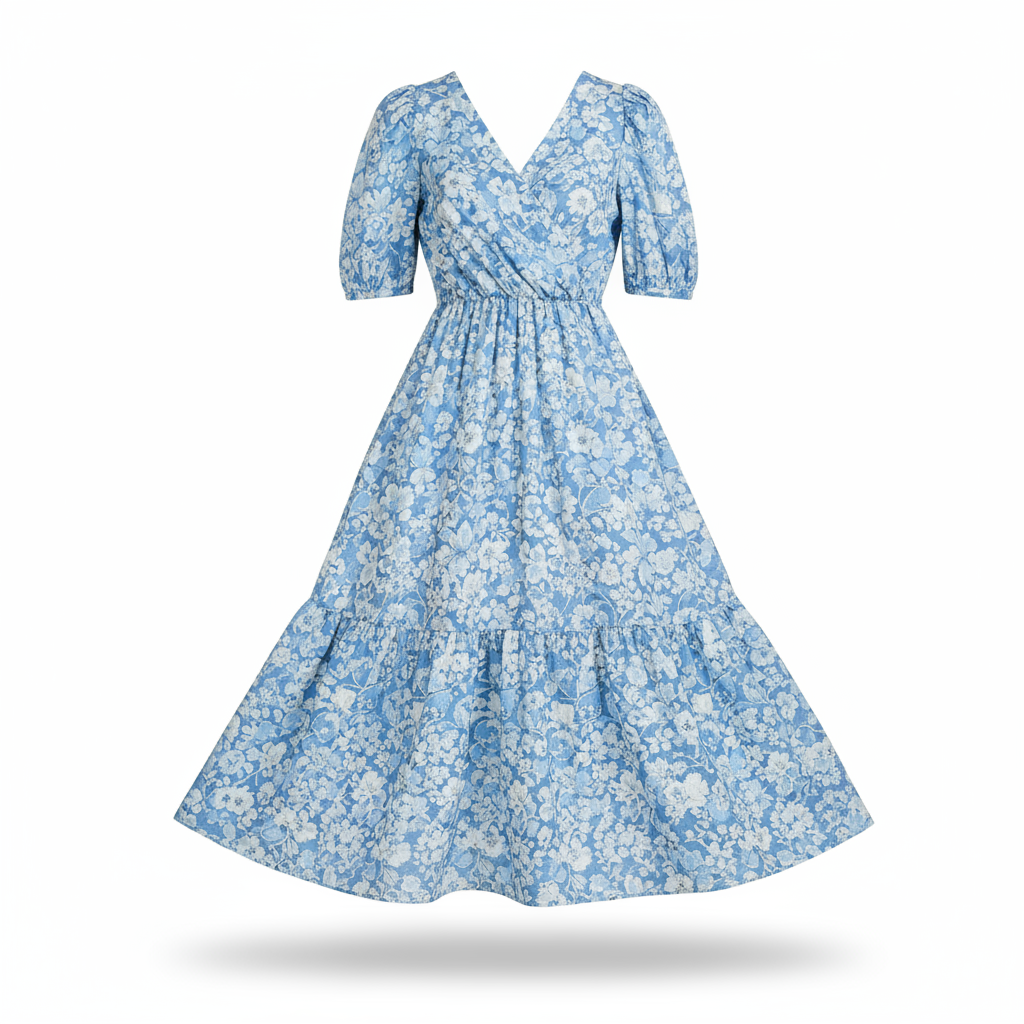
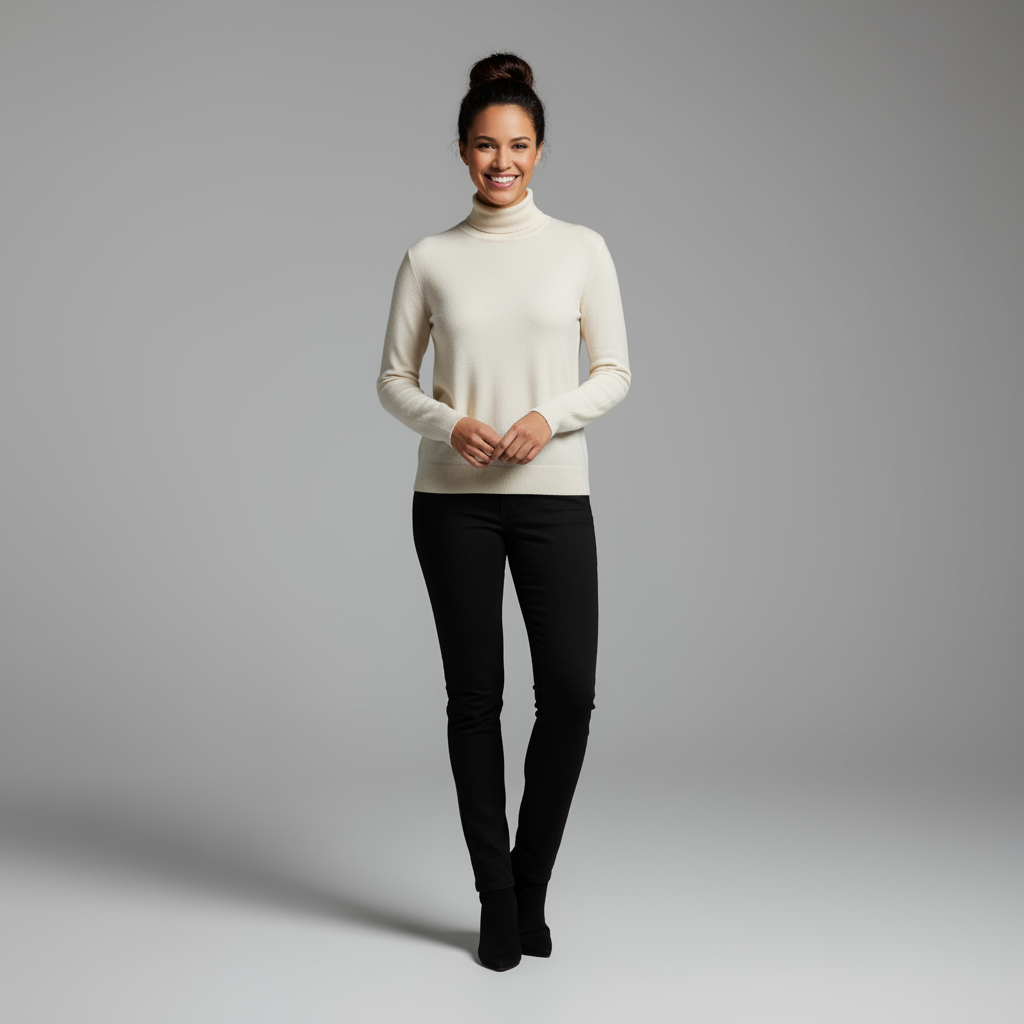
4. Advanced composition: Combining multiple images
Provide multiple images as context to create a new, composite scene. This is perfect for product mockups or creative collages.
Template
Create a new image by combining the elements from the provided images. Take
the [element from image 1] and place it with/on the [element from image 2].
The final image should be a [description of the final scene].
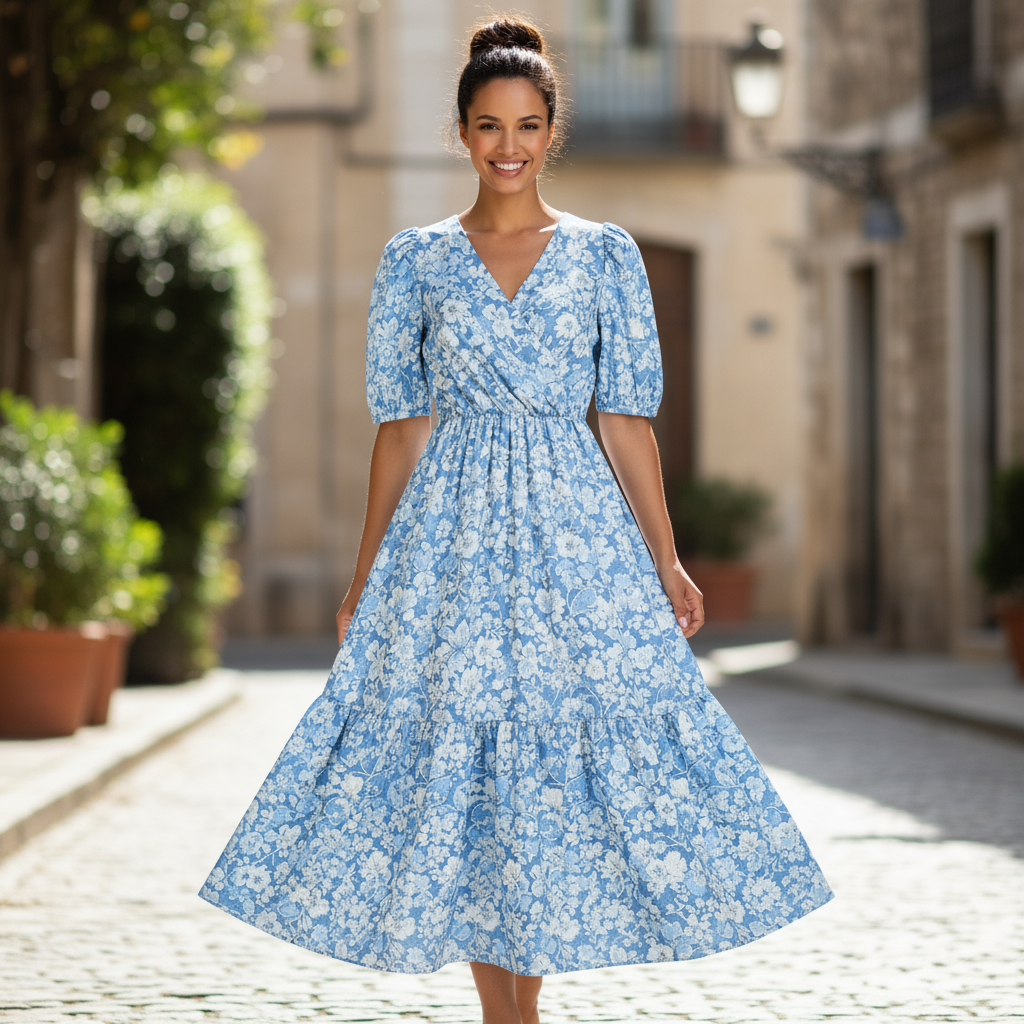
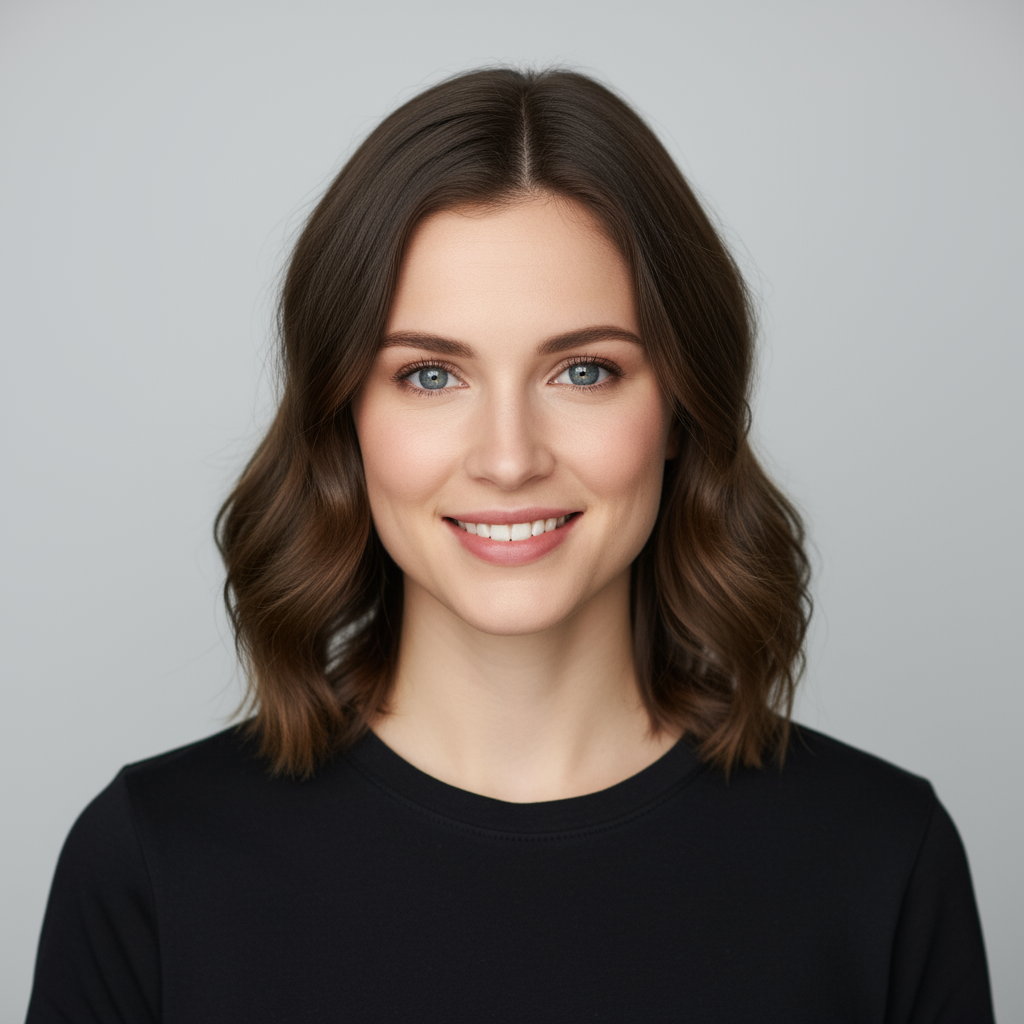
Prompt
"Create a professional e-commerce fashion photo. Take the blue floral dress
from the first image and let the woman from the second image wear it.
Generate a realistic, full-body shot of the woman wearing the dress, with
the lighting and shadows adjusted to match the outdoor environment."
Python
from google import genai
from PIL import Image
import base64

client = genai.Client()

with open('/path/to/your/dress.png', 'rb') as f:
    dress_bytes = f.read()
with open('/path/to/your/model.png', 'rb') as f:
    model_bytes = f.read()
text_input = """Create a professional e-commerce fashion photo. Take the blue floral dress from the first image and let the woman from the second image wear it. Generate a realistic, full-body shot of the woman wearing the dress, with the lighting and shadows adjusted to match the outdoor environment."""

interaction = client.interactions.create(
    model="gemini-3.1-flash-image",
    input=[
        {
            "type": "image",
            "data": base64.b64encode(dress_bytes).decode('utf-8'),
            "mime_type": "image/png"
        },
        {
            "type": "image",
            "data": base64.b64encode(model_bytes).decode('utf-8'),
            "mime_type": "image/png"
        },
        {"type": "text", "text": text_input}
    ],
)

for step in interaction.steps:
    if step.type == "model_output":
        for content_block in step.content:
            if content_block.type == "text":
                print(content_block.text)
            elif content_block.type == "image":
                with open("fashion_ecommerce_shot.png", "wb") as f:
                    f.write(base64.b64decode(content_block.data))
JavaScript
import { GoogleGenAI } from "@google/genai";
import * as fs from "node:fs";

async function main() {
  const ai = new GoogleGenAI({});

  const imagePath1 = "/path/to/your/dress.png";
  const imageData1 = fs.readFileSync(imagePath1);
  const base64Image1 = imageData1.toString("base64");
  const imagePath2 = "/path/to/your/model.png";
  const imageData2 = fs.readFileSync(imagePath2);
  const base64Image2 = imageData2.toString("base64");

  const input = [
    {
      type: "image",
      mime_type: "image/png",
      data: base64Image1
    },
    {
      type: "image",
      mime_type: "image/png",
      data: base64Image2
    },
    { type: "text", text: "Create a professional e-commerce fashion photo. Take the blue floral dress from the first image and let the woman from the second image wear it. Generate a realistic, full-body shot of the woman wearing the dress, with the lighting and shadows adjusted to match the outdoor environment." },
  ];

  const interaction = await ai.interactions.create({
    model: "gemini-3.1-flash-image",
    input: input,
  });
  for (const step of interaction.steps) {
    if (step.type === "model_output") {
      for (const contentBlock of step.content) {
        if (contentBlock.type === "text") {
          console.log(contentBlock.text);
        } else if (contentBlock.type === "image") {
          const buffer = Buffer.from(contentBlock.data, "base64");
          fs.writeFileSync("fashion_ecommerce_shot.png", buffer);
        }
      }
    }
  }
}

main();
REST
curl -s -X POST \
  "https://generativelanguage.googleapis.com/v1beta/interactions" \
    -H "x-goog-api-key: $GEMINI_API_KEY" \
    -H 'Content-Type: application/json' \
    -d "{
      \"model\": \"gemini-3.1-flash-image\",
      \"input\": [
            {\"type\": \"image\", \"mime_type\":\"image/png\", \"data\": \"<BASE64_IMAGE_DATA_1>\"},
            {\"type\": \"image\", \"mime_type\":\"image/png\", \"data\": \"<BASE64_IMAGE_DATA_2>\"},
            {\"type\": \"text\", \"text\": \"Create a professional e-commerce fashion photo. Take the blue floral dress from the first image and let the woman from the second image wear it. Generate a realistic, full-body shot of the woman wearing the dress, with the lighting and shadows adjusted to match the outdoor environment.\"}
      }]
    }"
Input 1 |
Input 2 |
Output |
|
|
|
5. High-fidelity detail preservation
To ensure critical details (like a face or logo) are preserved during an edit, describe them in great detail along with your edit request.
Template
Using the provided images, place [element from image 2] onto [element from
image 1]. Ensure that the features of [element from image 1] remain
completely unchanged. The added element should [description of how the
element should integrate].
Prompt
"Take the first image of the woman with brown hair, blue eyes, and a neutral
expression. Add the logo from the second image onto her black t-shirt.
Ensure the woman's face and features remain completely unchanged. The logo
should look like it's naturally printed on the fabric, following the folds
of the shirt."
Python
from google import genai
from PIL import Image
import base64

client = genai.Client()

with open('/path/to/your/woman.png', 'rb') as f:
    woman_bytes = f.read()
with open('/path/to/your/logo.png', 'rb') as f:
    logo_bytes = f.read()
text_input = """Take the first image of the woman with brown hair, blue eyes, and a neutral expression. Add the logo from the second image onto her black t-shirt. Ensure the woman's face and features remain completely unchanged. The logo should look like it's naturally printed on the fabric, following the folds of the shirt."""

interaction = client.interactions.create(
    model="gemini-3.1-flash-image",
    input=[
      {"type": "image", "mime_type":"image/png", "data": base64.b64encode(woman_bytes).decode('utf-8')},
      {"type": "image", "mime_type":"image/png", "data": base64.b64encode(logo_bytes).decode('utf-8')},
      {"type": "text", "text": text_input}
    ],
)

for step in interaction.steps:
    if step.type == "model_output":
        for content_block in step.content:
            if content_block.type == "text":
                print(content_block.text)
            elif content_block.type == "image":
                with open("woman_with_logo.png", "wb") as f:
                    f.write(base64.b64decode(content_block.data))
JavaScript
import { GoogleGenAI } from "@google/genai";
import * as fs from "node:fs";

async function main() {
  const ai = new GoogleGenAI({});

  const imagePath1 = "/path/to/your/woman.png";
  const imageData1 = fs.readFileSync(imagePath1);
  const base64Image1 = imageData1.toString("base64");
  const imagePath2 = "/path/to/your/logo.png";
  const imageData2 = fs.readFileSync(imagePath2);
  const base64Image2 = imageData2.toString("base64");

  const input = [
    {"type": "image", "mime_type":"image/png", "data": base64Image1},
    {"type": "image", "mime_type":"image/png", "data": base64Image2},
    {"type": "text", "text": "Take the first image of the woman with brown hair, blue eyes, and a neutral expression. Add the logo from the second image onto her black t-shirt. Ensure the woman's face and features remain completely unchanged. The logo should look like it's naturally printed on the fabric, following the folds of the shirt."},
  ];

  const interaction = await ai.interactions.create({
    model: "gemini-3.1-flash-image",
    input: input,
  });
  for (const step of interaction.steps) {
    if (step.type === "model_output") {
      for (const contentBlock of step.content) {
        if (contentBlock.type === "text") {
          console.log(contentBlock.text);
        } else if (contentBlock.type === "image") {
          const buffer = Buffer.from(contentBlock.data, "base64");
          fs.writeFileSync("woman_with_logo.png", buffer);
        }
      }
    }
  }
}

main();
REST
curl -s -X POST \
  "https://generativelanguage.googleapis.com/v1beta/interactions" \
    -H "x-goog-api-key: $GEMINI_API_KEY" \
    -H 'Content-Type: application/json' \
    -d "{
      \"model\": \"gemini-3.1-flash-image\",
      \"input\": [
        {\"type\": \"image\", \"mime_type\":\"image/png\", \"data\": \"<BASE64_IMAGE_DATA_1>\"},
        {\"type\": \"image\", \"mime_type\":\"image/png\", \"data\": \"<BASE64_IMAGE_DATA_2>\"},
        {\"type\": \"text\", \"text\": \"Take the first image of the woman with brown hair, blue eyes, and a neutral expression. Add the logo from the second image onto her black t-shirt. Ensure the woman's face and features remain completely unchanged. The logo should look like it's naturally printed on the fabric, following the folds of the shirt.\"}
      ]
    }"
Input 1 |
Input 2 |
Output |
|
|
|
6. Bring something to life
Upload a rough sketch or drawing and ask the model to refine it into a finished image.
Template
Turn this rough [medium] sketch of a [subject] into a [style description]
photo. Keep the [specific features] from the sketch but add [new details/materials].
Prompt
"Turn this rough pencil sketch of a futuristic car into a polished photo of the finished concept car in a showroom. Keep the sleek lines and low profile from the sketch but add metallic blue paint and neon rim lighting."
Python
from google import genai
from PIL import Image
import base64

client = genai.Client()

with open('/path/to/your/car_sketch.png', 'rb') as f:
    sketch_bytes = f.read()
text_input = """Turn this rough pencil sketch of a futuristic car into a polished photo of the finished concept car in a showroom. Keep the sleek lines and low profile from the sketch but add metallic blue paint and neon rim lighting."""

interaction = client.interactions.create(
    model="gemini-3.1-flash-image",
    input=[
      {"type": "image", "mime_type":"image/png", "data": base64.b64encode(sketch_bytes).decode('utf-8')},
      {"type": "text", "text": text_input}
    ],
)

for step in interaction.steps:
    if step.type == "model_output":
        for content_block in step.content:
            if content_block.type == "text":
                print(content_block.text)
            elif content_block.type == "image":
                with open("car_photo.png", "wb") as f:
                    f.write(base64.b64decode(content_block.data))
JavaScript
import { GoogleGenAI } from "@google/genai";
import * as fs from "node:fs";

async function main() {
  const ai = new GoogleGenAI({});

  const imagePath = "/path/to/your/car_sketch.png";
  const imageData = fs.readFileSync(imagePath);
  const base64Image = imageData.toString("base64");

  const input = [
    {"type": "image", "mime_type":"image/png", "data": base64Image},
    {"type": "text", "text": "Turn this rough pencil sketch of a futuristic car into a polished photo of the finished concept car in a showroom. Keep the sleek lines and low profile from the sketch but add metallic blue paint and neon rim lighting."},
  ];

  const interaction = await ai.interactions.create({
    model: "gemini-3.1-flash-image",
    input: input,
  });
  for (const step of interaction.steps) {
    if (step.type === "model_output") {
      for (const contentBlock of step.content) {
        if (contentBlock.type === "text") {
          console.log(contentBlock.text);
        } else if (contentBlock.type === "image") {
          const buffer = Buffer.from(contentBlock.data, "base64");
          fs.writeFileSync("car_photo.png", buffer);
        }
      }
    }
  }
}

main();
REST
curl -s -X POST \
  "https://generativelanguage.googleapis.com/v1beta/interactions" \
    -H "x-goog-api-key: $GEMINI_API_KEY" \
    -H 'Content-Type: application/json' \
    -d "{
      \"model\": \"gemini-3.1-flash-image\",
      \"input\": [
        {\"type\": \"image\", \"mime_type\":\"image/png\", \"data\": \"<BASE64_IMAGE_DATA>\"},
        {\"type\": \"text\", \"text\": \"Turn this rough pencil sketch of a futuristic car into a polished photo of the finished concept car in a showroom. Keep the sleek lines and low profile from the sketch but add metallic blue paint and neon rim lighting.\"}
      ]
    }"
Input |
Output |
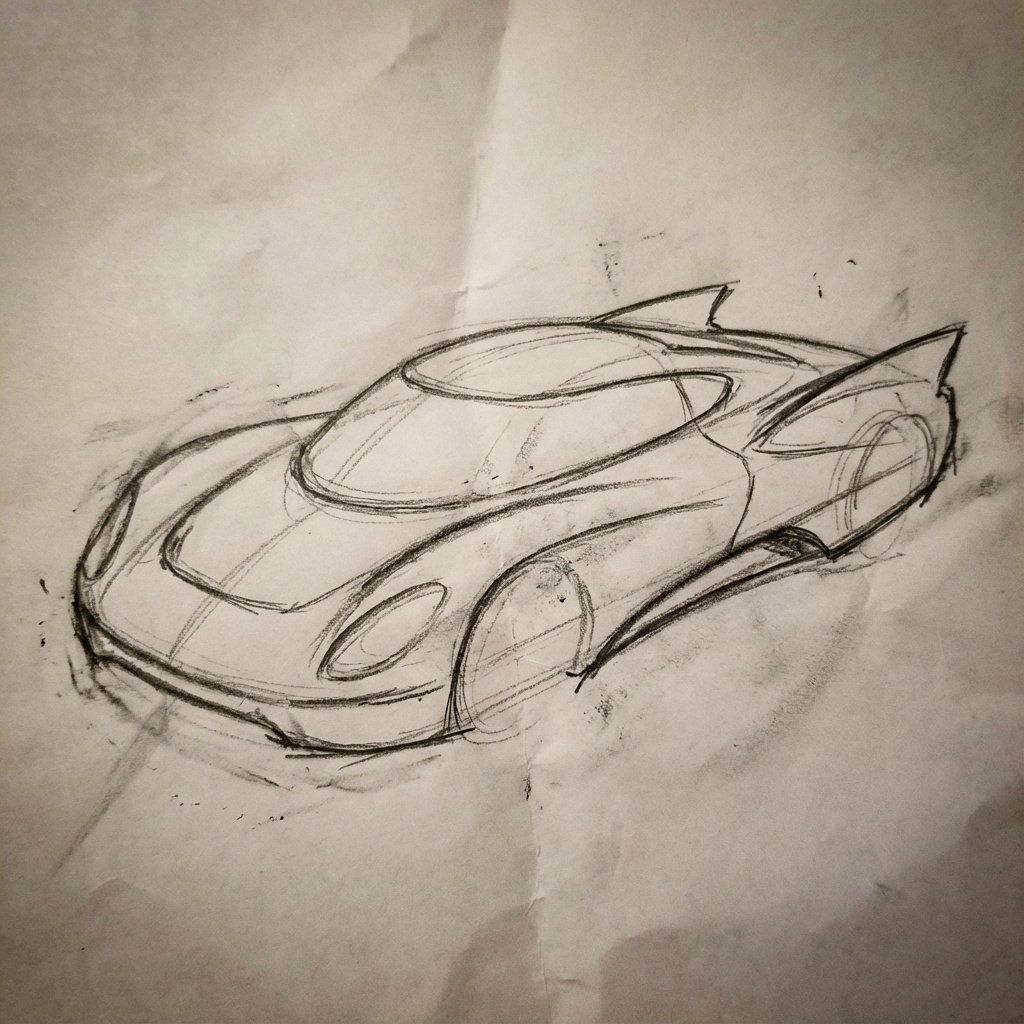
|
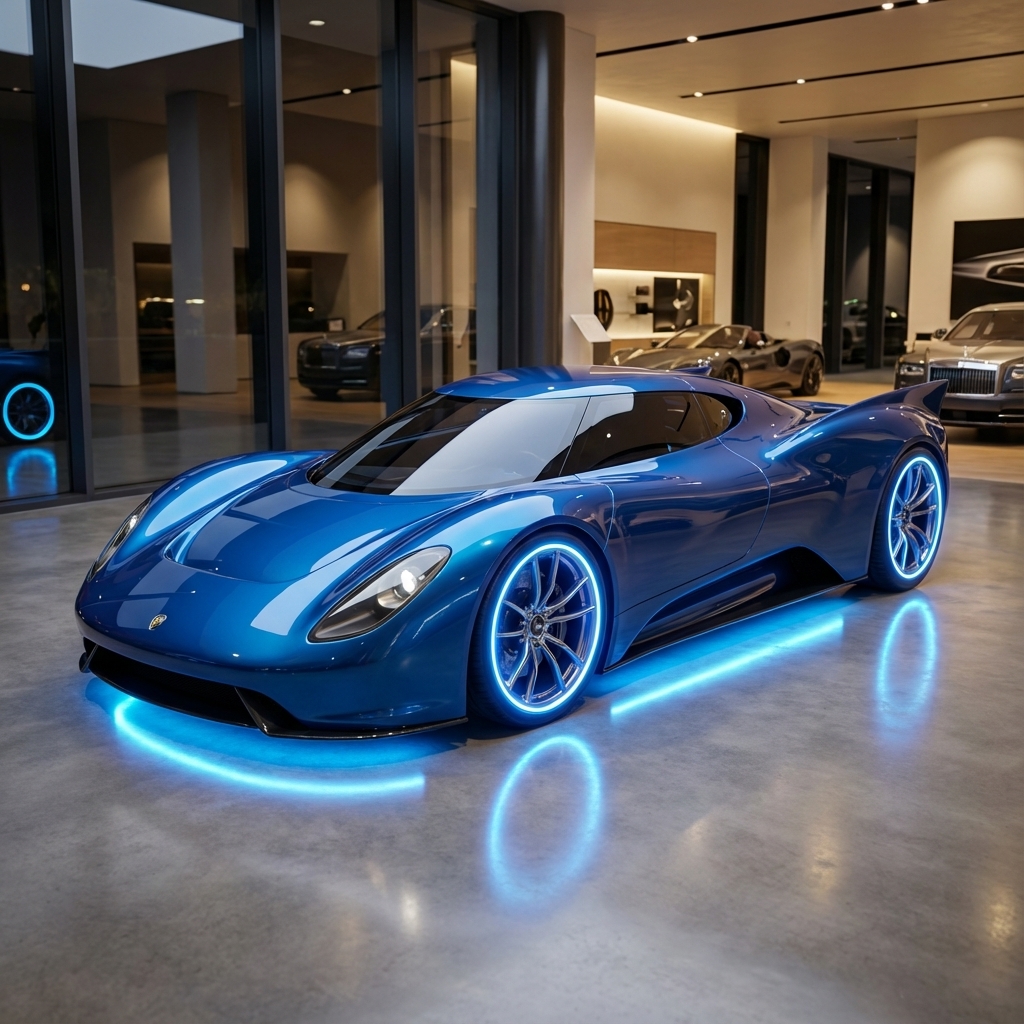
|
7. Character consistency: 360 view
You can generate 360-degree views of a character by iteratively prompting for different angles. For best results, include previously generated images in subsequent prompts to maintain consistency. For complex poses, include a reference image of the selected pose.
Template
A studio portrait of [person] against [background], [looking forward/in profile looking right/etc.]
Prompt
A studio portrait of this man against white, in profile looking right
Python
from google import genai
from PIL import Image
import base64

client = genai.Client()

with open('/path/to/your/man_in_white_glasses.jpg', 'rb') as f:
    image_bytes = f.read()
text_input = """A studio portrait of this man against white, in profile looking right"""

interaction = client.interactions.create(
    model="gemini-3.1-flash-image",
    input={
      {"type": "text", "text": text_input},
      {"type": "image", "mime_type":"image/png", "data": base64.b64encode(image_bytes).decode('utf-8')}
    },
)

for step in interaction.steps:
    if step.type == "model_output":
        for content_block in step.content:
            if content_block.type == "text":
                print(content_block.text)
            elif content_block.type == "image":
                with open("man_right_profile.png", "wb") as f:
                    f.write(base64.b64decode(content_block.data))
Input |
Output 1 |
Output 2 |
|
|

|

|
Best Practices
To elevate your results from good to great, incorporate these professional strategies into your workflow.
- Be Hyper-Specific: The more detail you provide, the more control you have. Instead of "fantasy armor," describe it: "ornate elven plate armor, etched with silver leaf patterns, with a high collar and pauldrons shaped like falcon wings."
- Provide Context and Intent: Explain the purpose of the image. The model's understanding of context will influence the final output. For example, "Create a logo for a high-end, minimalist skincare brand" will yield better results than just "Create a logo."
- Iterate and Refine: Don't expect a perfect image on the first try. Use the conversational nature of the model to make small changes. Follow up with prompts like, "That's great, but can you make the lighting a bit warmer?" or "Keep everything the same, but change the character's expression to be more serious."
- Use Step-by-Step Instructions: For complex scenes with many elements, break your prompt into steps. "First, create a background of a serene, misty forest at dawn. Then, in the foreground, add a moss-covered ancient stone altar. Finally, place a single, glowing sword on top of the altar."
- Use "Semantic Negative Prompts": Instead of saying "no cars," describe the intended scene positively: "an empty, deserted street with no signs of traffic."
- Control the Camera: Use photographic and cinematic language to control
the composition. Terms like
wide-angle shot,macro shot,low-angle perspective.
Limitations
- For best performance, use the following languages: EN, ar-EG, de-DE, es-MX, fr-FR, hi-IN, id-ID, it-IT, ja-JP, ko-KR, pt-BR, ru-RU, ua-UA, vi-VN, zh-CN.
- Image generation does not support audio inputs. Video inputs are only supported for Gemini 3.1 Flash Image.
- The model won't always follow the exact number of image outputs that the user explicitly asks for.
gemini-2.5-flash-imageworks best with up to 3 images as input, whilegemini-3-pro-imagesupports 5 images with high fidelity, and up to 14 images in total.gemini-3.1-flash-imagesupports character resemblance of up to 4 characters and the fidelity of up to 10 objects in a single workflow.- When generating text for an image, Gemini works best if you first generate the text and then ask for an image with the text.
gemini-3.1-flash-imageGrounding with Google Search does not support using real-world images of people from web search at this time.- All generated images include a SynthID watermark.
Optional configurations
You can optionally configure the output format, aspect ratio, and image size using the response_format parameter.
Output format
The model defaults to returning both text and image responses. You can configure the response to return only the generated images (omitting the conversational text) by specifying an image format in the response_format parameter.
To request multiple modalities (for example, both text and the generated image), pass an array of format entries to response_format instead.
Python
interaction = client.interactions.create(
    model="gemini-3.1-flash-image",
    input="Write a short poem about a starry night and generate an image of it.",
    response_format=[
        {"type": "text"},
        {"type": "image"},
    ],
)
JavaScript
const interaction = await ai.interactions.create({
  model: "gemini-3.1-flash-image",
  input: "Write a short poem about a starry night and generate an image of it.",
  response_format: [
    { type: "text" },
    { type: "image" },
  ],
});
REST
curl -s -X POST \
  "https://generativelanguage.googleapis.com/v1beta/interactions" \
  -H "x-goog-api-key: $GEMINI_API_KEY" \
  -H 'Content-Type: application/json' \
  -d '{
    "model": "gemini-3.1-flash-image",
    "input": "Write a short poem about a starry night and generate an image of it.",
    "response_format": [
      { "type": "text" },
      { "type": "image" }
    ]
  }'
Aspect ratios and image size
By default, the model matches the output image size to that of your input image, or otherwise generates 1:1 squares. You can control the aspect ratio and the size of the output image using the aspect_ratio and image_size fields under response_format when type is set to "image".
Python
interaction = client.interactions.create(
    model="gemini-3.1-flash-image",
    input=prompt,
    response_format={
        "type": "image",
        "aspect_ratio": "16:9",
        "image_size": "2K",
    },
)
JavaScript
const interaction = await ai.interactions.create({
    model: "gemini-3.1-flash-image",
    input: prompt,
    response_format: {
      type: "image",
      aspect_ratio: "16:9",
      image_size: "2K",
    },
  });
REST
curl -s -X POST \
  "https://generativelanguage.googleapis.com/v1beta/interactions" \
  -H "x-goog-api-key: $GEMINI_API_KEY" \
  -H 'Content-Type: application/json' \
  -d '{
    "model": "gemini-3.1-flash-image",
    "input": "Create a picture of a nano banana dish in a fancy restaurant with a Gemini theme",
    "response_format": {
      "type": "image",
      "aspect_ratio": "16:9",
      "image_size": "2K"
    }
  }'
The different ratios available and the size of the image generated are listed in the following tables:
3.1 Flash Image
| Aspect ratio | 512px resolution | 0.5K tokens | 1K resolution | 1K tokens | 2K resolution | 2K tokens | 4K resolution | 4K tokens |
|---|---|---|---|---|---|---|---|---|
| 1:1 | 512x512 | 747 | 1024x1024 | 1120 | 2048x2048 | 1120 | 4096x4096 | 2000 |
| 1:4 | 256x1024 | 747 | 512x2048 | 1120 | 1024x4096 | 1120 | 2048x8192 | 2000 |
| 1:8 | 192x1536 | 747 | 384x3072 | 1120 | 768x6144 | 1120 | 1536x12288 | 2000 |
| 2:3 | 424x632 | 747 | 848x1264 | 1120 | 1696x2528 | 1120 | 3392x5056 | 2000 |
| 3:2 | 632x424 | 747 | 1264x848 | 1120 | 2528x1696 | 1120 | 5056x3392 | 2000 |
| 3:4 | 448x600 | 747 | 896x1200 | 1120 | 1792x2400 | 1120 | 3584x4800 | 2000 |
| 4:1 | 1024x256 | 747 | 2048x512 | 1120 | 4096x1024 | 1120 | 8192x2048 | 2000 |
| 4:3 | 600x448 | 747 | 1200x896 | 1120 | 2400x1792 | 1120 | 4800x3584 | 2000 |
| 4:5 | 464x576 | 747 | 928x1152 | 1120 | 1856x2304 | 1120 | 3712x4608 | 2000 |
| 5:4 | 576x464 | 747 | 1152x928 | 1120 | 2304x1856 | 1120 | 4608x3712 | 2000 |
| 8:1 | 1536x192 | 747 | 3072x384 | 1120 | 6144x768 | 1120 | 12288x1536 | 2000 |
| 9:16 | 384x688 | 747 | 768x1376 | 1120 | 1536x2752 | 1120 | 3072x5504 | 2000 |
| 16:9 | 688x384 | 747 | 1376x768 | 1120 | 2752x1536 | 1120 | 5504x3072 | 2000 |
| 21:9 | 792x168 | 747 | 1584x672 | 1120 | 3168x1344 | 1120 | 6336x2688 | 2000 |
3 Pro Image
| Aspect ratio | 1K resolution | 1K tokens | 2K resolution | 2K tokens | 4K resolution | 4K tokens |
|---|---|---|---|---|---|---|
| 1:1 | 1024x1024 | 1120 | 2048x2048 | 1120 | 4096x4096 | 2000 |
| 2:3 | 848x1264 | 1120 | 1696x2528 | 1120 | 3392x5056 | 2000 |
| 3:2 | 1264x848 | 1120 | 2528x1696 | 1120 | 5056x3392 | 2000 |
| 3:4 | 896x1200 | 1120 | 1792x2400 | 1120 | 3584x4800 | 2000 |
| 4:3 | 1200x896 | 1120 | 2400x1792 | 1120 | 4800x3584 | 2000 |
| 4:5 | 928x1152 | 1120 | 1856x2304 | 1120 | 3712x4608 | 2000 |
| 5:4 | 1152x928 | 1120 | 2304x1856 | 1120 | 4608x3712 | 2000 |
| 9:16 | 768x1376 | 1120 | 1536x2752 | 1120 | 3072x5504 | 2000 |
| 16:9 | 1376x768 | 1120 | 2752x1536 | 1120 | 5504x3072 | 2000 |
| 21:9 | 1584x672 | 1120 | 3168x1344 | 1120 | 6336x2688 | 2000 |
Gemini 2.5 Flash Image
| Aspect ratio | Resolution | Tokens |
|---|---|---|
| 1:1 | 1024x1024 | 1290 |
| 2:3 | 832x1248 | 1290 |
| 3:2 | 1248x832 | 1290 |
| 3:4 | 864x1184 | 1290 |
| 4:3 | 1184x864 | 1290 |
| 4:5 | 896x1152 | 1290 |
| 5:4 | 1152x896 | 1290 |
| 9:16 | 768x1344 | 1290 |
| 16:9 | 1344x768 | 1290 |
| 21:9 | 1536x672 | 1290 |
Model selection
Choose the model best suited for your specific use case.
Gemini 3.1 Flash Image (Nano Banana 2) should be your go-to image generation model, as the best all around performance and intelligence to cost and latency balance. Check the model pricing and capabilities page for more details.
Gemini 3 Pro Image (Nano Banana Pro) is designed for professional asset production and complex instructions. This model features real-world grounding using Google Search, a default "Thinking" process that refines composition prior to generation, and can generate images of up to 4K resolutions. Check the model pricing and capabilities page for more details.
Gemini 2.5 Flash Image (Nano Banana) is designed for speed and efficiency. This model is optimized for high-volume, low-latency tasks and generates images at 1024px resolution. Check the model pricing and capabilities page for more details.
When to use Imagen
In addition to using Gemini's built-in image generation capabilities, you can also access Imagen, our specialized image generation model, through the Gemini API. Plan to migrate before the shutdown date.
What's next
- Check out the Veo guide to learn how to generate videos with the Gemini API.
- To learn more about Gemini models, see Gemini models.