
객체 감지기는 알려진 객체 집합 중 어떤 객체가 있을 수 있는지 식별하고 지정된 이미지 또는 동영상 스트림 내에서의 위치에 관한 정보를 제공할 수 있습니다. 객체 감지기는 여러 클래스의 객체의 존재와 위치를 감지하도록 학습됩니다. 예를 들어 모델은 다양한 과일이 포함된 이미지와 과일의 클래스를 지정하는 라벨 (예: 사과, 바나나, 딸기) 및 이미지에 각 객체가 표시되는 위치를 지정하는 데이터로 학습될 수 있습니다. 객체 감지기에 관한 자세한 내용은 객체 감지 예시를 참고하세요.
작업 라이브러리 ObjectDetector API를 사용하여 맞춤 객체 감지기 또는 사전 학습된 객체 감지기를 모바일 앱에 배포합니다.
ObjectDetector API의 주요 기능
회전, 크기 조절, 색상 공간 변환을 비롯한 입력 이미지 처리
지도 언어 라벨
결과를 필터링할 점수 기준입니다.
상위 k개 감지 결과입니다.
라벨 허용 목록 및 차단 목록
지원되는 객체 감지기 모델
다음 모델은 ObjectDetector API와 호환됩니다.
AutoML Vision Edge 객체 감지로 만든 모델
모델 호환성 요구사항을 충족하는 맞춤 모델
Java에서 추론 실행
Android 앱에서 ObjectDetector를 사용하는 방법의 예는 객체 감지 참조 앱을 참고하세요.
1단계: Gradle 종속 항목 및 기타 설정 가져오기
모델이 실행될 Android 모듈의 애셋 디렉터리에 .tflite 모델 파일을 복사합니다. 파일을 압축하지 않도록 지정하고 TensorFlow Lite 라이브러리를 모듈의 build.gradle 파일에 추가합니다.
android {
    // Other settings

    // Specify tflite file should not be compressed for the app apk
    aaptOptions {
        noCompress "tflite"
    }
}

dependencies {
    // Other dependencies

    // Import the Task Vision Library dependency
    implementation 'org.tensorflow:tensorflow-lite-task-vision'
    // Import the GPU delegate plugin Library for GPU inference
    implementation 'org.tensorflow:tensorflow-lite-gpu-delegate-plugin'
}
2단계: 모델 사용
// Initialization
ObjectDetectorOptions options =
    ObjectDetectorOptions.builder()
        .setBaseOptions(BaseOptions.builder().useGpu().build())
        .setMaxResults(1)
        .build();
ObjectDetector objectDetector =
    ObjectDetector.createFromFileAndOptions(
        context, modelFile, options);

// Run inference
List<Detection> results = objectDetector.detect(image);
ObjectDetector를 구성하는 추가 옵션은 소스 코드 및 javadoc을 참고하세요.
iOS에서 추론 실행
1단계: 종속 항목 설치
작업 라이브러리는 CocoaPods를 사용한 설치를 지원합니다. 시스템에 CocoaPods가 설치되어 있는지 확인합니다. 자세한 내용은 CocoaPods 설치 가이드를 참고하세요.
Xcode 프로젝트에 포드를 추가하는 방법에 관한 자세한 내용은 CocoaPods 가이드를 참고하세요.
Podfile에 TensorFlowLiteTaskVision 포드를 추가합니다.
target 'MyAppWithTaskAPI' do
  use_frameworks!
  pod 'TensorFlowLiteTaskVision'
end
추론에 사용할 .tflite 모델이 앱 번들에 있는지 확인합니다.
2단계: 모델 사용
Swift
// Imports
import TensorFlowLiteTaskVision
// Initialization
guard let modelPath = Bundle.main.path(forResource: "ssd_mobilenet_v1",
ofType: "tflite") else { return }
let options = ObjectDetectorOptions(modelPath: modelPath)
// Configure any additional options:
// options.classificationOptions.maxResults = 3
let detector = try ObjectDetector.detector(options: options)
// Convert the input image to MLImage.
// There are other sources for MLImage. For more details, please see:
// https://developers.google.com/ml-kit/reference/ios/mlimage/api/reference/Classes/GMLImage
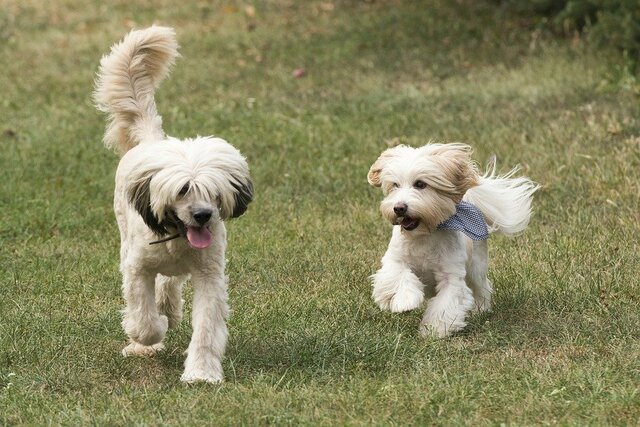
guard let image = UIImage (named: "cats_and_dogs.jpg"), let mlImage = MLImage(image: image) else { return }
// Run inference
let detectionResult = try detector.detect(mlImage: mlImage)
Objective-C
// Imports
#import <TensorFlowLiteTaskVision/TensorFlowLiteTaskVision.h>

// Initialization
NSString *modelPath = [[NSBundle mainBundle] pathForResource:@"ssd_mobilenet_v1" ofType:@"tflite"];

TFLObjectDetectorOptions *options = [[TFLObjectDetectorOptions alloc] initWithModelPath:modelPath];

// Configure any additional options:
// options.classificationOptions.maxResults = 3;

TFLObjectDetector *detector = [TFLObjectDetector objectDetectorWithOptions:options
                                                                     error:nil];

// Convert the input image to MLImage.
UIImage *image = [UIImage imageNamed:@"dogs.jpg"];

// There are other sources for GMLImage. For more details, please see:
// https://developers.google.com/ml-kit/reference/ios/mlimage/api/reference/Classes/GMLImage
GMLImage *gmlImage = [[GMLImage alloc] initWithImage:image];

// Run inference
TFLDetectionResult *detectionResult = [detector detectWithGMLImage:gmlImage error:nil];
TFLObjectDetector를 구성하는 추가 옵션은 소스 코드를 참고하세요.
Python에서 추론 실행
1단계: pip 패키지 설치
pip install tflite-support
2단계: 모델 사용
# Imports
from tflite_support.task import vision
from tflite_support.task import core
from tflite_support.task import processor

# Initialization
base_options = core.BaseOptions(file_name=model_path)
detection_options = processor.DetectionOptions(max_results=2)
options = vision.ObjectDetectorOptions(base_options=base_options, detection_options=detection_options)
detector = vision.ObjectDetector.create_from_options(options)

# Alternatively, you can create an object detector in the following manner:
# detector = vision.ObjectDetector.create_from_file(model_path)

# Run inference
image = vision.TensorImage.create_from_file(image_path)
detection_result = detector.detect(image)
ObjectDetector를 구성하는 추가 옵션은 소스 코드를 참고하세요.
C++에서 추론 실행
// Initialization
ObjectDetectorOptions options;
options.mutable_base_options()->mutable_model_file()->set_file_name(model_path);
std::unique_ptr<ObjectDetector> object_detector = ObjectDetector::CreateFromOptions(options).value();

// Create input frame_buffer from your inputs, `image_data` and `image_dimension`.
// See more information here: tensorflow_lite_support/cc/task/vision/utils/frame_buffer_common_utils.h
std::unique_ptr<FrameBuffer> frame_buffer = CreateFromRgbRawBuffer(
      image_data, image_dimension);

// Run inference
const DetectionResult result = object_detector->Detect(*frame_buffer).value();
ObjectDetector를 구성하는 추가 옵션은 소스 코드를 참고하세요.
결과 예시
다음은 TensorFlow Hub의 ssd mobilenet v1 감지 결과의 예입니다.
Results:
 Detection #0 (red):
  Box: (x: 355, y: 133, w: 190, h: 206)
  Top-1 class:
   index       : 17
   score       : 0.73828
   class name  : dog
 Detection #1 (green):
  Box: (x: 103, y: 15, w: 138, h: 369)
  Top-1 class:
   index       : 17
   score       : 0.73047
   class name  : dog
입력 이미지에 경계 상자를 렌더링합니다.

자체 모델과 테스트 데이터로 간단한 ObjectDetector용 CLI 데모 도구를 사용해 보세요.
모델 호환성 요구사항
ObjectDetector API는 필수 TFLite 모델 메타데이터가 있는 TFLite 모델을 예상합니다. TensorFlow Lite Metadata Writer API를 사용하여 객체 감지기의 메타데이터를 만드는 예를 참고하세요.
호환되는 객체 감지기 모델은 다음 요구사항을 충족해야 합니다.
입력 이미지 텐서: (kTfLiteUInt8/kTfLiteFloat32)
[batch x height x width x channels]크기의 이미지 입력- 일괄 추론은 지원되지 않습니다 (
batch이 1이어야 함). - RGB 입력만 지원됩니다 (
channels은 3이어야 함). - 유형이 kTfLiteFloat32인 경우 입력 정규화의 메타데이터에 NormalizationOptions를 연결해야 합니다.
출력 텐서는
DetectionPostProcess작업의 4개 출력이어야 합니다. 즉,- 위치 텐서 (kTfLiteFloat32)
- 크기가
[1 x num_results x 4]인 텐서로, 내부 배열은 [top, left, right, bottom] 형식의 경계 상자를 나타냅니다. - BoundingBoxProperties는 메타데이터에 연결해야 하며
type=BOUNDARIES및 `coordinate_type=RATIO`를 지정해야 합니다. 클래스 텐서 (kTfLiteFloat32)
크기가
[1 x num_results]인 텐서로, 각 값은 클래스의 정수 인덱스를 나타냅니다.선택사항(권장) 라벨 맵은 AssociatedFile로 연결될 수 있으며, 유형은 TENSOR_VALUE_LABELS이고 한 줄에 하나의 라벨이 포함됩니다. 라벨 파일 예시를 참고하세요. 이러한 첫 번째 AssociatedFile (있는 경우)은 결과의
class_name필드를 채우는 데 사용됩니다.display_name필드는 생성 시 사용된ObjectDetectorOptions의display_names_locale필드와 언어가 일치하는 AssociatedFile에서 채워집니다('en'이 기본값, 즉 영어). 이러한 필드가 없으면 결과의index필드만 채워집니다.점수 텐서 (kTfLiteFloat32)
크기가
[1 x num_results]인 텐서로, 각 값은 감지된 객체의 점수를 나타냅니다.감지 텐서 수 (kTfLiteFloat32)
[1]크기의 텐서로 정수 num_results를 반환합니다.