Gemini Omni Flash(gemini-omni-flash-preview)は、高速な動画生成、編集、シネマティック コントロール向けに設計された高性能なマルチモーダル モデルです。
Gemini Omni は、以前の動画モデルとは異なる次のコア機能に基づいて構築されています。
- ネイティブ マルチモーダル: テキスト、画像、音声、動画を同時に処理し、よりまとまりのある、一貫性のある、制御可能な出力を生成します。
- 話して編集: Interactions API を使用して、自然言語での会話を通じて動画を繰り返し調整、編集できます。変更したい内容を説明すると、保持したい動画の部分を維持しながら編集が適用されます。
- 世界知識: Gemini Omni は、物理学の理解と、Gemini の歴史、科学、文化的背景に関する知識を組み合わせることで、フォトリアリズムから意味のあるストーリーテリングへのギャップを埋めます。
テキストからの動画作成
テキスト プロンプトから動画を生成します。モデルは、テキストの説明に基づいて音声付きの動画を生成します。シーンの説明、カメラの動き、照明、ムードなどの詳細をプロンプトに記述すると、最適な結果が得られます。
Python
import base64
from google import genai

client = genai.Client()

interaction = client.interactions.create(
    model="gemini-omni-flash-preview",
    input="A marble rolling fast on a chain reaction style track, continuous smooth shot."
)
with open("marble.mp4", "wb") as f:
    f.write(base64.b64decode(interaction.output_video.data))
JavaScript
import { GoogleGenAI } from '@google/genai';
import * as fs from 'fs';
const ai = new GoogleGenAI({});

const interaction = await ai.interactions.create({
  model: 'gemini-omni-flash-preview',
  input: 'A marble rolling fast on a chain reaction style track, continuous smooth shot.',
});

if (interaction.output_video?.data) {
  fs.writeFileSync('marble.mp4', Buffer.from(interaction.output_video.data, 'base64'));
}
REST
curl -X POST "https://generativelanguage.googleapis.com/v1beta/interactions?key=$API_KEY" \
-H "Content-Type: application/json" \
-d '{
 "model": "gemini-omni-flash-preview",
 "input": "A marble rolling fast on a chain reaction style track, continuous smooth shot."
}'
REST レスポンス スキーマ
便利なフィールド interaction.output_video はSDK 専用 です。
REST API を直接使用する場合は、steps 配列から動画出力を取得します。
REST JSON 構造(未加工):
{
  "steps": [
    { "type": "user_input", "content": [{"type": "text", "text": "..."}] },
    { "type": "thought", "content": [{"text": "...", "type": "thought"}] },
    {
      "type": "model_output",
      "content": [
        {
          "type": "video",
          "mime_type": "video/mp4",
          "data": "AAAAIGZ0eXBpc29t..." // Base64 encoded video data
        }
      ]
    }
  ],
  "id": "v1_...",
  "status": "completed",
  "model": "gemini-omni-flash-preview",
  "object": "interaction"
}
アスペクト比を制御する
aspect_ratio を "9:16" に設定して、縦向きの動画を作成します。デフォルトは横向き(16:9)です。
Python
import base64
from google import genai

client = genai.Client()

interaction = client.interactions.create(
    model="gemini-omni-flash-preview",
    input="A futuristic city with neon lights and flying cars, cyberpunk style",
    response_format={
        "type": "video",  # optional
        "aspect_ratio": "9:16"  # Supported values: "9:16", "16:9"
    }
)
with open("example.mp4", "wb") as f:
    f.write(base64.b64decode(interaction.output_video.data))
JavaScript
import { GoogleGenAI } from '@google/genai';
import * as fs from 'fs';
const ai = new GoogleGenAI({});

const interaction = await ai.interactions.create({
  model: 'gemini-omni-flash-preview',
  input: 'A futuristic city with neon lights and flying cars, cyberpunk style',
  response_format: {
    type: 'video', // optional
    aspect_ratio: '9:16' // Supported values: '9:16', '16:9'
  },
});

if (interaction.output_video?.data) {
  fs.writeFileSync('example.mp4', Buffer.from(interaction.output_video.data, 'base64'));
}
REST
curl -X POST "https://generativelanguage.googleapis.com/v1beta/interactions?key=$API_KEY" \
-H "Content-Type: application/json" \
-d '{
 "model": "gemini-omni-flash-preview",
 "input": "A futuristic city with neon lights and flying cars, cyberpunk style",
 "response_format": {
   "type": "video",
   "aspect_ratio": "9:16"
 }
}'
画像からの動画生成
テキスト プロンプトで参照画像を指定できます。プロンプトに応じて、モデルは画像の用途を決定します。これは、商品写真、イラスト、写真を生き生きと表現するのに便利です。
次の例は、水から飛び出す魚の絵の参照画像を使用する方法を示しています。
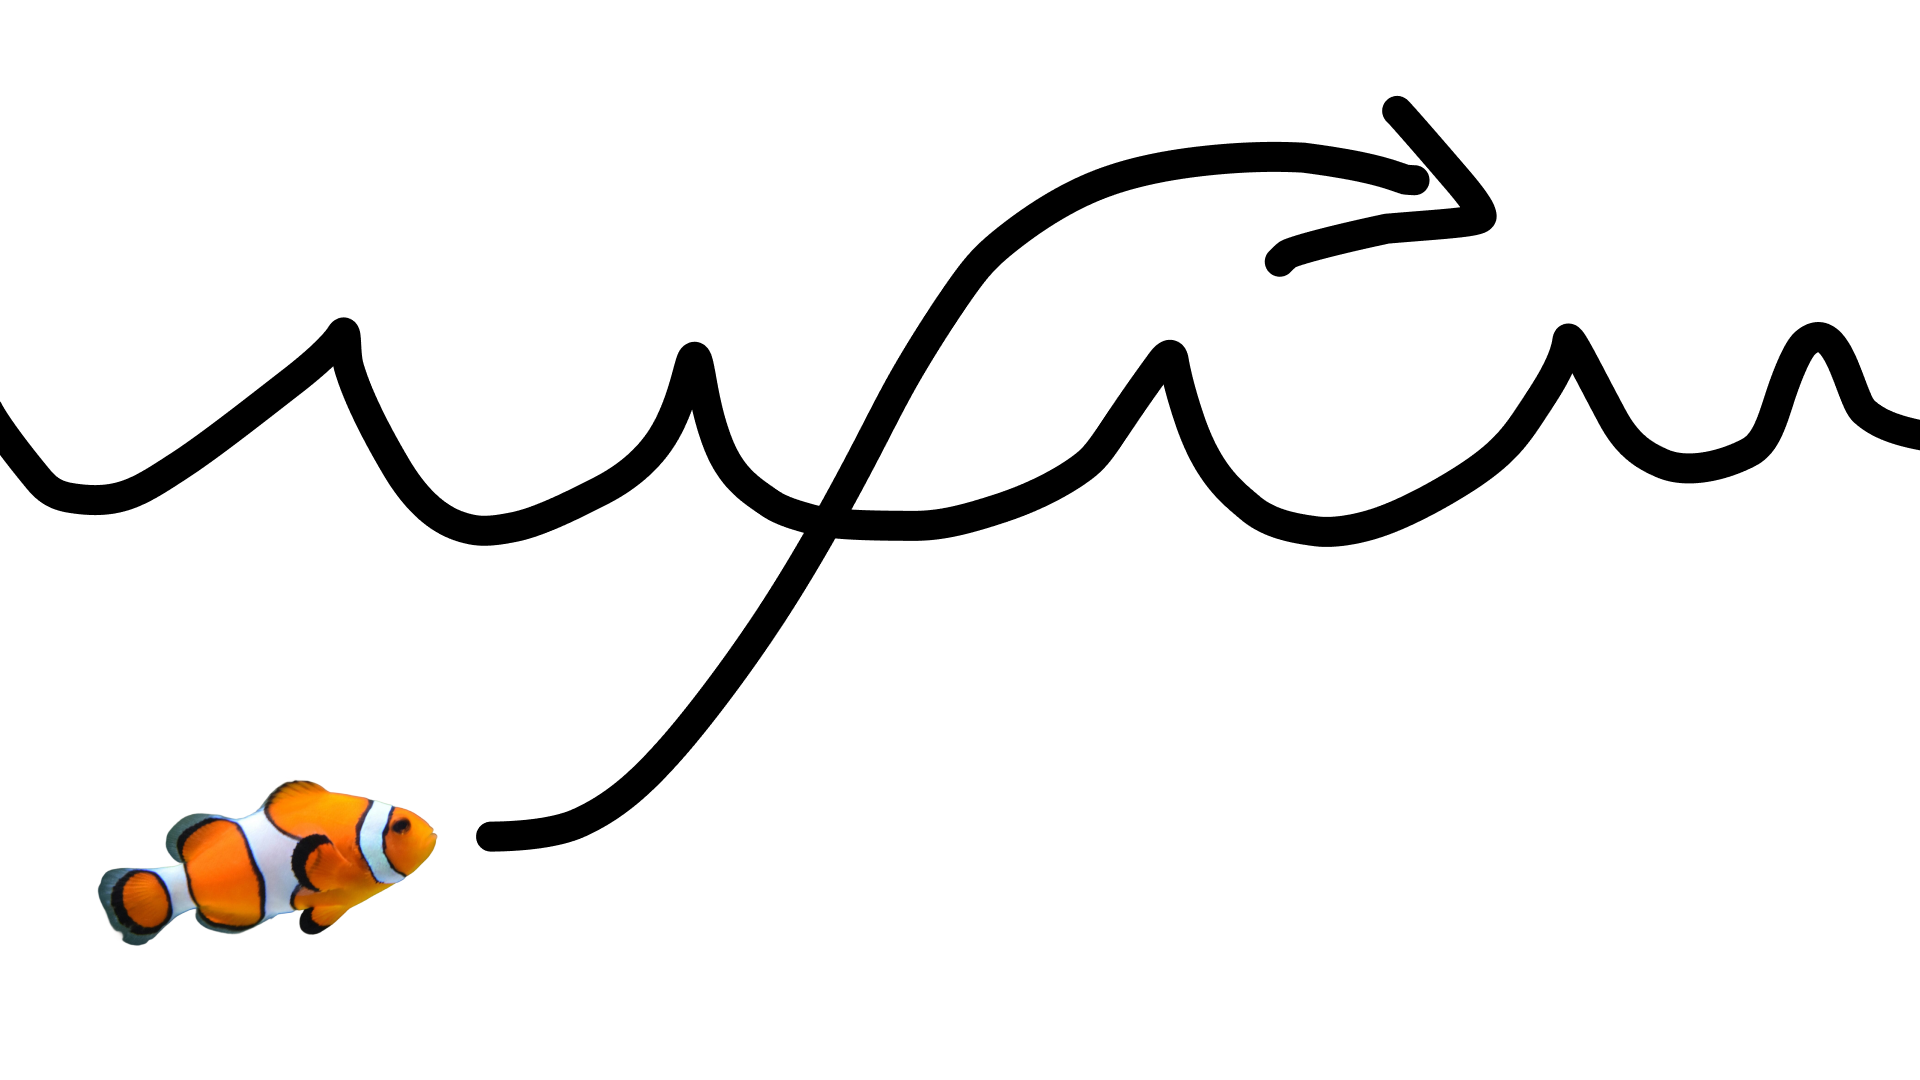
次のプロンプトを使用します。
turn this into realistic footage, using the drawing only as a guide for movement, do not show the drawing in the final video
絵のリアルな動画を生成します。
Python
import base64
from google import genai

client = genai.Client()

interaction = client.interactions.create(
    model="gemini-omni-flash-preview",
    input=[
        {"type": "image", "data": base64_image, "mime_type": "image/jpeg"},
        {"type": "text", "text": "turn this into realistic footage, using the drawing only as a guide for movement, do not show the drawing in the final video"}
    ],
)
with open("clownfish.mp4", "wb") as f:
    f.write(base64.b64decode(interaction.output_video.data))
JavaScript
import { GoogleGenAI } from '@google/genai';
import * as fs from 'fs';
const ai = new GoogleGenAI({});

const interaction = await ai.interactions.create({
  model: 'gemini-omni-flash-preview',
  input: [
    { type: 'image', data: base64Image, mime_type: 'image/jpeg' },
    { type: 'text', text: 'turn this into realistic footage, using the drawing only as a guide for movement, do not show the drawing in the final video' }
  ]
});

if (interaction.output_video?.data) {
  fs.writeFileSync('clownfish.mp4', Buffer.from(interaction.output_video.data, 'base64'));
}
REST
curl -X POST "https://generativelanguage.googleapis.com/v1beta/interactions?key=$API_KEY" \
-H "Content-Type: application/json" \
-d '{
 "model": "gemini-omni-flash-preview",
 "input": [
   {"type": "image", "data": "'"$BASE64_IMAGE"'", "mime_type": "image/jpeg"},
   {"type": "text", "text": "turn this into realistic footage, using the drawing only as a guide for movement, do not show the drawing in the final video"}
 ]
}'
被写体参照
参照画像として指定された特定の被写体を組み込んだ動画を生成できます。 たとえば、次のコードは、猫と毛糸の 2 枚の画像を指定して、猫が毛糸で遊ぶ動画を生成する方法を示しています。
Python
import base64
from google import genai

client = genai.Client()

interaction = client.interactions.create(
    model="gemini-omni-flash-preview",
    input=[
        {"type": "image", "data": cat_b64, "mime_type": "image/png"},
        {"type": "image", "data": yarn_b64, "mime_type": "image/png"},
        {"type": "text", "text": "A cat playfully batting at a ball of yarn."}
    ],
)
with open("cat.mp4", "wb") as f:
    f.write(base64.b64decode(interaction.output_video.data))
JavaScript
import { GoogleGenAI } from '@google/genai';
import * as fs from 'fs';
const ai = new GoogleGenAI({});

const interaction = await ai.interactions.create({
  model: 'gemini-omni-flash-preview',
  input: [
    { type: 'image', data: catData, mime_type: 'image/png' },
    { type: 'image', data: yarnData, mime_type: 'image/png' },
    { type: 'text', text: 'A cat playfully batting at a ball of yarn.' }
  ]
});

if (interaction.output_video?.data) {
  fs.writeFileSync('cat.mp4', Buffer.from(interaction.output_video.data, 'base64'));
}
REST
curl -X POST "https://generativelanguage.googleapis.com/v1beta/interactions?key=$API_KEY" \
-H "Content-Type: application/json" \
-d '{
 "model": "gemini-omni-flash-preview",
 "input": [
   {"type": "image", "data": "'"$CAT_B64"'", "mime_type": "image/png"},
   {"type": "image", "data": "'"$YARN_B64"'", "mime_type": "image/png"},
   {"type": "text", "text": "A cat playfully batting at a ball of yarn."}
 ]
}'
タスク パラメータ
video-config の task パラメータを使用して、意図する動作を明確に示します。たとえば、モデルに画像から動画を生成させる場合は、パラメータを image_to_video に設定します。このパラメータを設定しない場合、モデルはプロンプトから意図を推測します。
使用できる値は次のとおりです。
text_to_videoimage_to_videoreference_to_videoedit
次の例は、前に示した画像から動画への変換の例でこのパラメータを設定する方法を示しています。
Python
import base64
from google import genai

client = genai.Client()

interaction = client.interactions.create(
    model="gemini-omni-flash-preview",
    input=[
        {"type": "image", "data": base64_image, "mime_type": "image/jpeg"},
        {"type": "text", "text": "turn this into realistic footage, using the drawing only as a guide for movement, do not show the drawing in the final video"}
    ],
    generation_config={
      "video_config": {
        "task": "image_to_video",
      }
    },
)
with open("example.mp4", "wb") as f:
    f.write(base64.b64decode(interaction.output_video.data))
JavaScript
import { GoogleGenAI } from "@google/genai";
import * as fs from 'fs';
const ai = new GoogleGenAI({});

const interaction = await ai.interactions.create({
  model: 'gemini-omni-flash-preview',
  input: [
    { type: 'image', data: base64Image, mime_type: 'image/jpeg' },
    { type: 'text', text: 'turn this into realistic footage, using the drawing only as a guide for movement, do not show the drawing in the final video' }
  ],
  generationConfig: {
    videoConfig: {
      task: 'image_to_video',
    }
  }
});

if (interaction.output_video?.data) {
  fs.writeFileSync('example.mp4', Buffer.from(interaction.output_video.data, 'base64'));
}
REST
curl -X POST "https://generativelanguage.googleapis.com/v1beta/interactions" \
  -H "x-goog-api-key: $GEMINI_API_KEY" \
  -H "Content-Type: application/json" \
  -d '{
    "model": "gemini-omni-flash-preview",
    "input": [
      {
        "type": "image",
        "data": "'"$BASE64_IMAGE"'",
        "mime_type": "image/jpeg"
      },
      {
        "type": "text",
        "text": "turn this into realistic footage, using the drawing only as a guide for movement, do not show the drawing in the final video"
      }
    ],
    "generation_config": {
      "video_config": {
        "task": "image_to_video"
      }
    }
  }'
ステートフルな動画編集
動画を生成し、フォローアップ プロンプトを使用して繰り返し編集します。各ターンは前の結果に基づいて構築されます。モデルは動画のコンテキストを記憶し、言及していない要素を保持しながら変更を適用します。previous_interaction_id を使用すると、前の動画を再アップロードせずに、会話履歴と生成された動画の状態を追跡できます。
次の例は、最初の動画を生成してから編集する方法を示しています。
Python
import base64
from google import genai

client = genai.Client()

# Turn 1: Generate initial video
res1 = client.interactions.create(model="gemini-omni-flash-preview", input="A woman playing violin outdoors.")

# Turn 2: Edit the previous video
res2 = client.interactions.create(
    model="gemini-omni-flash-preview",
    previous_interaction_id=res1.id,
    input="Make the violin invisible."
)
with open("example.mp4", "wb") as f:
    f.write(base64.b64decode(res2.output_video.data))
JavaScript
import { GoogleGenAI } from '@google/genai';
import * as fs from 'fs';
const ai = new GoogleGenAI({});

// Turn 1: Generate initial video
const res1 = await ai.interactions.create({
  model: 'gemini-omni-flash-preview',
  input: 'A woman playing violin outdoors.',
});

// Turn 2: Edit the previous video
const res2 = await ai.interactions.create({
  model: 'gemini-omni-flash-preview',
  previous_interaction_id: res1.id,
  input: 'Make the violin invisible.',
});

if (res2.output_video?.data) {
  fs.writeFileSync('example.mp4', Buffer.from(res2.output_video.data, 'base64'));
}
REST
curl -X POST "https://generativelanguage.googleapis.com/v1beta/interactions?key=$API_KEY" \
-H "Content-Type: application/json" \
-d '{
 "model": "gemini-omni-flash-preview",
 "previous_interaction_id": "'"$PREVIOUS_ID"'",
 "input": "Make the violin invisible."
}'
最初の動画の例:
編集した動画の例:
会話の各ターンで新しい動画が生成されます。モデルは前のターンのコンテキストを理解しているため、シーン全体を再記述することなく、照明の調整や背景の入れ替えなどの増分変更を行うことができます。
自分の動画を編集する
Files API を使用して動画をアップロードし、Gemini Omni Flash で編集します。
次の例は、次の元の動画を編集する方法を示しています。
Python
import time
import base64
from google import genai

client = genai.Client()

# Upload video using the file API
video_file = client.files.upload(file="Video.mp4")

while video_file.state == "PROCESSING":
    print('Waiting for video to be processed.')
    time.sleep(10)
    video_file = client.files.get(name=video_file.name)

if video_file.state == "FAILED":
  raise ValueError(video_file.state)
print(f'Video processing complete: ' + video_file.uri)

# Edit your video
interaction = client.interactions.create(
    model="gemini-omni-flash-preview",
    input=[
        {"type": "document", "uri": video_file.uri},
        {"type": "text", "text": "When the person touches the mirror, make the mirror ripple beautifully like liquid, and the person's arm turns into reflective mirror material"}
    ],
)
with open("example.mp4", "wb") as f:
    f.write(base64.b64decode(interaction.output_video.data))
JavaScript
import { GoogleGenAI } from '@google/genai';
import * as fs from 'fs';
const ai = new GoogleGenAI({});

// Upload video using the file API
let videoFile = await ai.files.upload({
  file: 'Video.mp4',
});

while (videoFile.state === 'PROCESSING') {
  console.log('Waiting for video to be processed.');
  await new Promise(r => setTimeout(r, 10000));
  videoFile = await ai.files.get({ name: videoFile.name });
}

if (videoFile.state === 'FAILED') {
  throw new Error(videoFile.state);
}
console.log('Video processing complete: ' + videoFile.uri);

// Edit your video
const interaction = await ai.interactions.create({
  model: 'gemini-omni-flash-preview',
  input: [
    { type: 'document', uri: videoFile.uri },
    { type: 'text', text: "When the person touches the mirror, make the mirror ripple beautifully like liquid, and the person's arm turns into reflective mirror material" }
  ],
});

if (interaction.output_video?.data) {
  fs.writeFileSync('example.mp4', Buffer.from(interaction.output_video.data, 'base64'));
}
REST
#!/bin/bash
VIDEO_B64=$(encode_file "$VIDEO_FILE")

curl -sS -w "\n[HTTP %{http_code}]\n" "https://generativelanguage.googleapis.com/v1beta/interactions" \
  -H "x-goog-api-key: ${API_KEY}" \
  -H "Content-Type: application/json" \
  -d @- <<EOF > video_editing_response.json
{
  "model": "gemini-omni-flash-preview",
  "input": [
    {
      "type": "user_input",
      "content": [
        {
          "type": "video",
          "mime_type": "video/mp4",
          "data": "$VIDEO_B64"
        },
        {
          "type": "text",
          "text": "When the person touches the mirror, make the mirror ripple beautifully like liquid, and the person's arm turns into reflective mirror material"
        }
      ]
    }
  ],
  "response_format": { "type": "video" }
}
EOF
編集した動画の例:
URI を使用して動画を取得する
response_format で delivery="uri" パラメータを使用して、4 MB を超える生成された動画を取得します。
これにより、動画が ACTIVE になるまでポーリングできる Google がホストする URI が返されます。
Python
import time
from google import genai

client = genai.Client()

# 1. Request video via URI delivery
interaction = client.interactions.create(
    model="gemini-omni-flash-preview",
    input="A beautiful sunset.",
    response_format={"type": "video", "delivery": "uri"}
)

# 2. Extract file name and poll for ACTIVE state
video_output = interaction.output_video
file_name = video_output.uri.split("/")[-1] # Extract ID

print("Waiting for video processing...")
while True:
    f_info = client.files.get(name=f"files/{file_name}")
    if f_info.state.name == "ACTIVE":
        break
    elif f_info.state.name == "FAILED":
        raise RuntimeError("Generation failed.")
    time.sleep(5)

# 3. Download the final video
video_bytes = client.files.download(file=video_output.uri)
with open("output.mp4", "wb") as f:
    f.write(video_bytes)
JavaScript
import { GoogleGenAI } from '@google/genai';
const ai = new GoogleGenAI({});

// 1. Request video via URI delivery
const interaction = await ai.interactions.create({
  model: 'gemini-omni-flash-preview',
  input: 'A beautiful sunset.',
  response_format: { type: 'video', delivery: 'uri' },
});

// 2. Extract file name and poll for ACTIVE state
const videoOutput = interaction.output_video;
const fileId = videoOutput.uri.match(/files\/([a-zA-Z0-9]+)/)[1];
const name = `files/${fileId}`;

console.log("Waiting for video processing...");
while (true) {
  const fInfo = await ai.files.get({ name });
  if (fInfo.state.name === 'ACTIVE') break;
  if (fInfo.state.name === 'FAILED') throw new Error("Generation failed.");
  await new Promise(r => setTimeout(r, 5000));
}

// 3. Download the final video
await ai.files.download({
  file: videoOutput,
  downloadPath: 'output.mp4',
});
console.log("💾 Saved video to output.mp4");
REST
#!/bin/bash

# 1. Initial request to generate the video
RESPONSE=$(curl -s -X POST "https://generativelanguage.googleapis.com/v1beta/interactions?key=$API_KEY" \
-H "Content-Type: application/json" \
-d '{
 "model": "gemini-omni-flash-preview",
 "input": "A beautiful sunset over a calm ocean.",
 "response_format": {"type": "video", "delivery": "uri"}
}')

# Extract FILE_ID from the URI (e.g., "files/abc-123" -> "abc-123")
FILE_URI=$(echo $RESPONSE | jq -r '.output_video.uri')
FILE_ID=$(echo $FILE_URI | cut -d'/' -f2)

echo "Video requested (ID: $FILE_ID). Waiting for processing..."

# 2. Polling loop
while true; do
 # Get current file status
 STATUS_JSON=$(curl -s -X GET "https://generativelanguage.googleapis.com/v1beta/files/$FILE_ID?key=$API_KEY")
 STATE=$(echo $STATUS_JSON | jq -r '.state')

 if [ "$STATE" == "ACTIVE" ]; then
   echo "Processing complete! Downloading..."
   break
 elif [ "$STATE" == "FAILED" ]; then
   echo "Error: Generation failed."
   exit 1
 else
   echo "Current state: $STATE... (waiting 5s)"
   sleep 5
 fi
done

# 3. Final download
curl -L -X GET "https://generativelanguage.googleapis.com/v1beta/files/$FILE_ID:download?alt=media&key=$API_KEY" \
--output "output.mp4"

echo "Done! Video saved to output.mp4"
REST JSON 構造(未加工)(URI):
{
  "steps": [
    { "type": "user_input", "content": [{"type": "text", "text": "..."}] },
    { "type": "thought", "content": [{"text": "...", "type": "thought"}] },
    {
      "type": "model_output",
      "content": [
        {
          "type": "video",
          "mime_type": "video/mp4",
          "uri": "https://generativelanguage.googleapis.com/v1beta/files/...:download?alt=media"
        }
      ]
    }
  ],
  "id": "v1_...",
  "status": "completed",
  "model": "gemini-omni-flash-preview",
  "object": "interaction"
}
ベスト プラクティス
- 大きな動画には URI 配信を使用する: 4 MB を超える動画(>720p
)の場合は、
delivery="uri"でresponse_formatを使用して、ペイロード サイズの上限を超えないようにします。 - パフォーマンスの最適化: 高速な同期ユニタリ生成の場合は、
background=false、store=false、stream=falseを設定します。store=falseを設定すると、生成された動画はprevious_interaction_idを使用して後続のターンで編集できなくなります。 - プロンプトの精度: 詳細については、プロンプト ガイドをご覧ください。
制限事項
- 未成年者が写っている画像のアップロードと編集は、欧州経済領域、スイス、英国では対象外です。
- 特定の認識可能な人物が写っている画像のアップロードと編集は対象外です。
- アップロードした動画の編集は、現在、欧州経済領域(EEA)、スイス、英国のユーザーはご利用いただけません(モデルによって生成された動画の編集はサポートされています)。
- 現在のバージョンの API では、音声参照のアップロードはサポートされていません。
- 最長 3 秒の動画参照は API スキーマで受け付けられますが、現時点ではモデルで正しく処理されません。
- 複数の動画にまたがる参照や推論はサポートされていません。複数の動画のプロンプトを試すと、モデルのパフォーマンスが低下したり、予期しない出力が生成されたりする可能性があります。
- 動画の拡張と動画の補間(最初と最後のフレームの間に動画を生成する)は対象外です。
- 音声編集はサポートされていません。
- プロビジョニングされたスループットはサポートされていません。
- システム指示、温度、
top_p、停止シーケンス、ネガティブ プロンプトはサポートされていません(通常のプロンプトにネガティブな内容を入力できます。例: 「X を行わないでください」)。 - YouTube 動画をメディアソースとして使用することは対象外です。
詳細な技術情報
- 生成されたすべての動画には、SynthID の透かしが埋め込まれています。これは視聴者には見えませんが、来歴の確認のためにプログラムで検出できます。
- 動画の生成時間は、長さ、解像度、現在の API の負荷によって異なります。動画が長く、解像度が高いほど、生成に時間がかかります。
- コンテンツ セーフティ フィルタは、入力プロンプトと生成された動画の両方に適用されます(地域によって異なります)。利用規約に違反するプロンプトはブロックされます。
- 英語(EN)は完全にサポートされていますが、他の言語は評価されていないため、機能する可能性はありますが、結果は異なる場合があります。
Gemini Omni Flash プロンプト ガイド
このセクションでは、Gemini Omni Flash を効果的にプロンプトする方法に関するヒントと例を紹介します。
単一シーン
デフォルトでは、Omni Flash はいくつかの異なるショットを含む動画を作成しようとします。 プロンプトに基づいて、興味深いナレーションを作成しようとします。
出力動画に単一のシーンを含める必要がある場合は、次のようにプロンプトする必要があります。
- 途切れない単一のシーンで
- 連続した一発ショットで
- シーンカットなし
次に例を示します。
Continuous, unbroken handheld shot of a fluffy tabby cat sitting on a sunny windowsill, looking out into a leafy garden. The cat's tail twitches slowly, and its ears rotate slightly toward ambient noises. Sunbeams illuminate dust motes in the air. Sound design: Gentle breeze, distant bird chirps. No dialogue.
不要な要素を削除する
生成された動画に不要なものが含まれている場合は、簡単なネガティブ プロンプトを含めて回避します。
- 会話なし
- 装飾なし
- 追加の効果音なし
編集用のプロンプト
動画編集にはシンプルなプロンプトが最適です。説明が多すぎるプロンプトは、意図しない変更につながる可能性があります。
シンプルな編集プロンプトの例を次に示します。
- この動画をアニメにする
- この人にファッショナブルな帽子をかぶせる
- 照明をよりドラマチックにする
- 看板のテキストを「Omni Flash」に変更する
動画の特定の側面を編集する場合は、"Keep everything else the same" を含めて視覚的な一貫性を維持します。
この手法を適用する方法の例を次に示します。
- 避けるべきこと:
In the video of the man sitting on the sofa, please add a small black cat that runs from the right side of the screen, jumps onto his lap, and then he starts to stroke its head while looking down.- シンプルにする:
Add a cat that jumps onto his lap, he begins to pet it.
Keep everything else the same.
- シンプルにする:
- 避けるべきこと:
Please remove the cell phone that the person is holding in their hand and fill in the background so it looks like they are just holding their hand empty.- シンプルにする:
Make the phone invisible. Keep everything else the
same.
- シンプルにする:
音声のプロンプト
デフォルトでは、モデルは動画に適した音声トラックを生成しようとします。これが常に望ましいとは限りません。プロンプトを使用して、必要な音声の種類を記述できます。これは、動画に音楽を入れたい場合に特に重要です。
- 穏やかなバックグラウンド ミュージックを含める
- 動画にはハイエナジー テクノ ビートがある
- 音声は、バックグラウンドで曲を再生する、低音のラジオ放送です
イベントのタイミング
動画の特定の時間に発生する事柄をプロンプトできます。正確な構文は必要なく、自然言語を使用できます。これは、独自のシーンカット、リズム、連射シーケンスを作成する場合に特に便利です。 例を次に示します。
- 3 秒後に女性がシーンに入る。
- 5 秒でバックグラウンド音声でサビが始まる。
- 2 秒ごとに新しいフレームに切り替える。
- 連射シーケンスでは、0.5 秒ごと(24 fps で 12 フレーム)にシーンを新しい場所に切り替えます。
タイムコード構文を使用することもできます。
[0-3s] A person is walking
[3-6s] They stop and turn around
[6-10s] They start running
メタプロンプト
Gemini Omni Flash に、動画生成の一般的な品質や原則に注意を払うよう指示できます。
- マイクロディテール、表現、タイミングを考慮して、非常にリッチで詳細でありながら完全に自然なシーンを作成します。
- キャラクターと環境の説明は非常に詳細に記述してください。 キャラクターに衣装デザインの原則を適用します。シーン内の人物、アイテム、オブジェクトを具体的に指定します。
- 背景要素に適切な詳細を多く含めて、シーンをリアルで自然なものにします。
- 1 秒ごとに異なる珍しい
[thing]、アップビートな音楽、テキストを含めて、連射動画を作成します。
動画内のテキスト
動画にテキストを含めるようにプロンプトすると、Gemini Omni は正しく読みやすい方法でレンダリングします。動画に自然に発生するテキストがある場合は、背景要素であっても、その内容を定義すると役立ちます。
- 画面に一度に 1 つの単語を表示する: 「did, you, know, that, Omni, can, do, awesome, text?」 各単語は 1 秒間表示され、アニメーション スタイルは異なります。会話はありません。
- 「This is an AI generation by Omni」と書かれた道路標識、「All you need AI」と書かれた店舗、「OMN111」というナンバー プレートの車があります。
プロンプトでタグを使用して画像ロールを設定する
タグを使用して、アップロードしたメディアを特定の生成ロールにバインドできます。これにより、各画像が最初のフレームか参照かを指定できます。
1. シンプルなタグ(推奨)
プロンプトから画像のロールが明確なシンプルなケースでは、画像をロールに直接バインドできます。
<FIRST_FRAME>: 画像を動画の開始フレームとして使用します。 例:<FIRST_FRAME> a woman is walking<IMAGE_REF_N>: 画像を参照として使用します。例:in the style of <IMAGE_REF_0> a woman <IMAGE_REF_1> is walking(最初の画像のスタイル 参照と 2 番目の画像の被写体参照を組み合わせます)。 画像参照は 0 から始まります。
次の例は、6 つの参照画像を使用しています。
[0-3s] A studio fashion sequence. Starting with woman <IMAGE_REF_0>, she is holding <IMAGE_REF_1>
[3-6s] Then we see the man <IMAGE_REF_2> holding <IMAGE_REF_3>
[6-10s] And finally another woman <IMAGE_REF_4> who is holding <IMAGE_REF_5> while walking.
2. 明示的な宣言
複数の画像と複数のロールを使用する複雑なケースでは、自然言語の指示サフィックスと組み合わせた明示的な接頭辞タグを使用できます。
- ソースと参照画像を宣言する:
[# Sources <FIRST_FRAME>@Image1]は、最初の画像を最初のフレームとして使用します。[# References <IMAGE_REF_0>@Image1]は、最初の画像を参照として使用します。[# References <IMAGE_REF_1>@Image2]は、2 番目の画像を参照として使用します。[# References <IMAGE_REF_0>@Image1 <IMAGE_REF_1>@Image2]は、両方の画像を参照として使用します。[# Sources <FIRST_FRAME>@Image1] [# References <IMAGE_REF_0>@Image2]は、最初の画像を最初のフレームとして使用し、2 番目の画像を参照として使用します。
- ガイド指示: プロンプトの最後にガイド指示を追加します:
- 開始フレームの場合:
"Use this image as the starting frame." - 参照画像の場合:
"Use the given image(s) as references for video generation. The images should not be used as literal initial frames."
- 開始フレームの場合:
プロンプトの例:
[# Sources <FIRST_FRAME>@Image1] [# References <IMAGE_REF_0>@Image2] a woman <IMAGE_REF_0> is walking. Use Image1 as the starting frame. Use Image2 as a reference for the video generation.
次のステップ
- Omni クイックスタート Colab で試して、Gemini Omni Flash を使ってみる。
- プロンプト設計の概要で、より良いプロンプトを作成する方法を学ぶ。